How to Get Started in Gold Mining

How to Get Started in Gold Mining

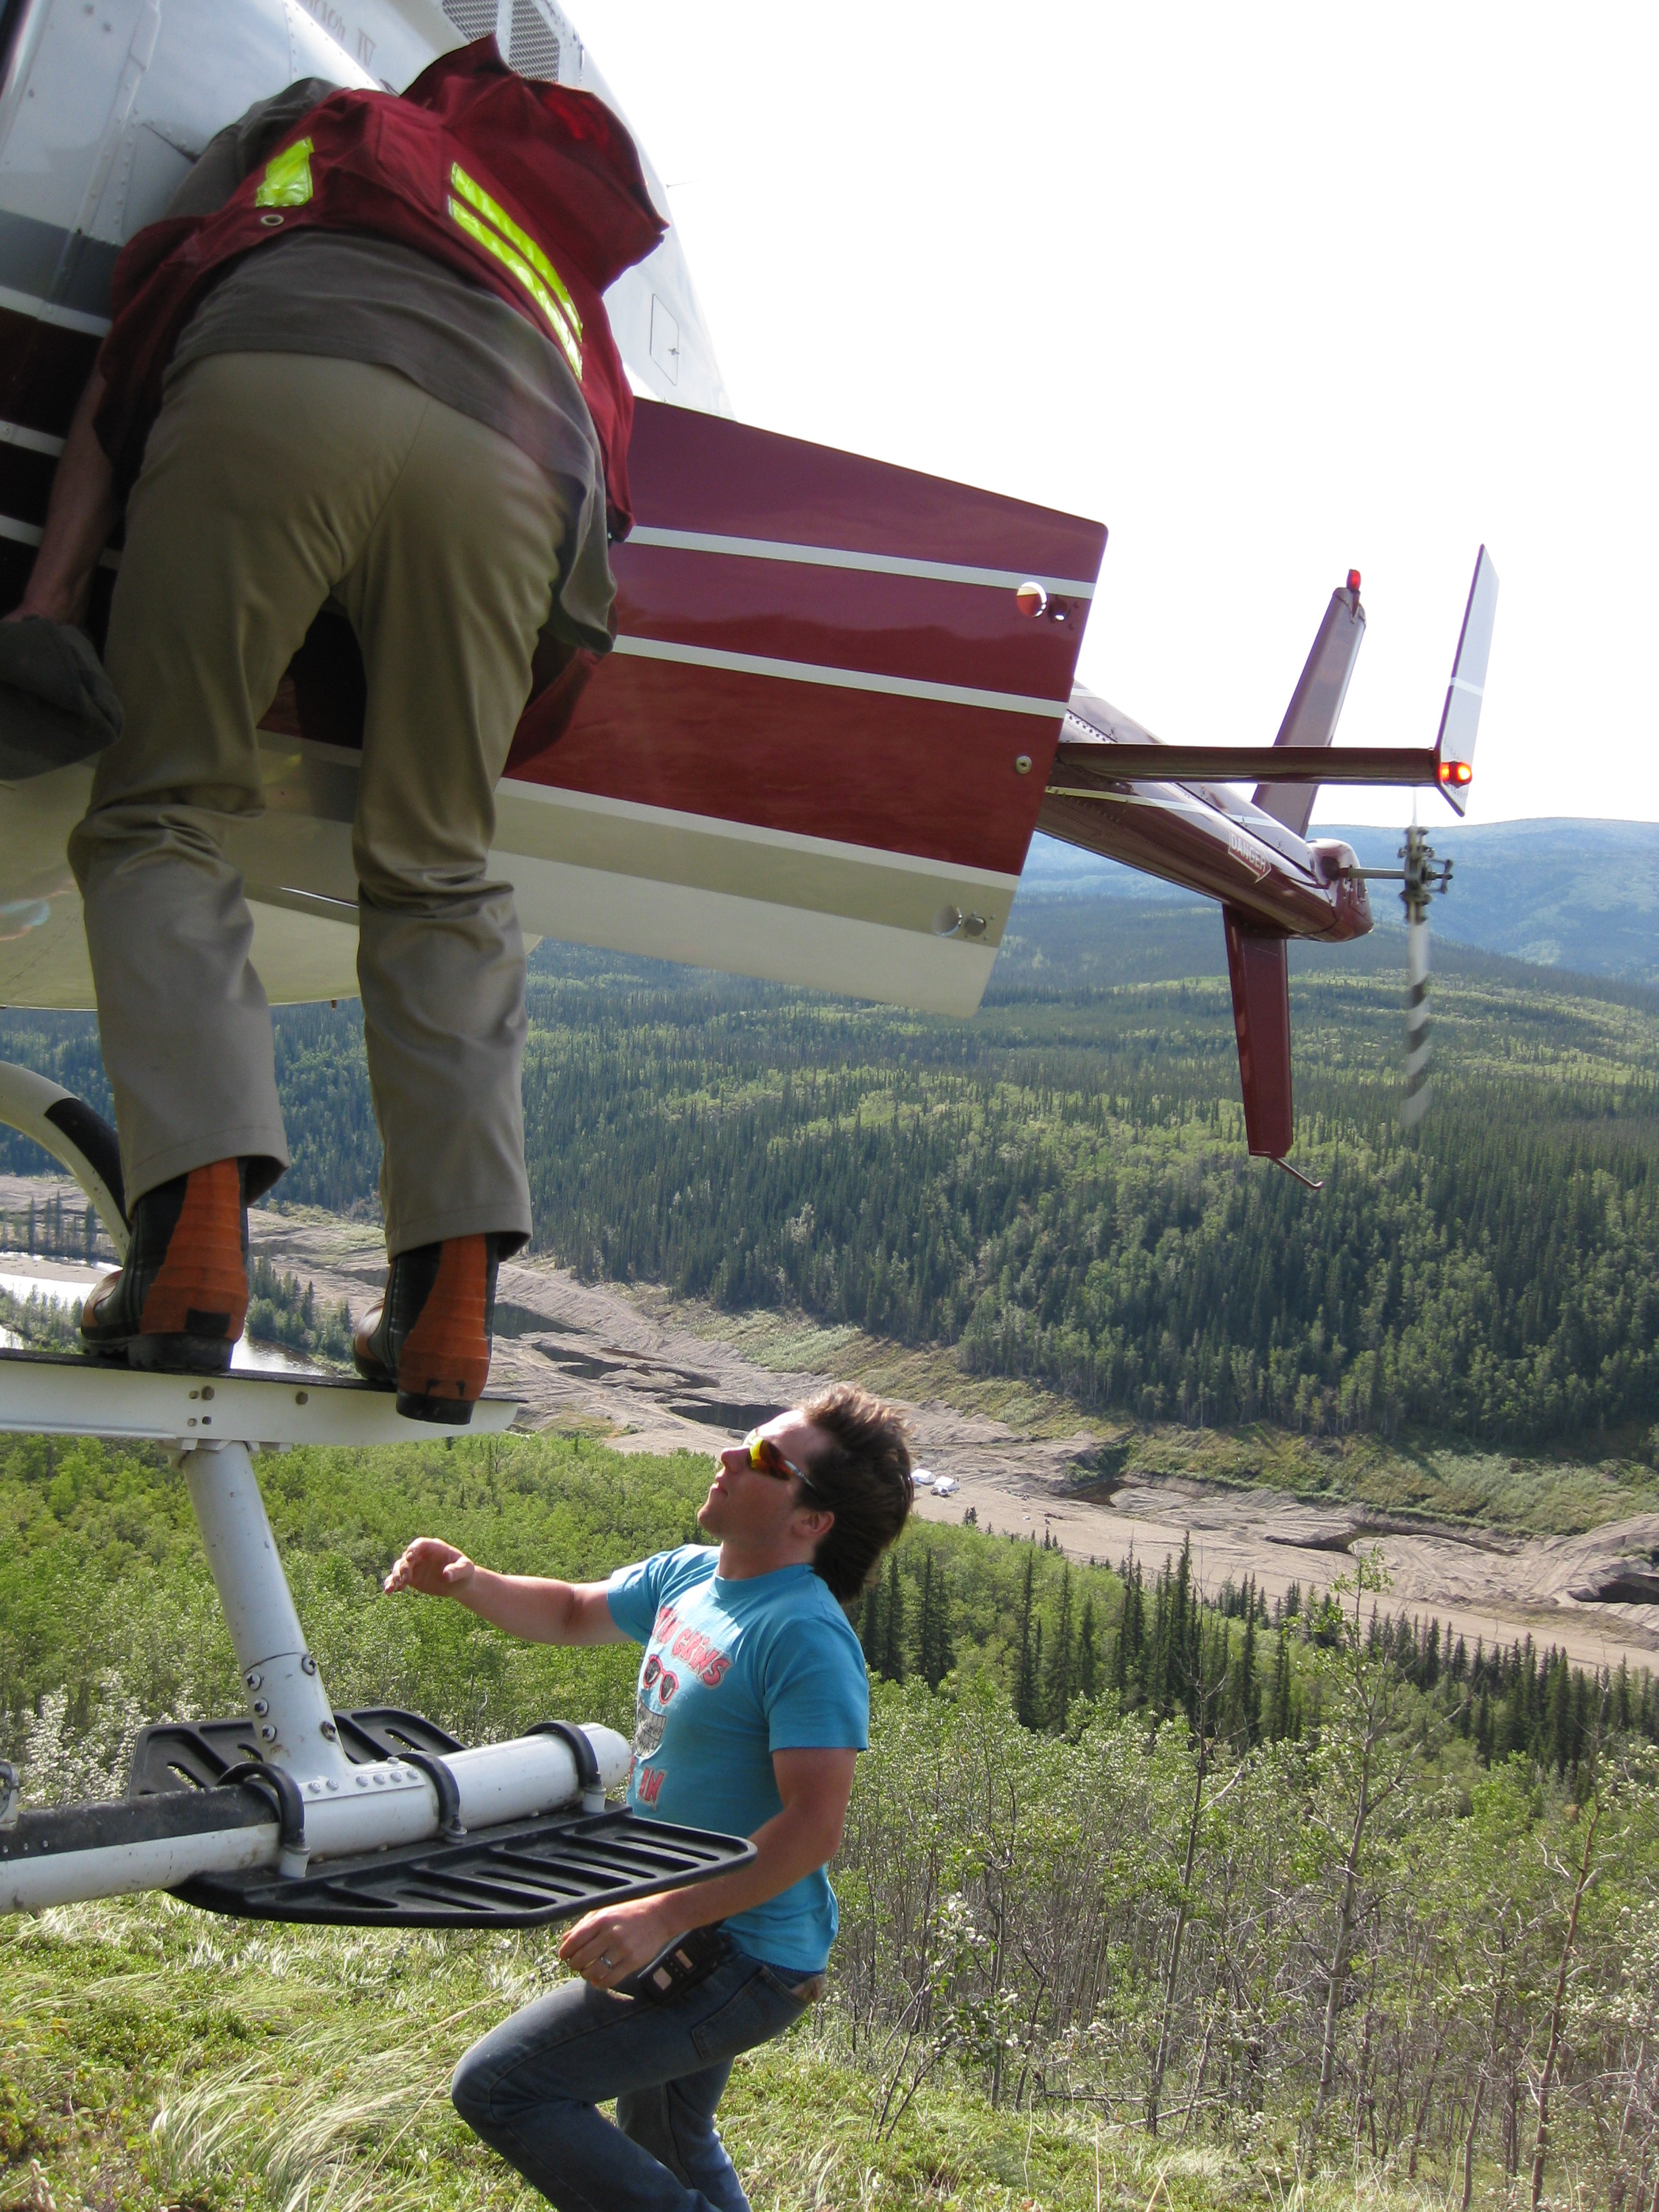
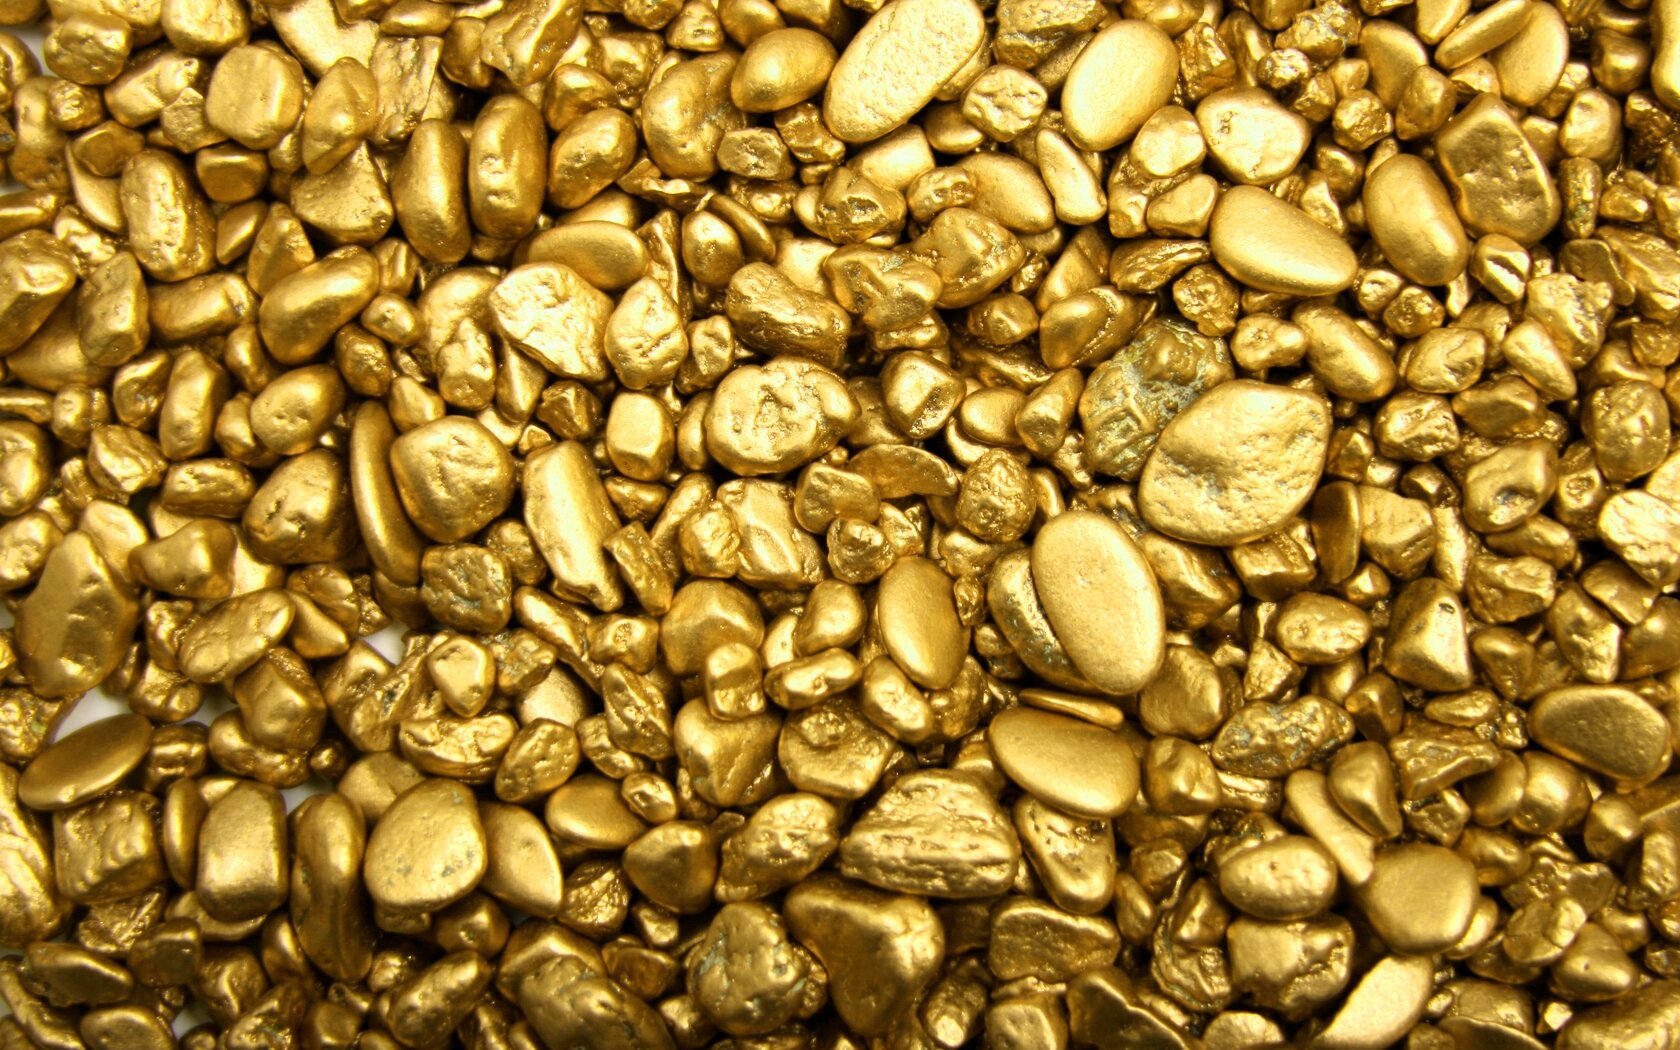
Prospecting for gold is an activity that has captured the imagination of man for thousands of years. There’s something about gold that grabs at our sense of adventure like nothing else in the natural world. The men and women who participated in the gold rushes of the 1800s left us with rich stories that are just as entertaining to read today as the day that they happened.

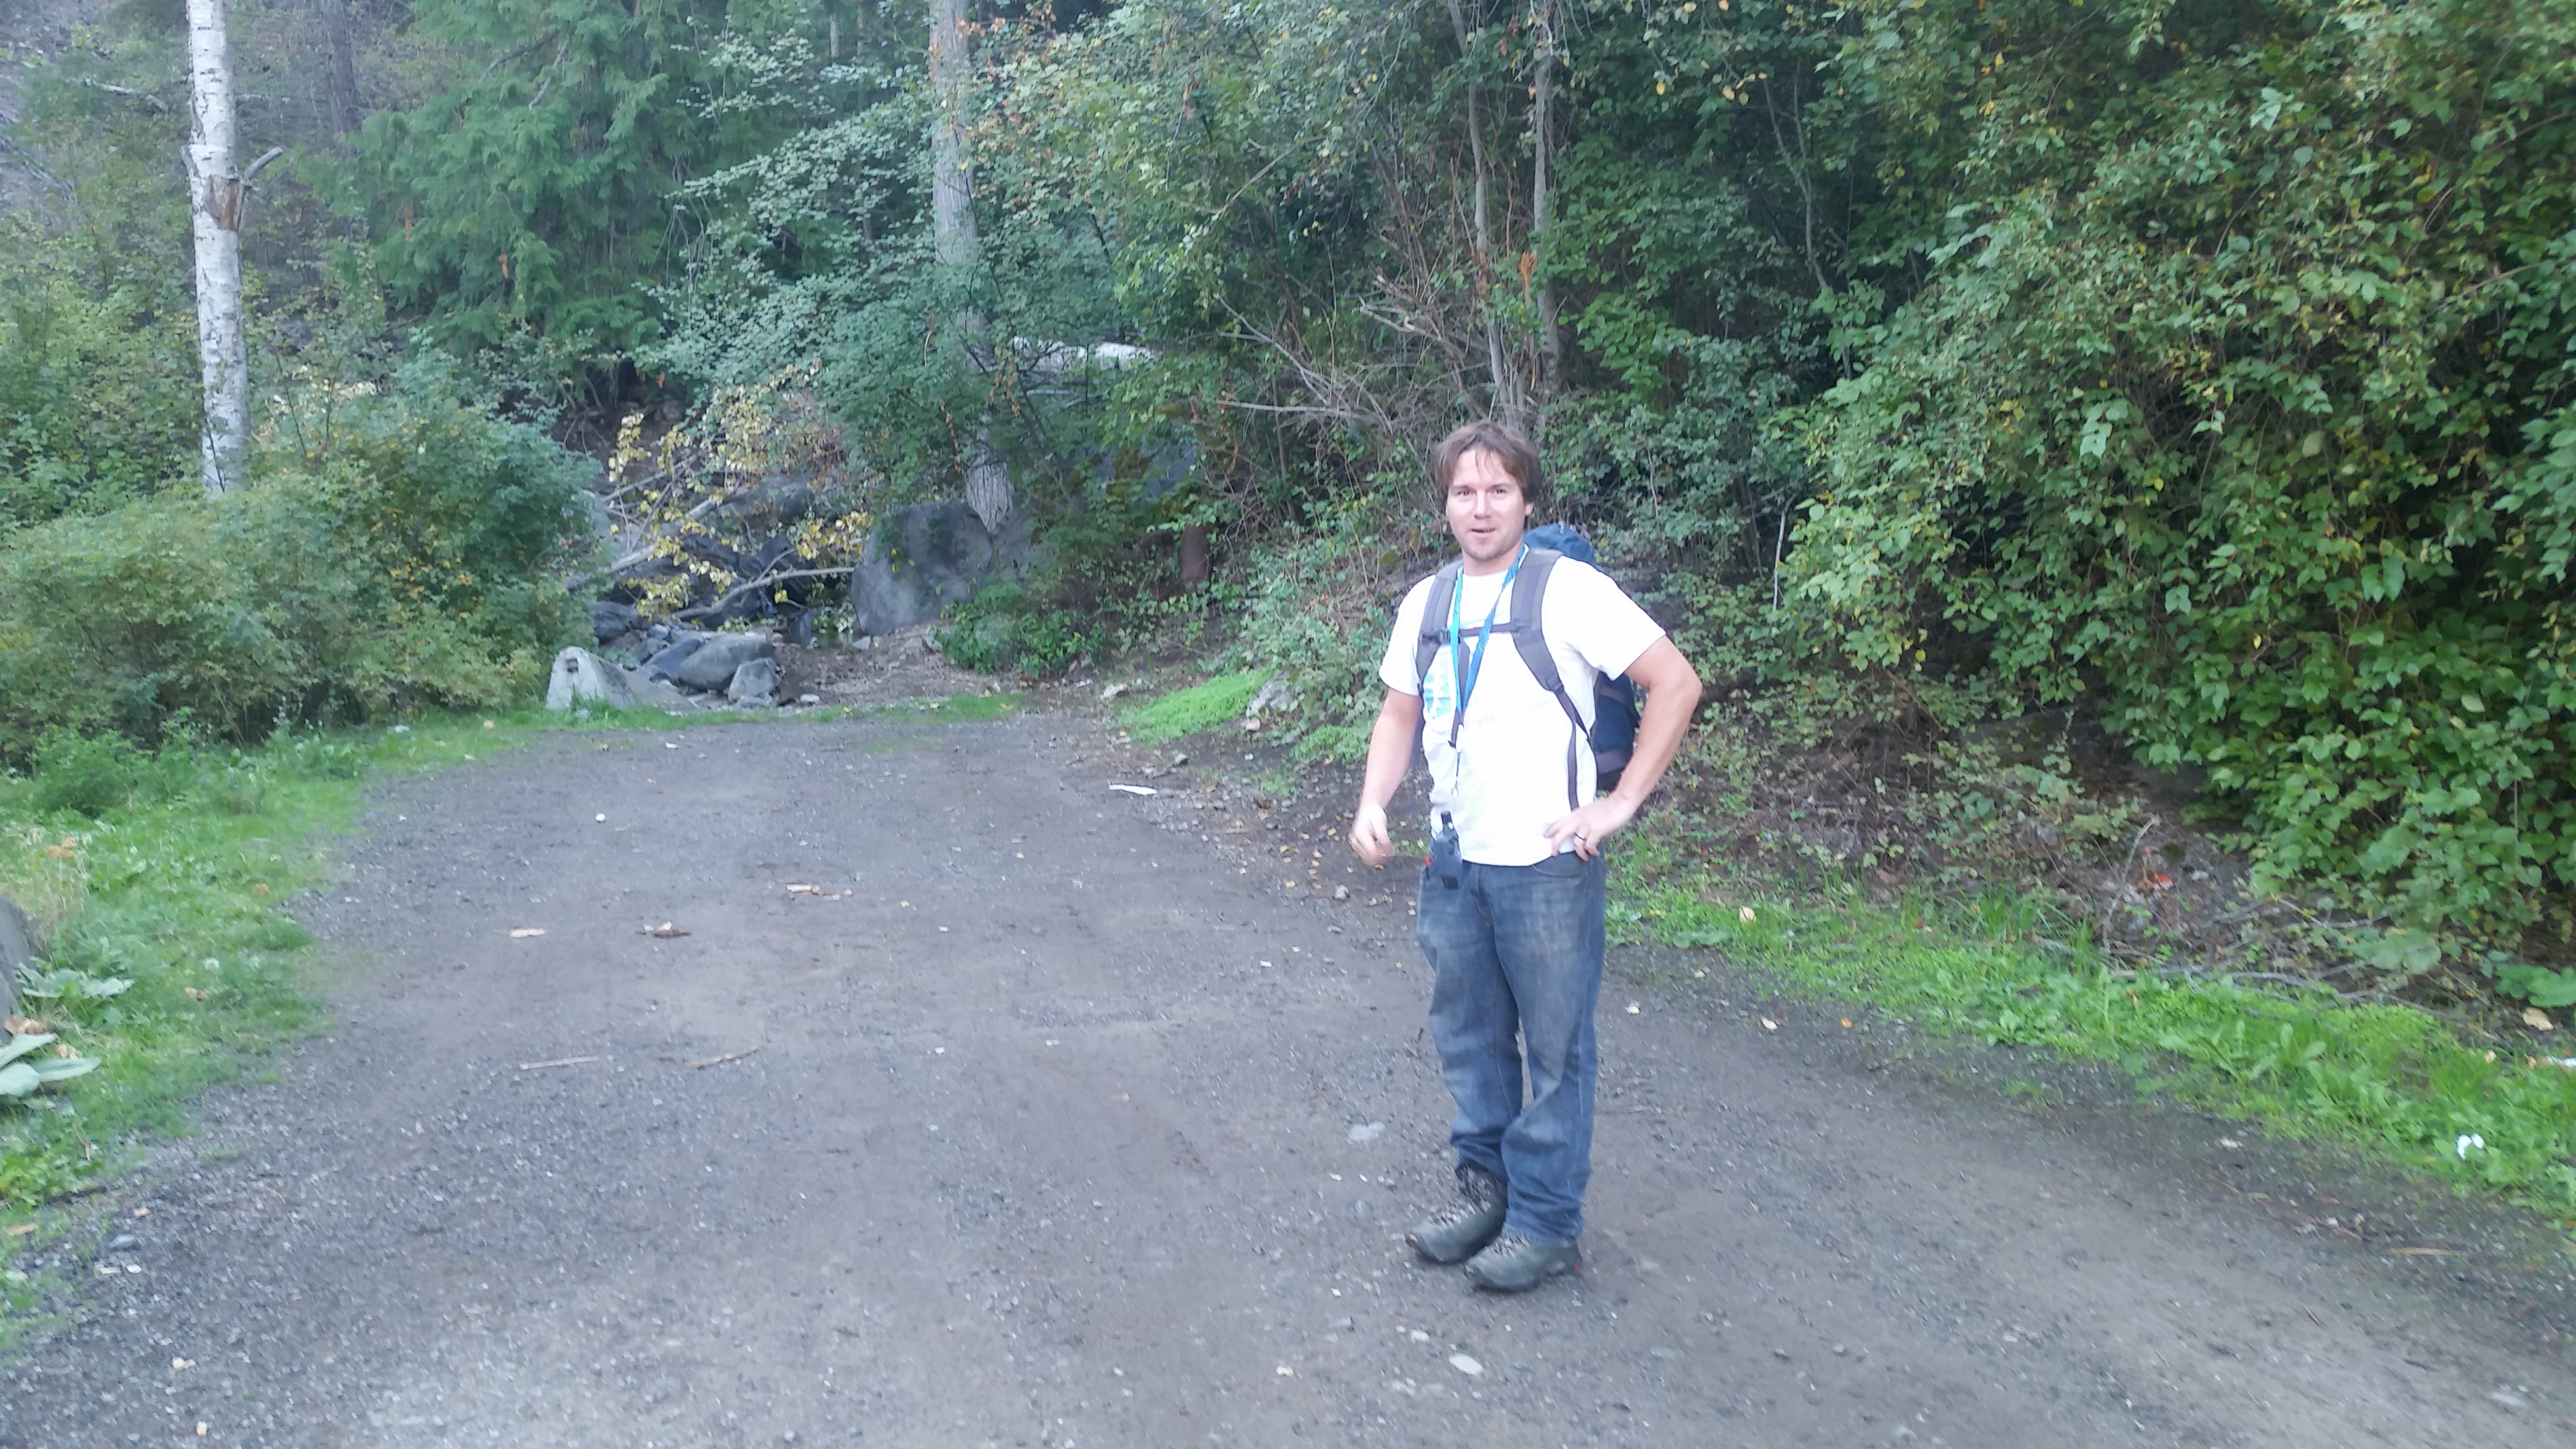
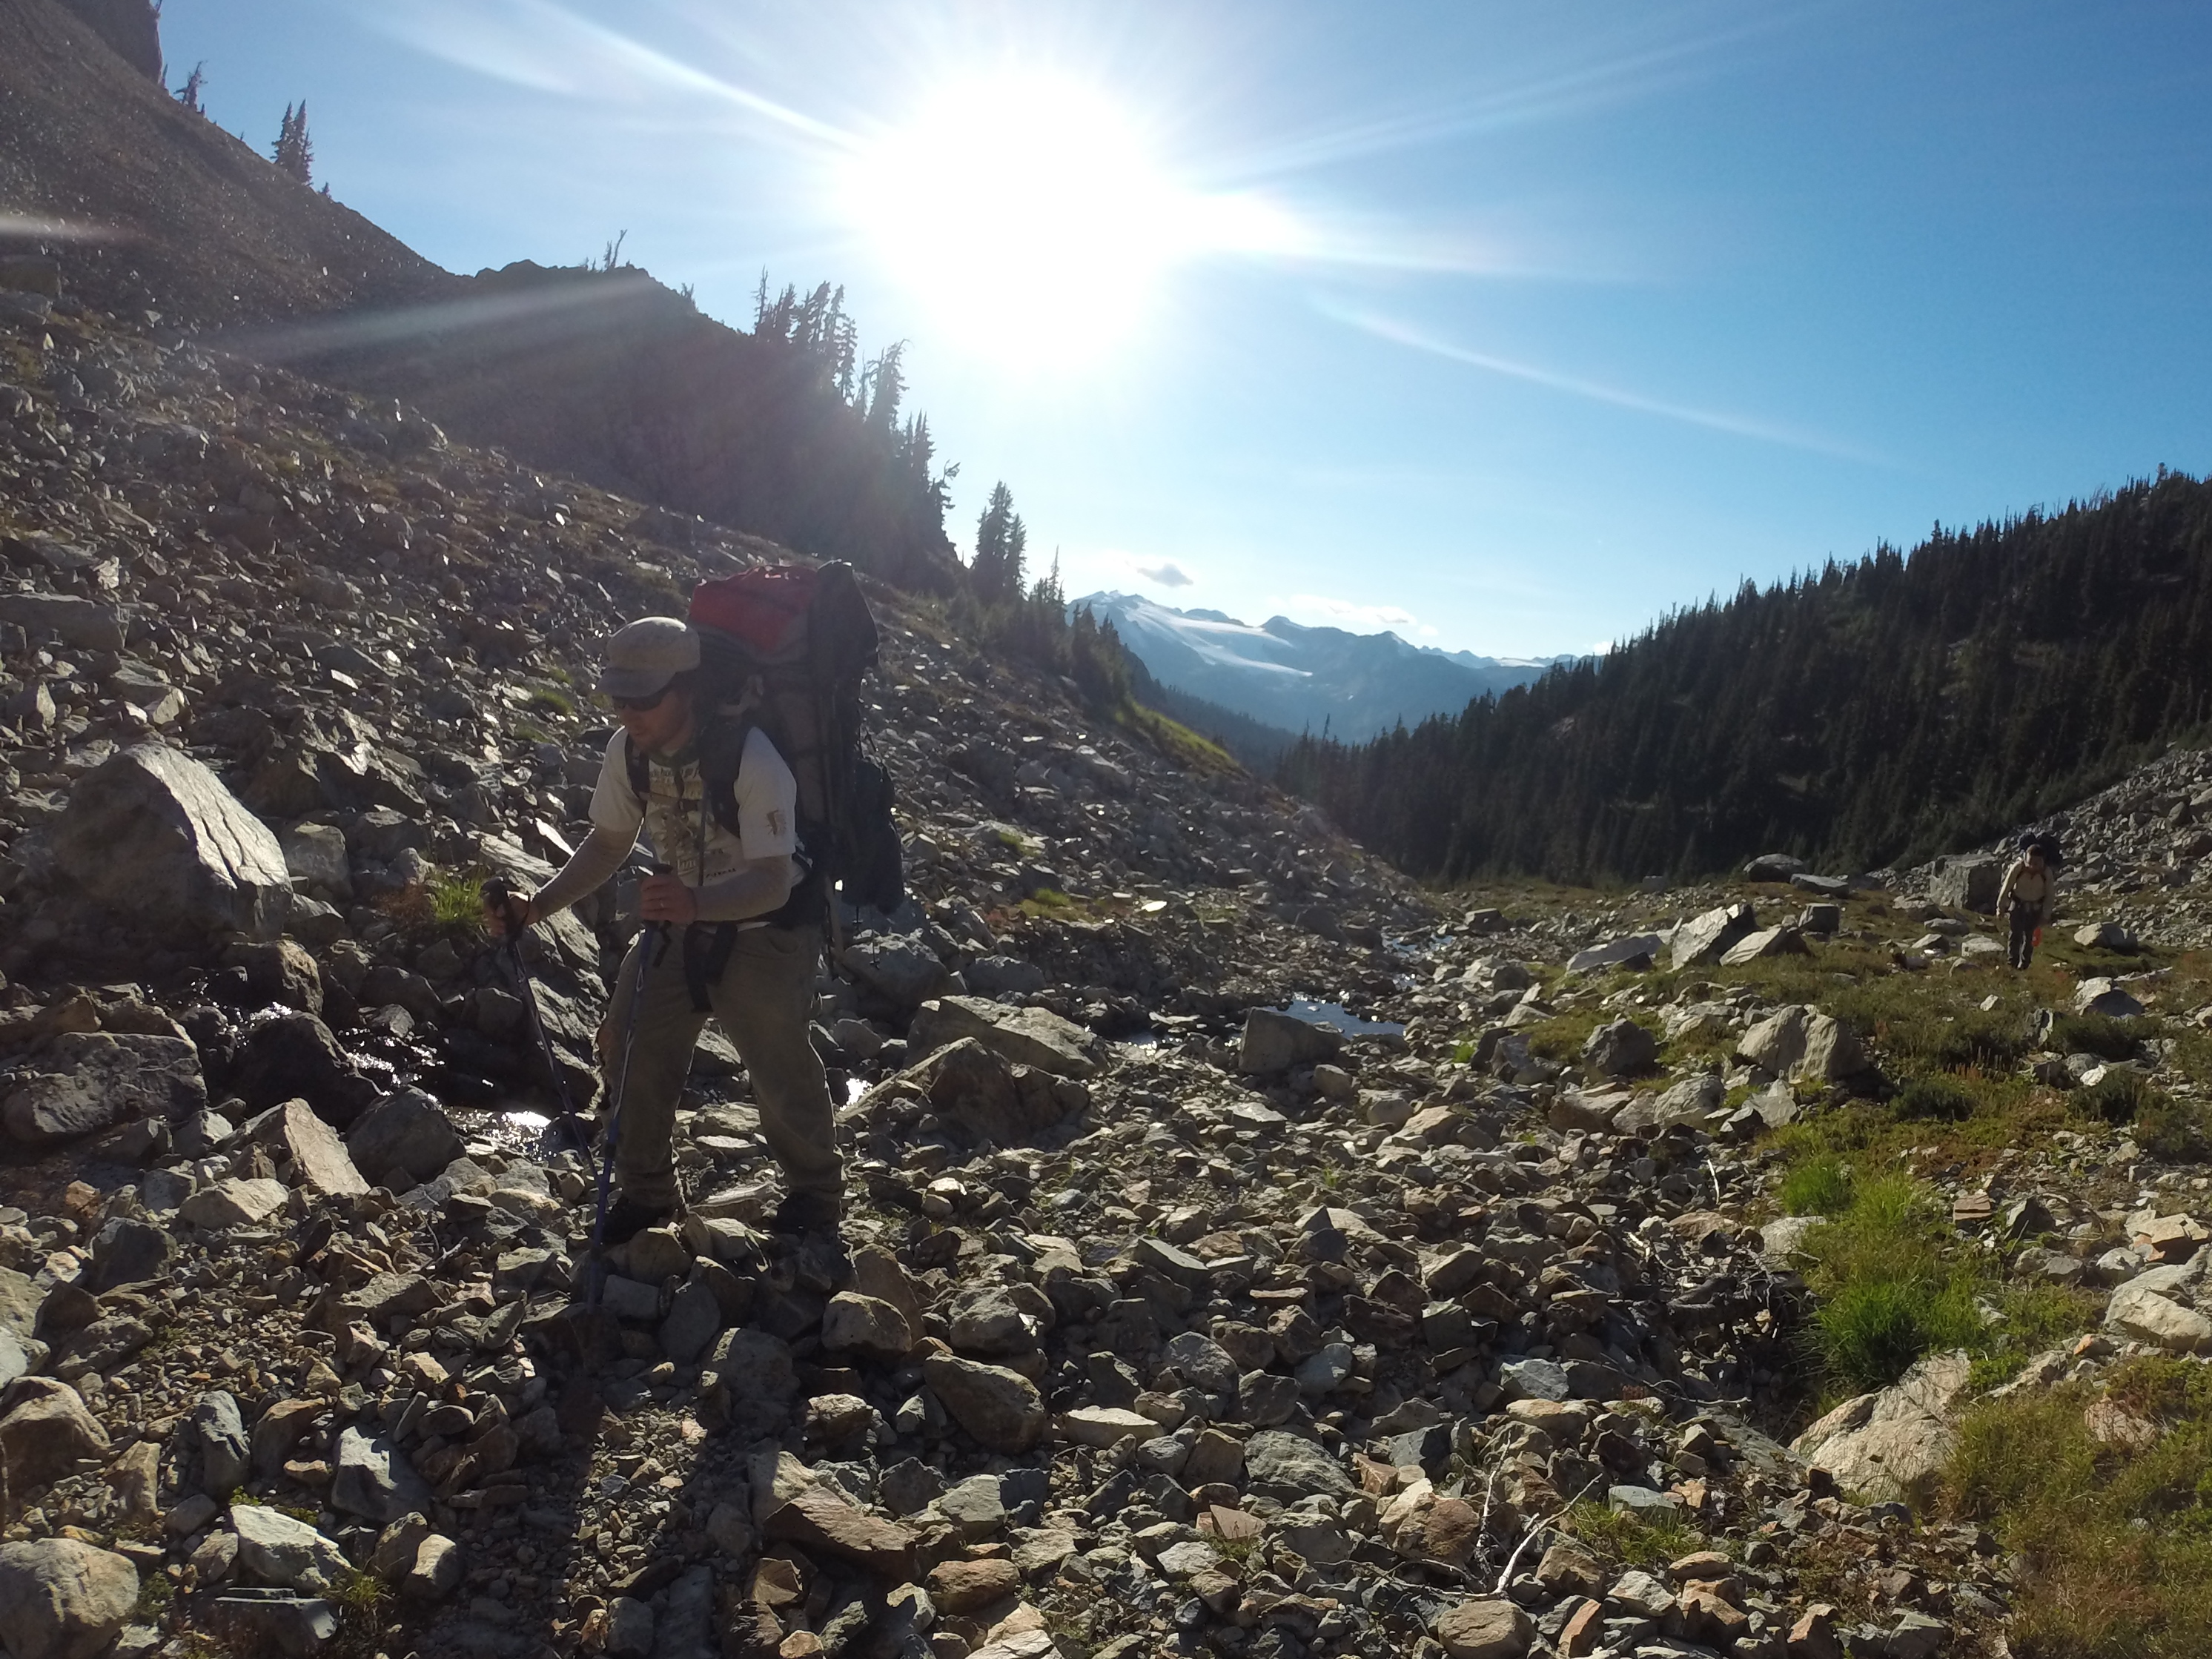
If you are the kind of person who loves the outdoors, craves adventure, and enjoys the sense of accomplishment that comes along with achieving difficult goals then gold prospecting is an activity that you should consider.

There are a lot of things to think about when starting to become a prospector. The first thing is to determine what your personal goals are. There are several different paths that you can take and each one will require different skills and knowledge.

get started gold mining canada

Choose your path

Do you want to be a recreational prospector? That would mean prospecting as a hobby or pastime while still having another source of income. Recreational prospecting is a great hobby and very rewarding. As a recreational prospector you may or may not need to own a claim and the investments in equipment and training are minimal.

If you aspire to become a small-scale miner you’re going to have to invest a lot more time and money into your endeavors. You’ll need to hold your own claim and will require substantially more equipment than a recreational prospector.

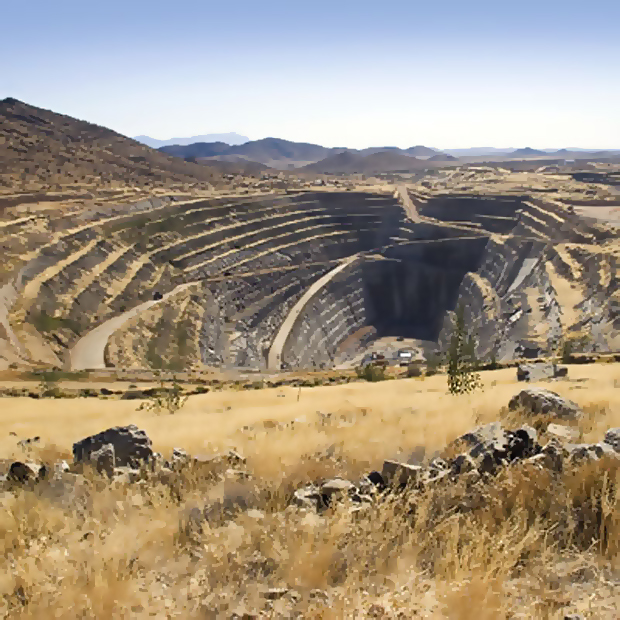
Full-scale commercial miners are a whole different story. You’ll require advanced knowledge of gold deposits, exploration, sampling, and mining techniques as well as heavy investments in mining property and equipment.

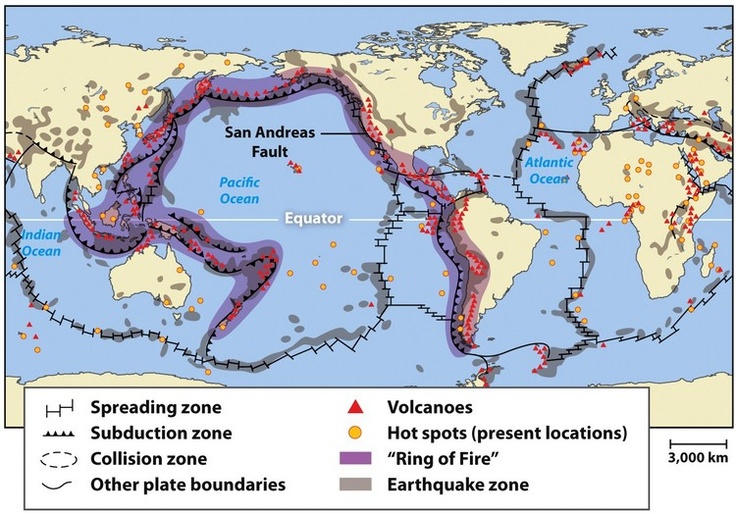
In addition to the scale of mining activities that you plan to engage in you’ll have to think about what type of prospecting you want to do. There are two general types of gold prospecting Hard Rock and Placer.

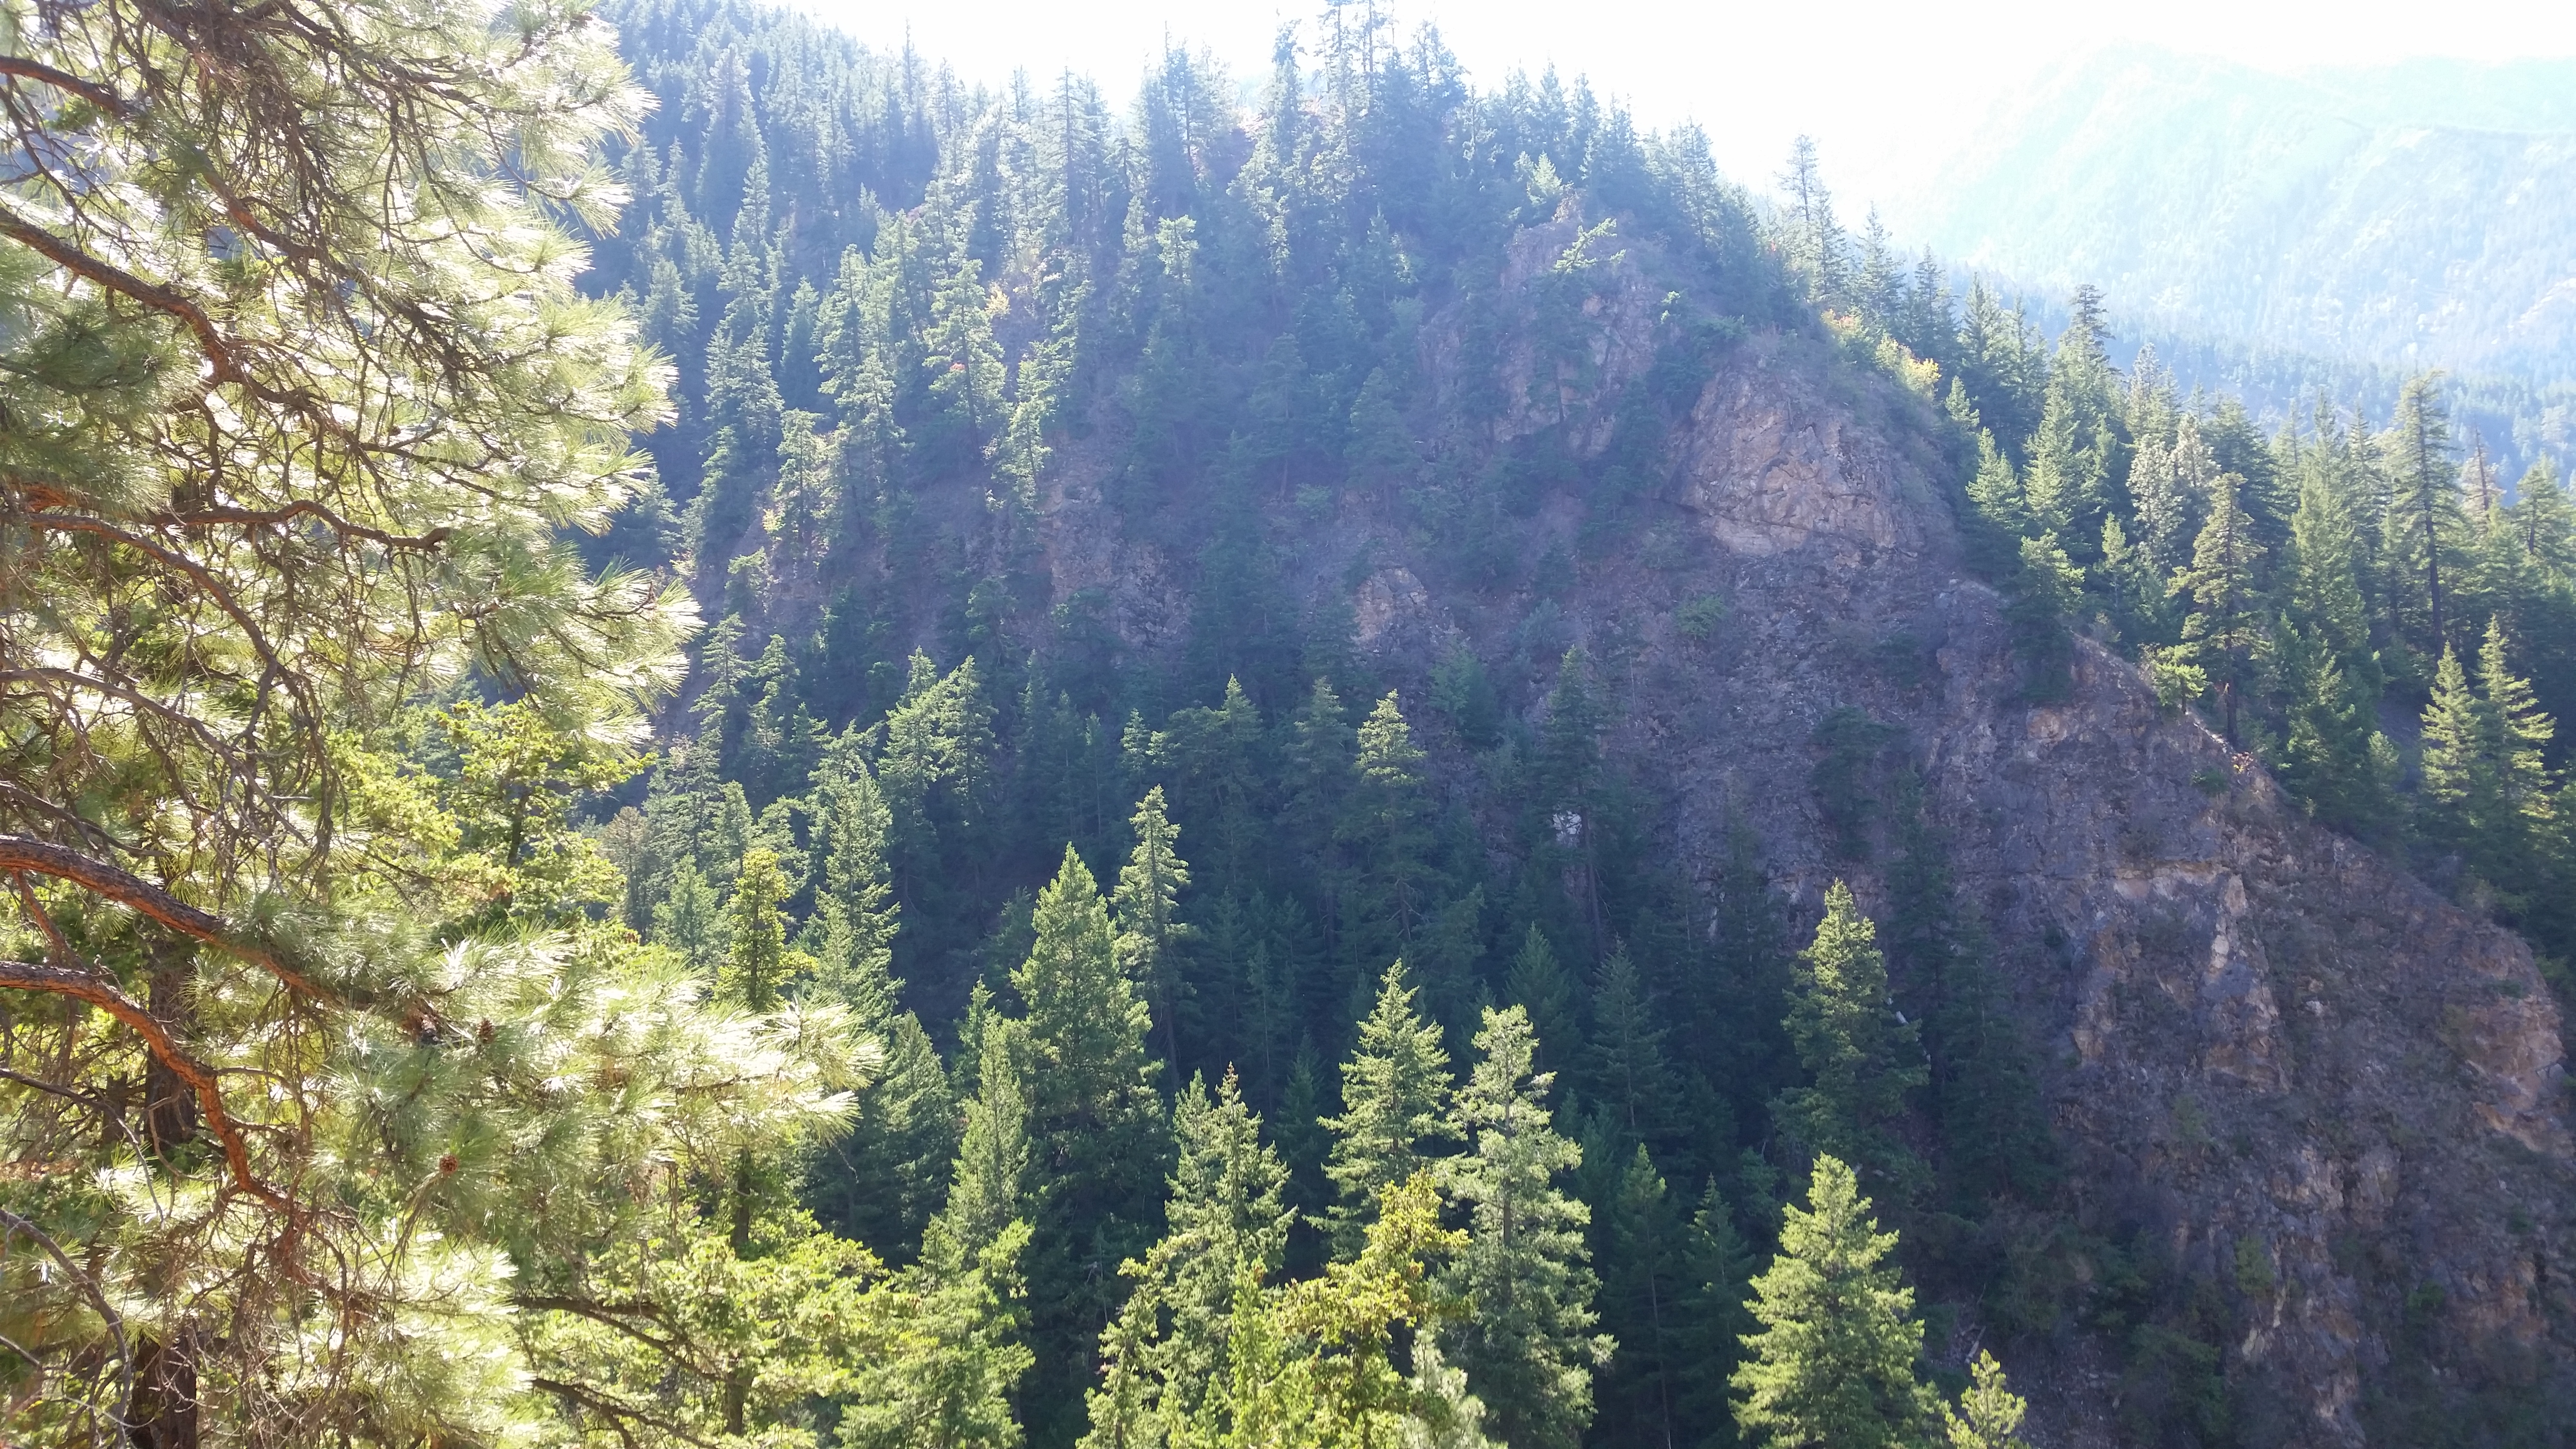
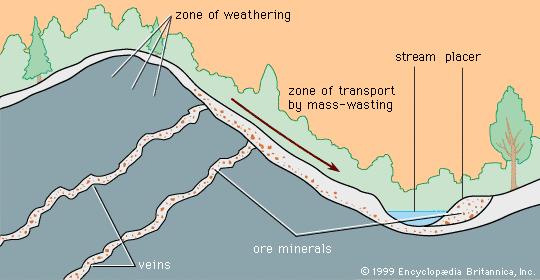
Placer gold is the type that is deposited in river gravels and ancient stream beds. Hard rock gold is located in its original source, in actual rock. The prospecting techniques and methods used for placer and hard rock are totally different with very little overlap. There’s nothing wrong with wanting to explore for both types of gold.

Once you’ve set your goals you’ll be better positioned to set yourself up to reach them. It’s pretty difficult to start from scratch and become a full-scale commercial miner in your first year but that hasn’t stopped people from trying. If you are considering that path make sure that you have some people supporting you with legitimate mining and exploration experience.

Learn prospecting techniques

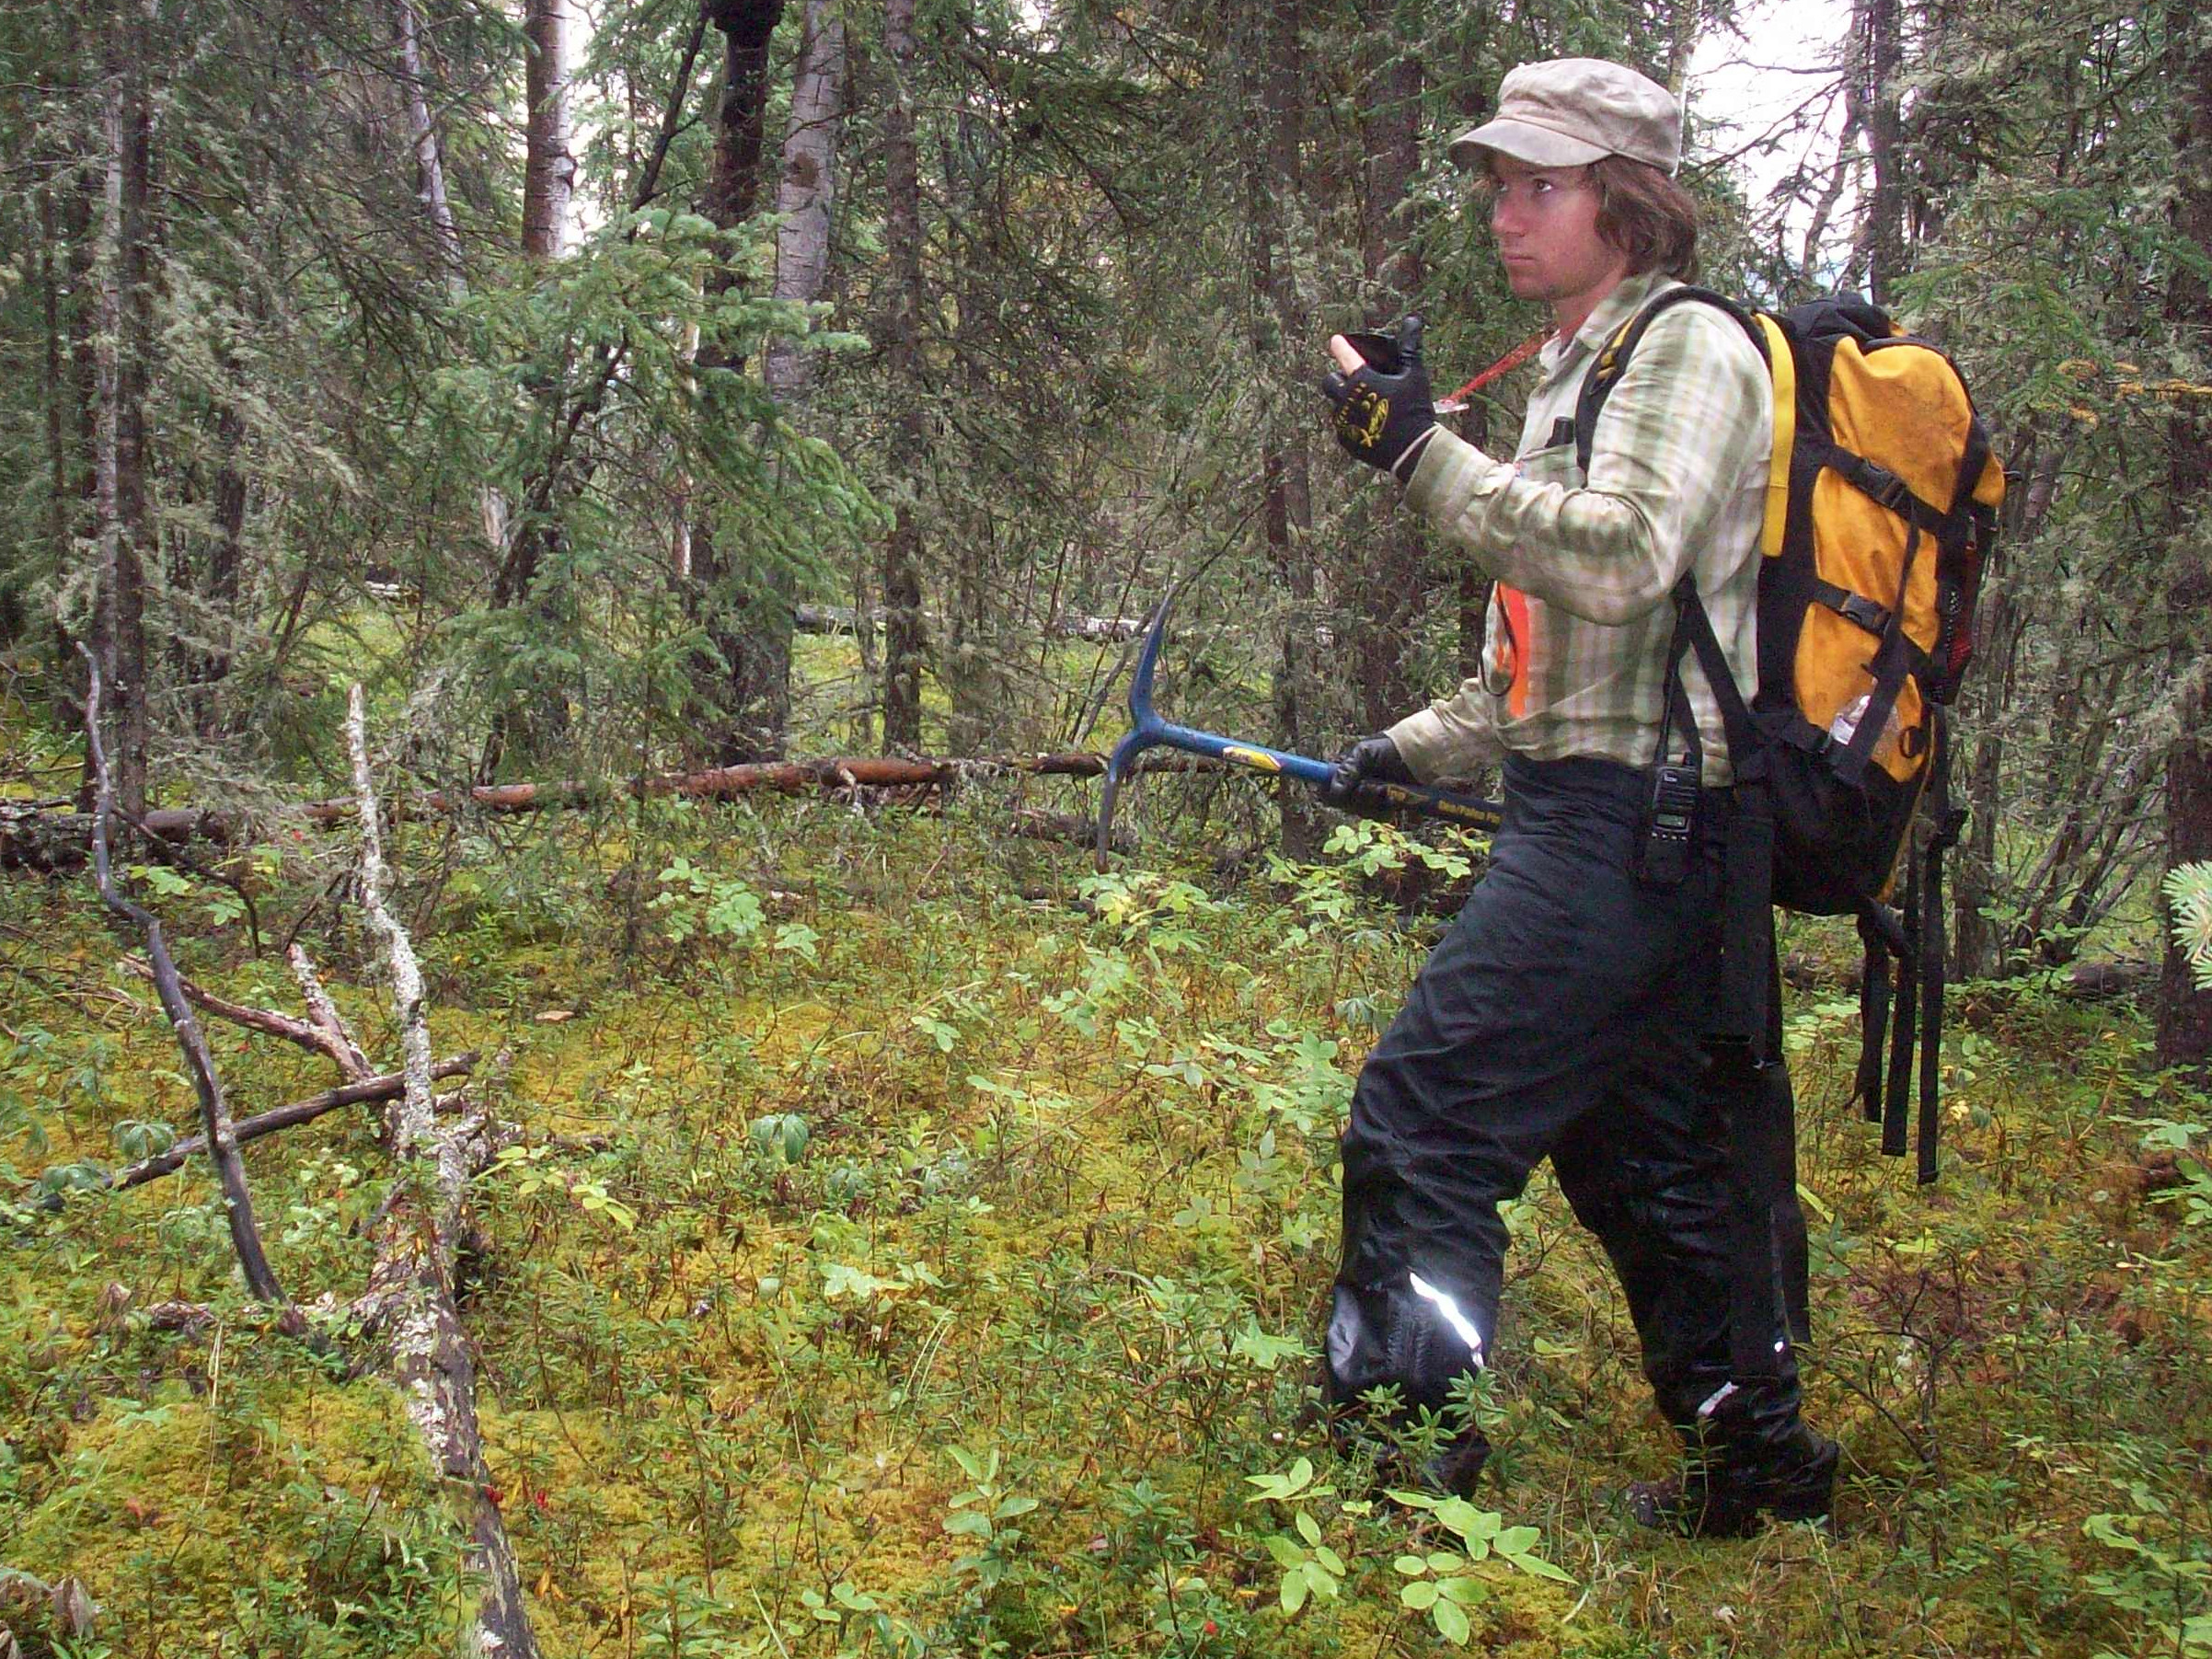
Different types of gold deposits require different techniques to find them. As a fledgling prospector, you won’t become skilled at all aspects of gold exploration right away. You’ll have to determine what type of prospecting you want to focus on.

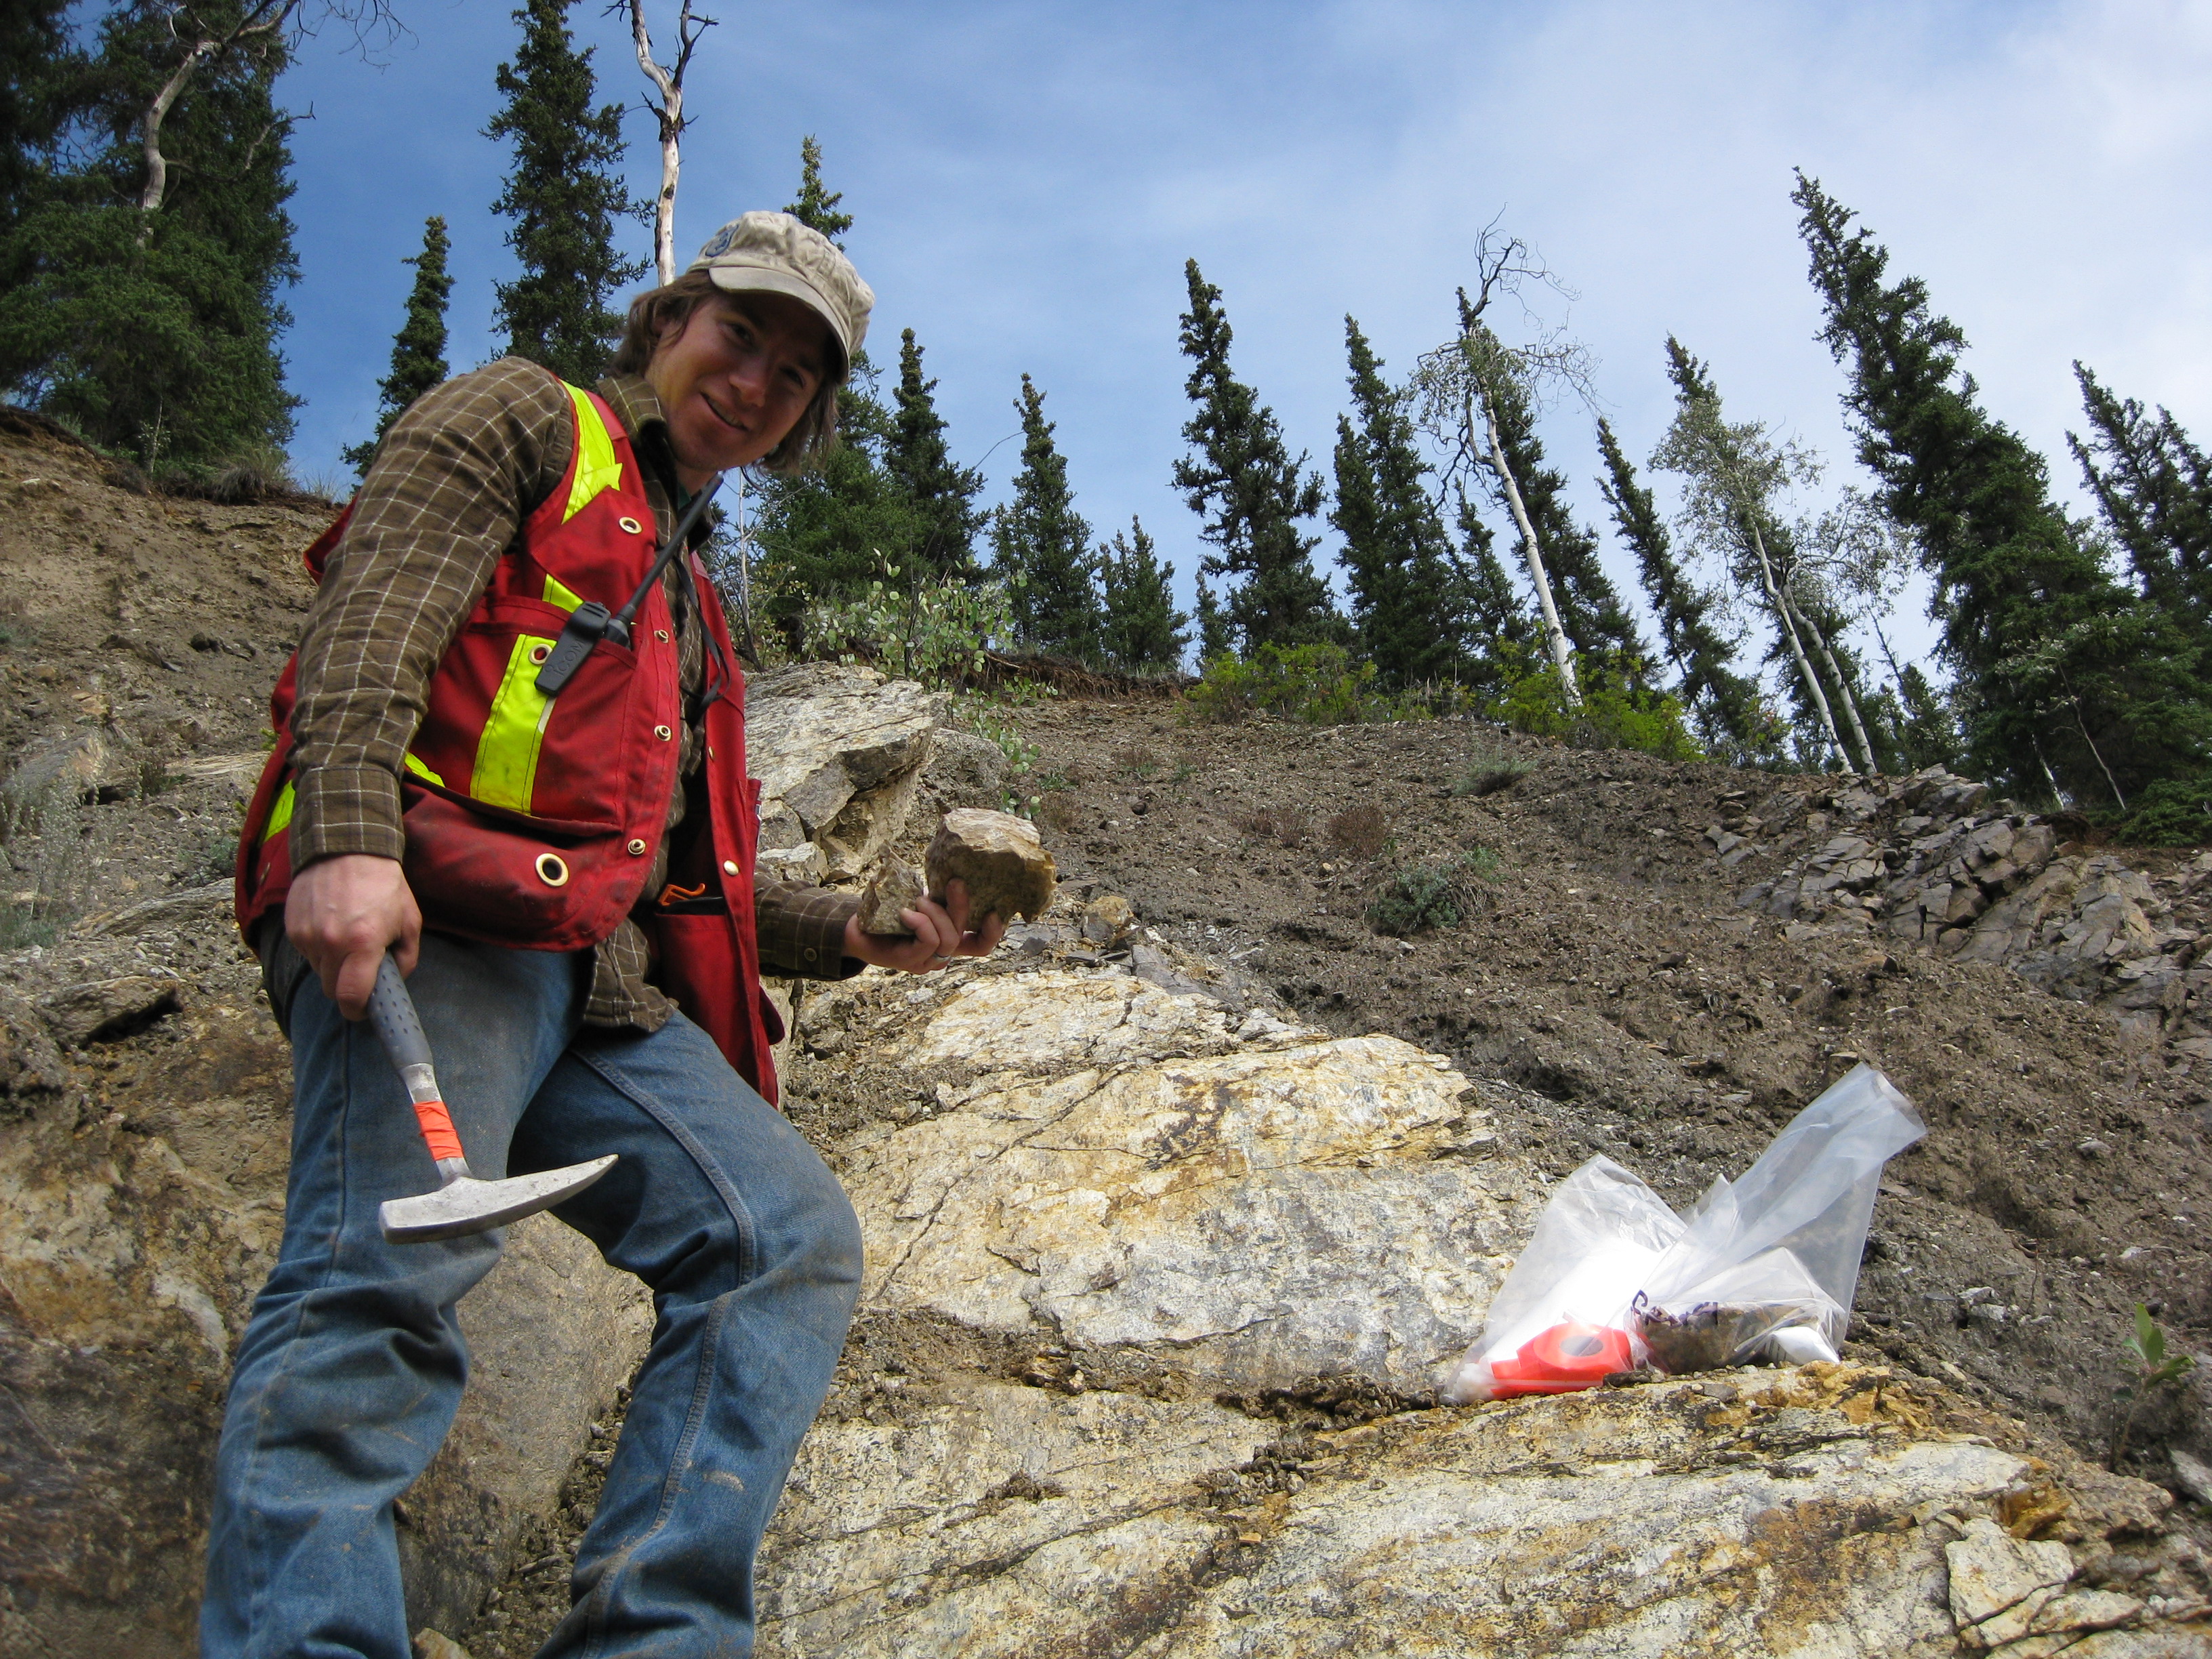
To get started you’ll need to learn some basic geology and an understanding of where gold is likely to be found. You don’t have to become a geologist but it will be helpful to understand a few of the different rock types and environments where gold is commonly found in your area. Placer gold is found in creeks and ancient river channels while hard rock gold sources can occur pretty much anywhere in the right kinds of rock.

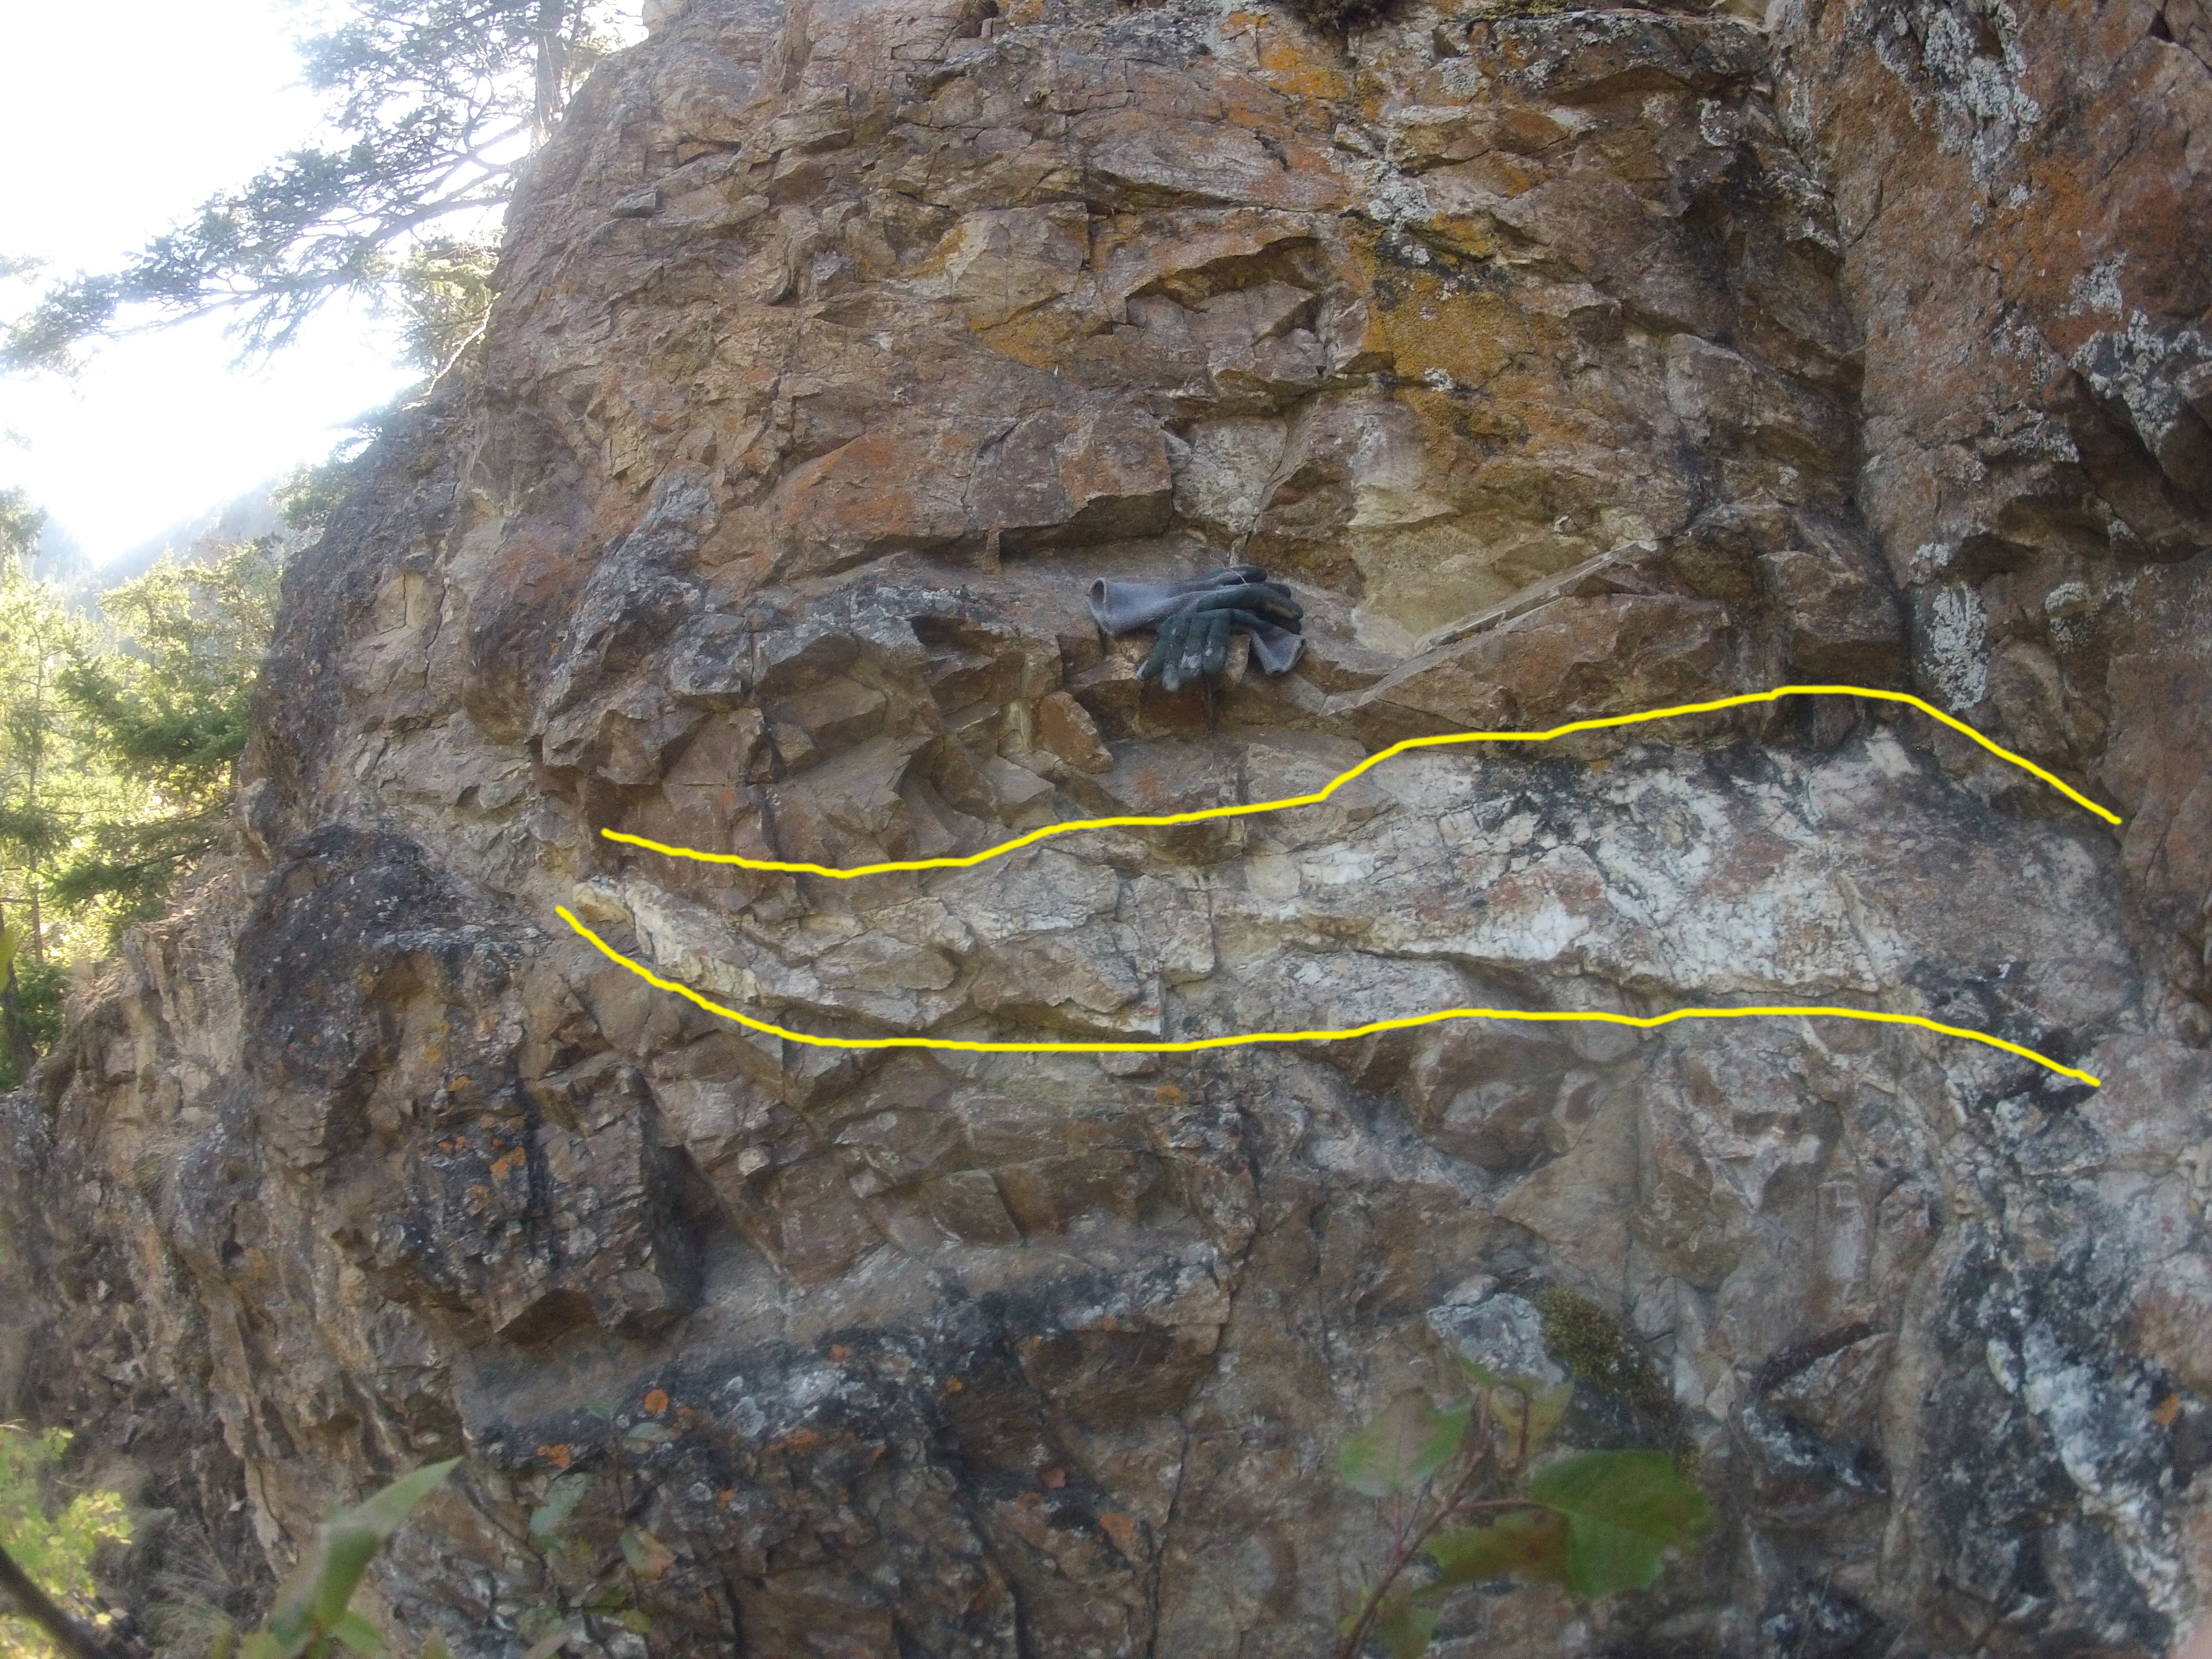
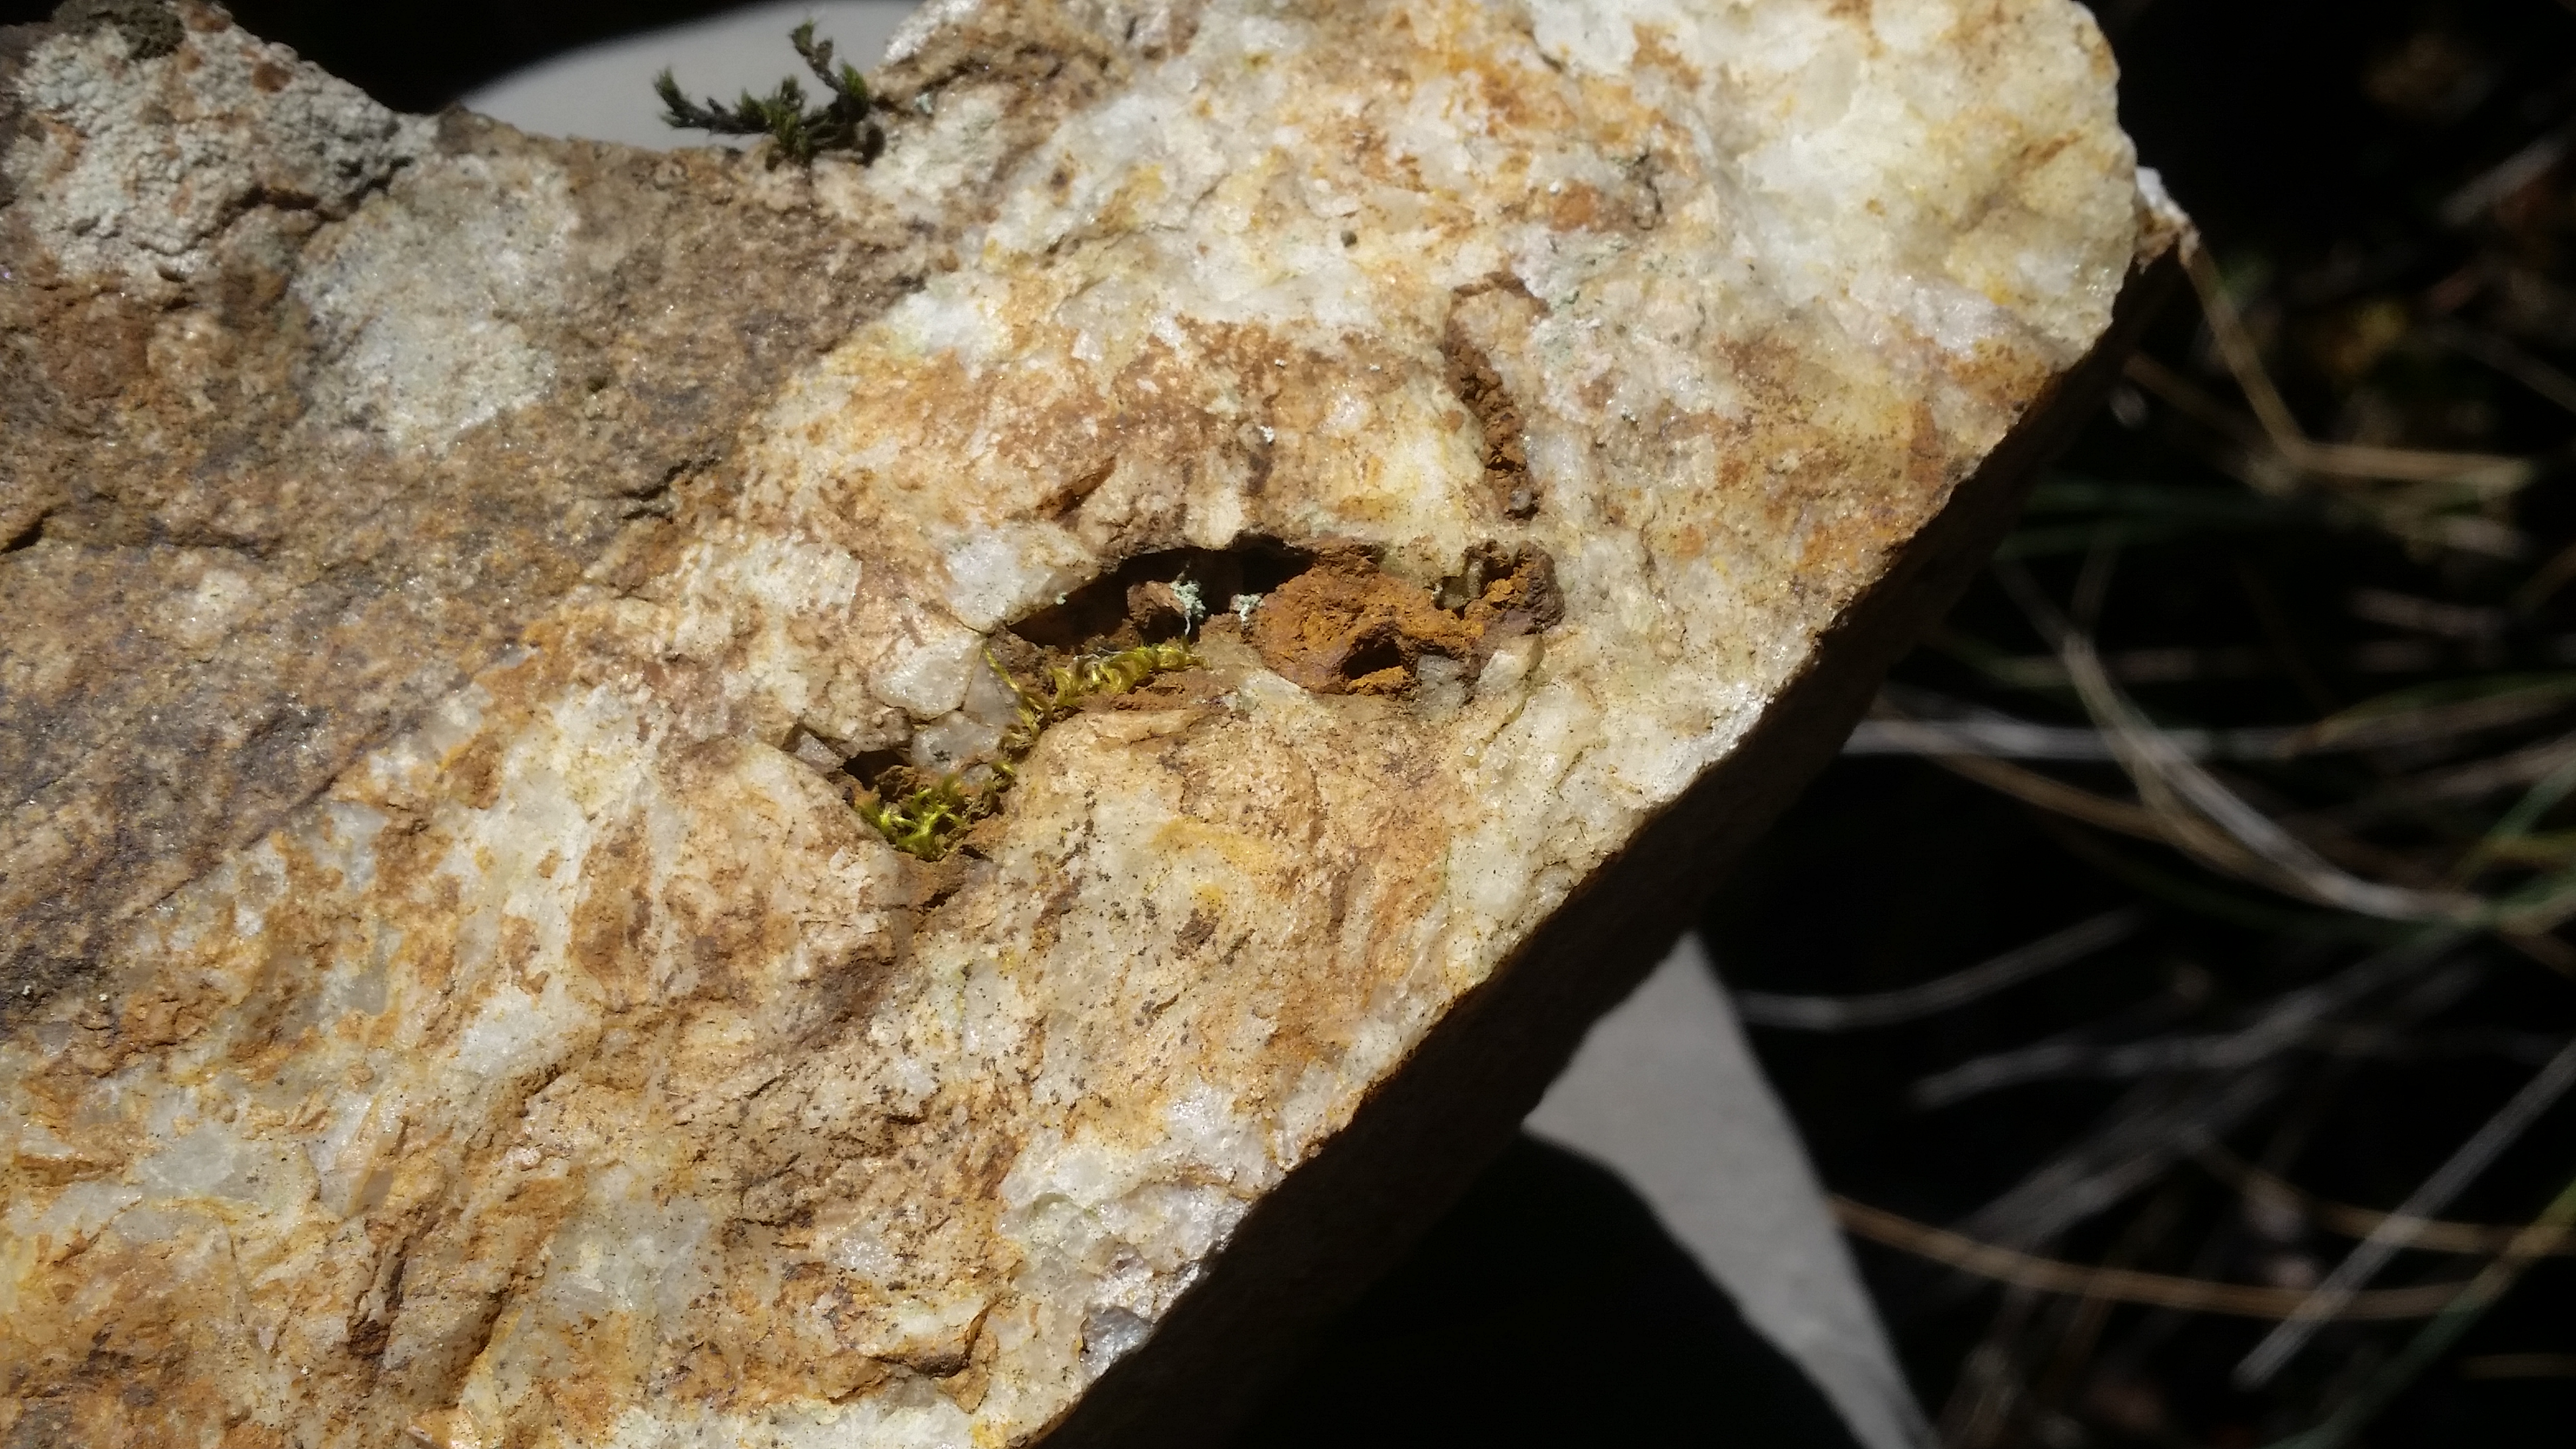
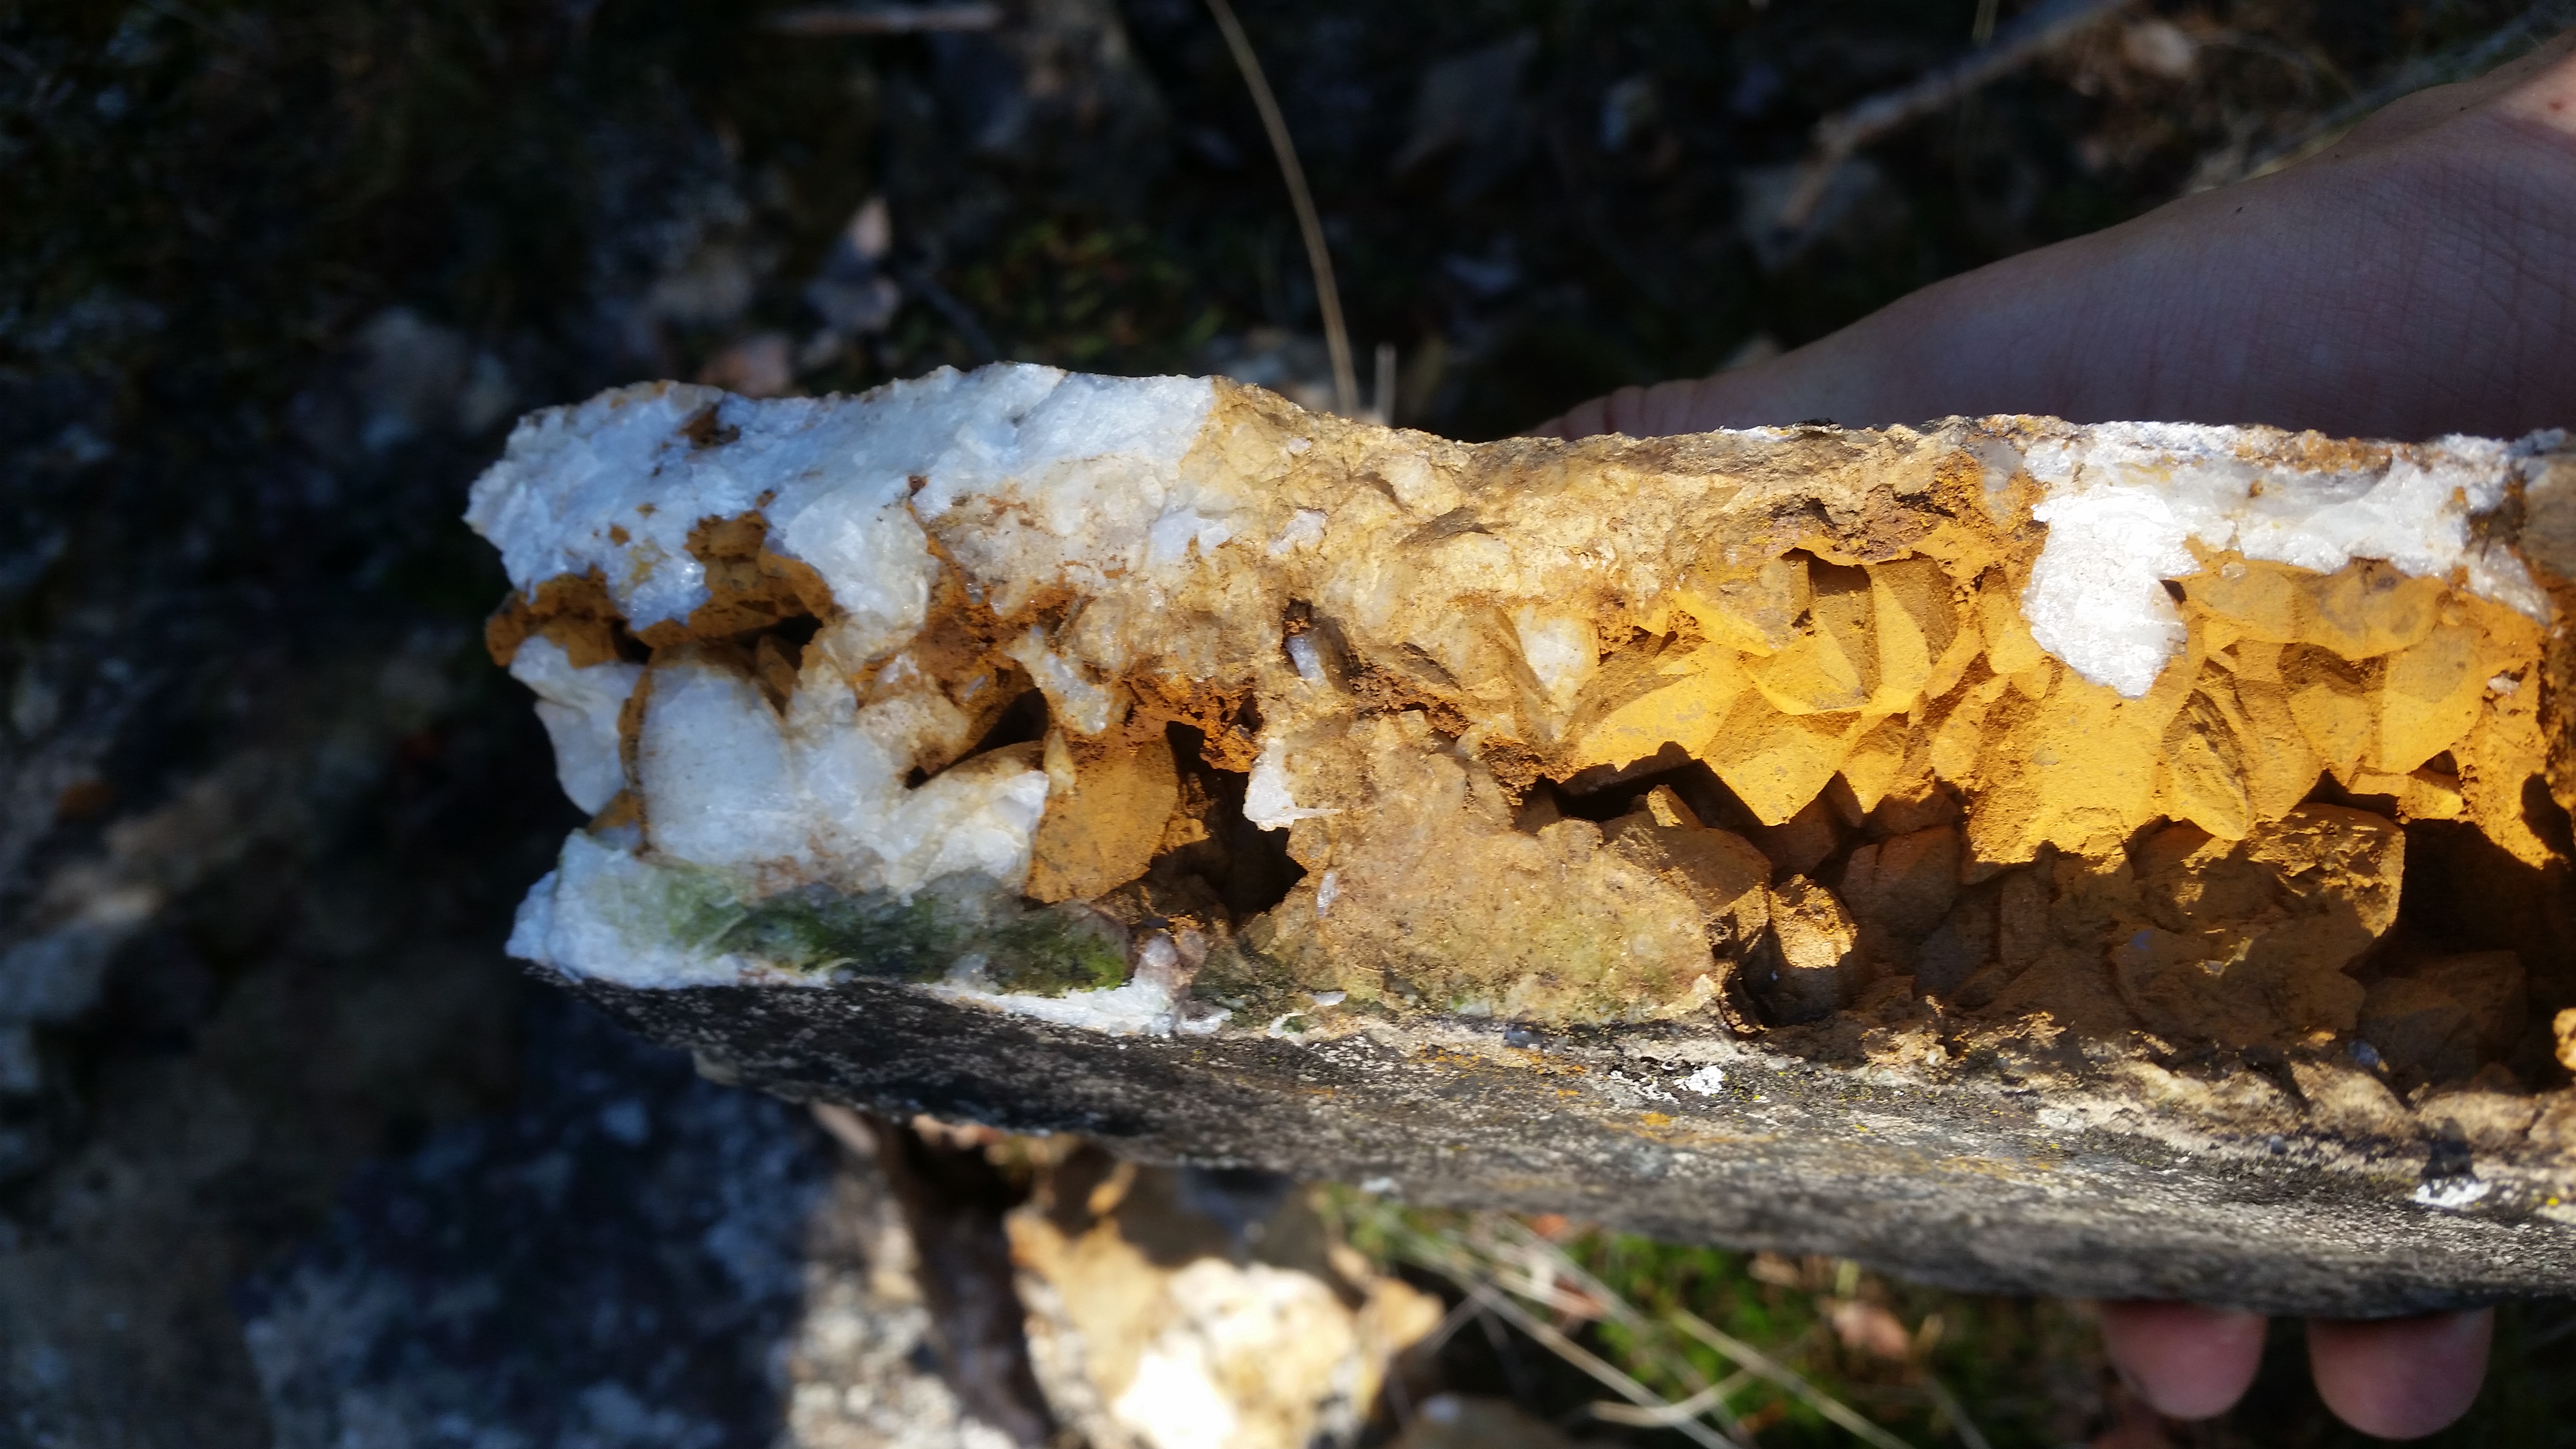
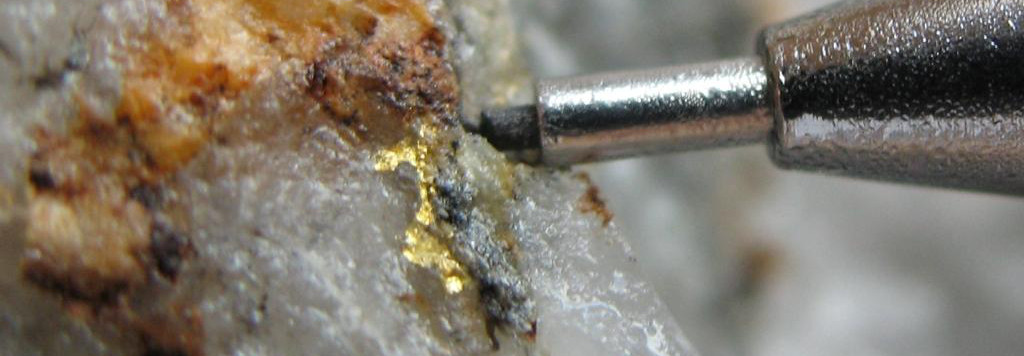
You’ll want to learn the difference between igneous, sedimentary, and metamorphic rocks. You’ll want to be familiar with minerals that occur in the same environment as gold such as quartz, pyrite, chalcopyrite, and mica. It’s important to be able to tell the difference between fool’s gold and real gold.

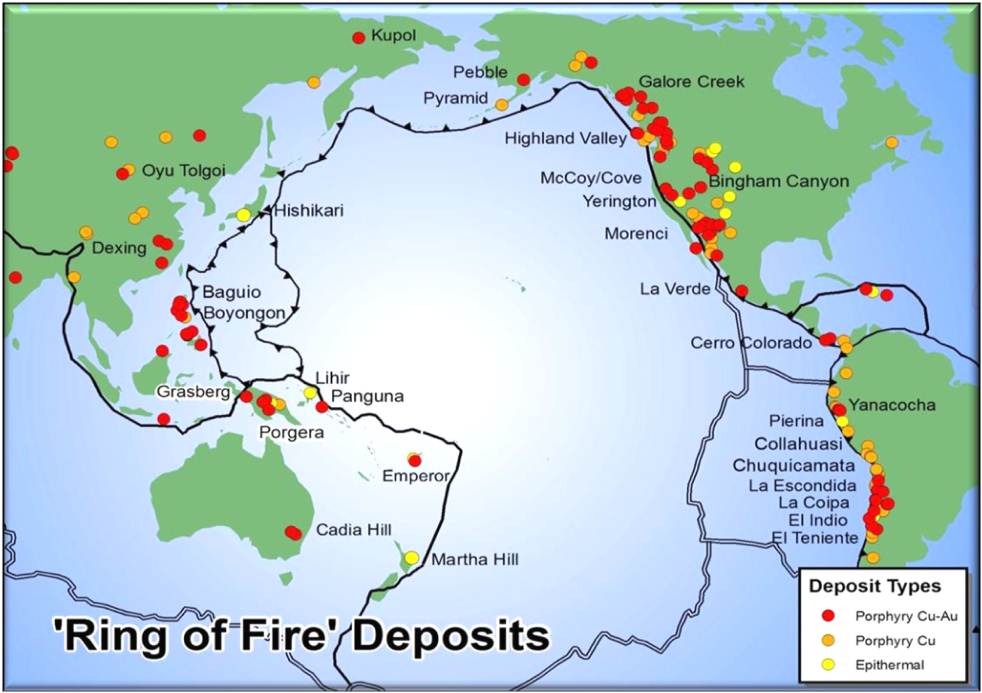
For hard rock prospecting, you’ll want to be able to recognize the types of environments where gold deposits form. Some common types are epithermal, porphyry, and volcanic massive sulfide. That all might sound new to you now but through research and experience, you’ll learn to recognize the signs of these different environments.

Placer gold and hard rock gold start out the same but end up being collected in different locations. Placer gold is just in-situ gold that has been eroded and concentrated in a creek or river environment. That being said, placer deposits don’t always point towards hard rock deposits and the opposite is also true.

Spotty River paleochannel gold

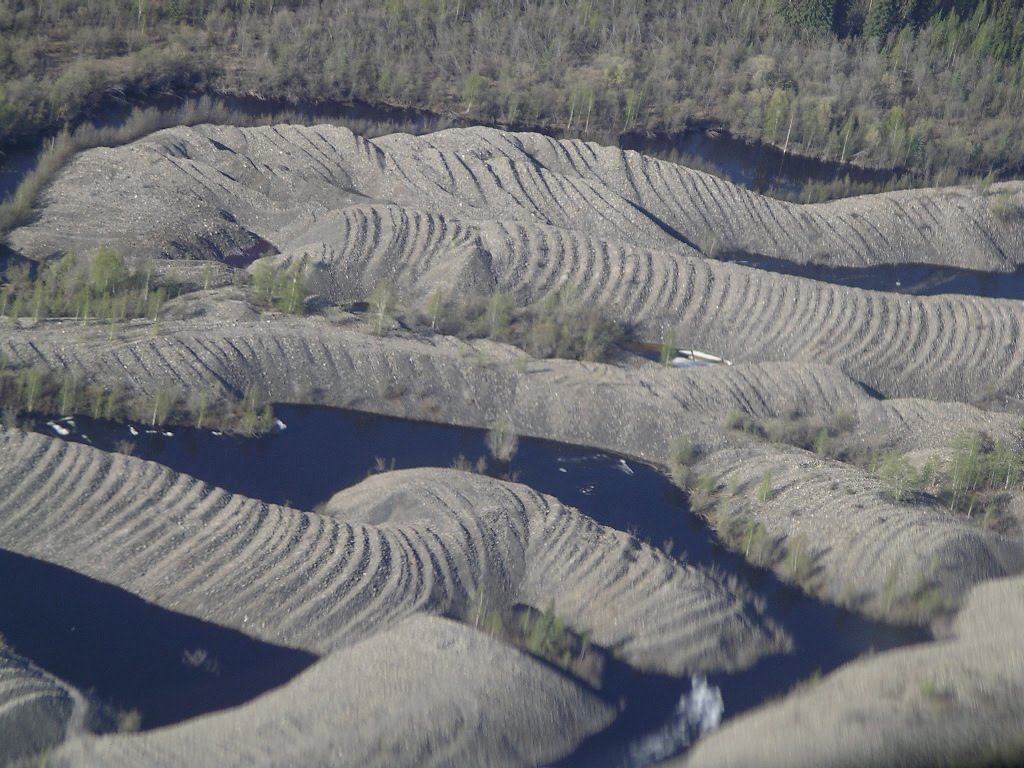
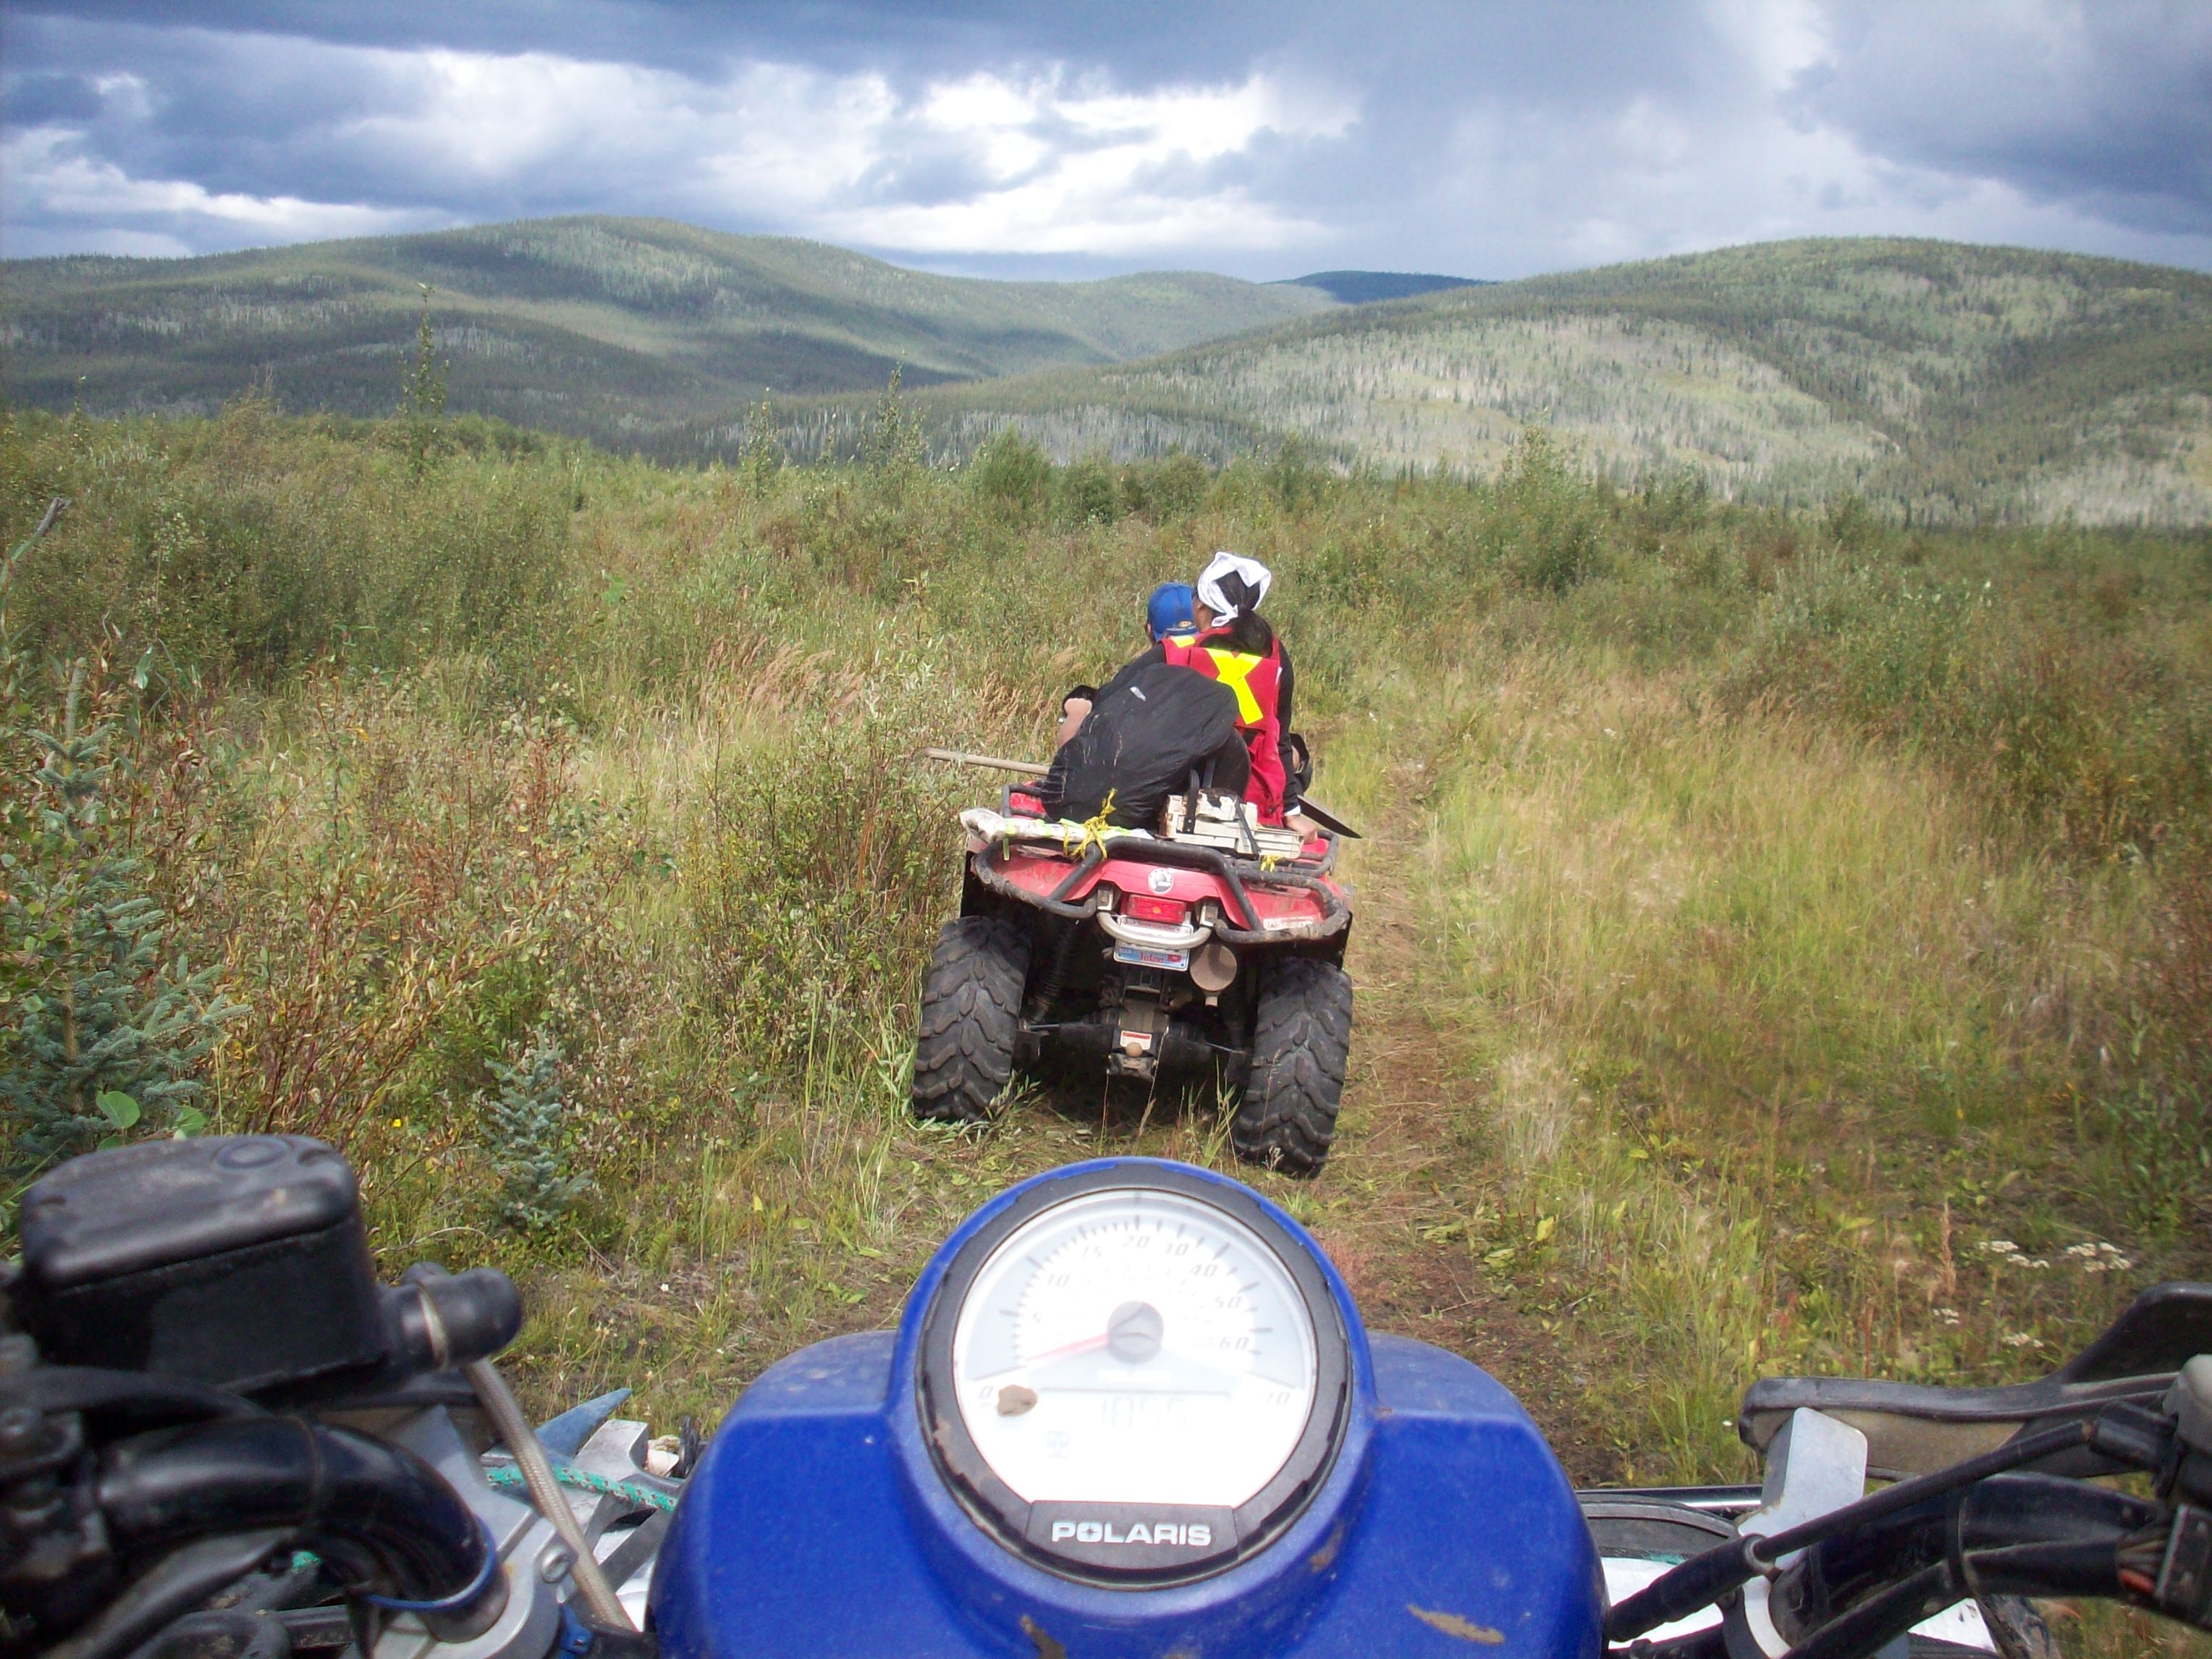
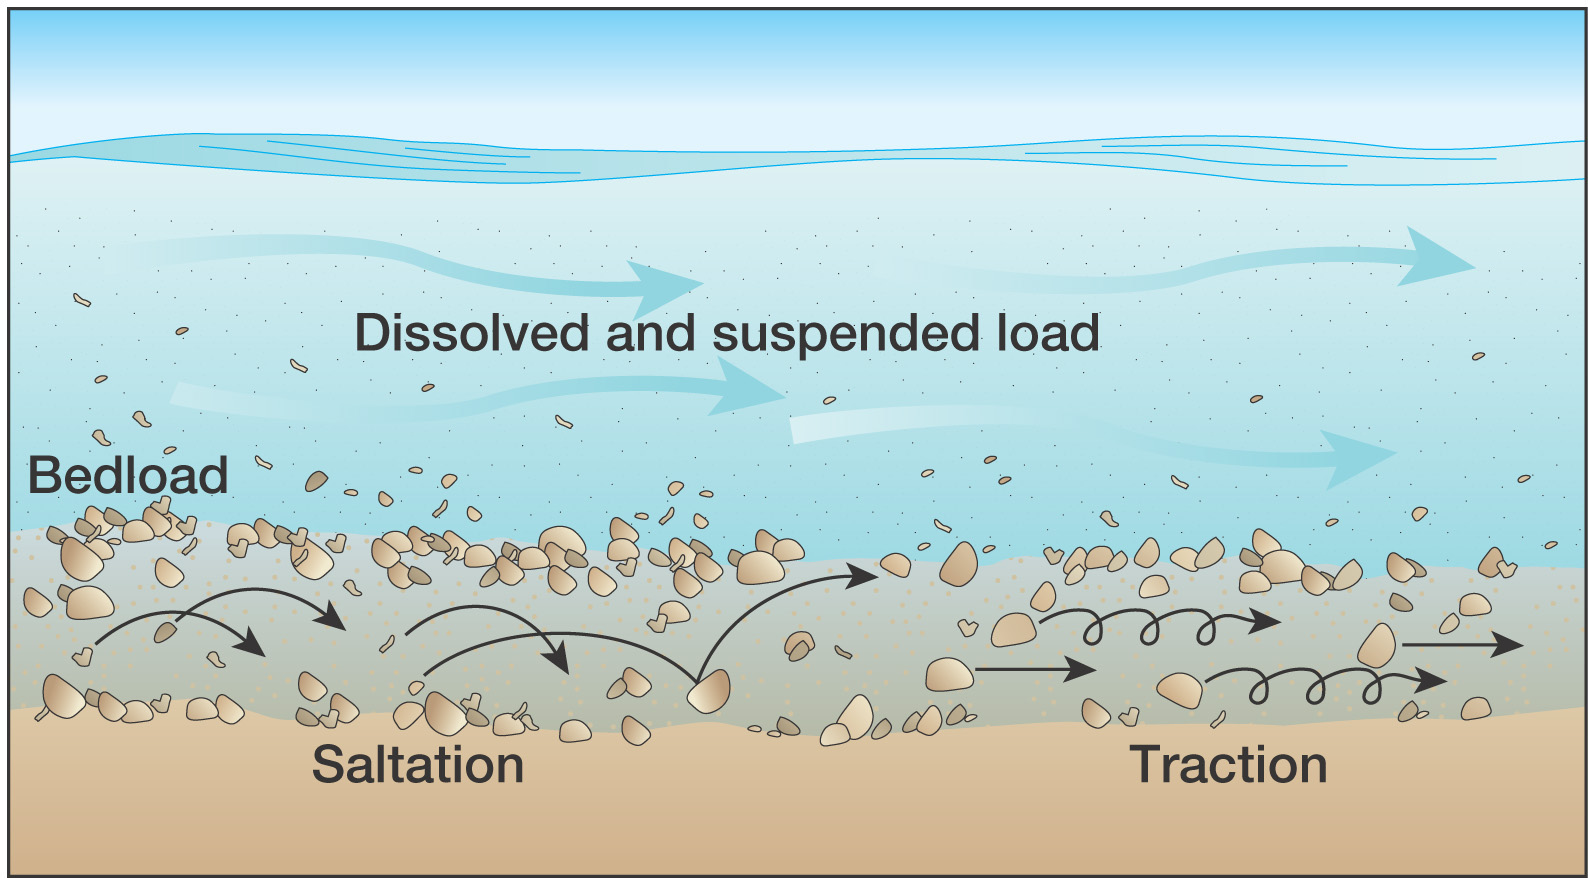
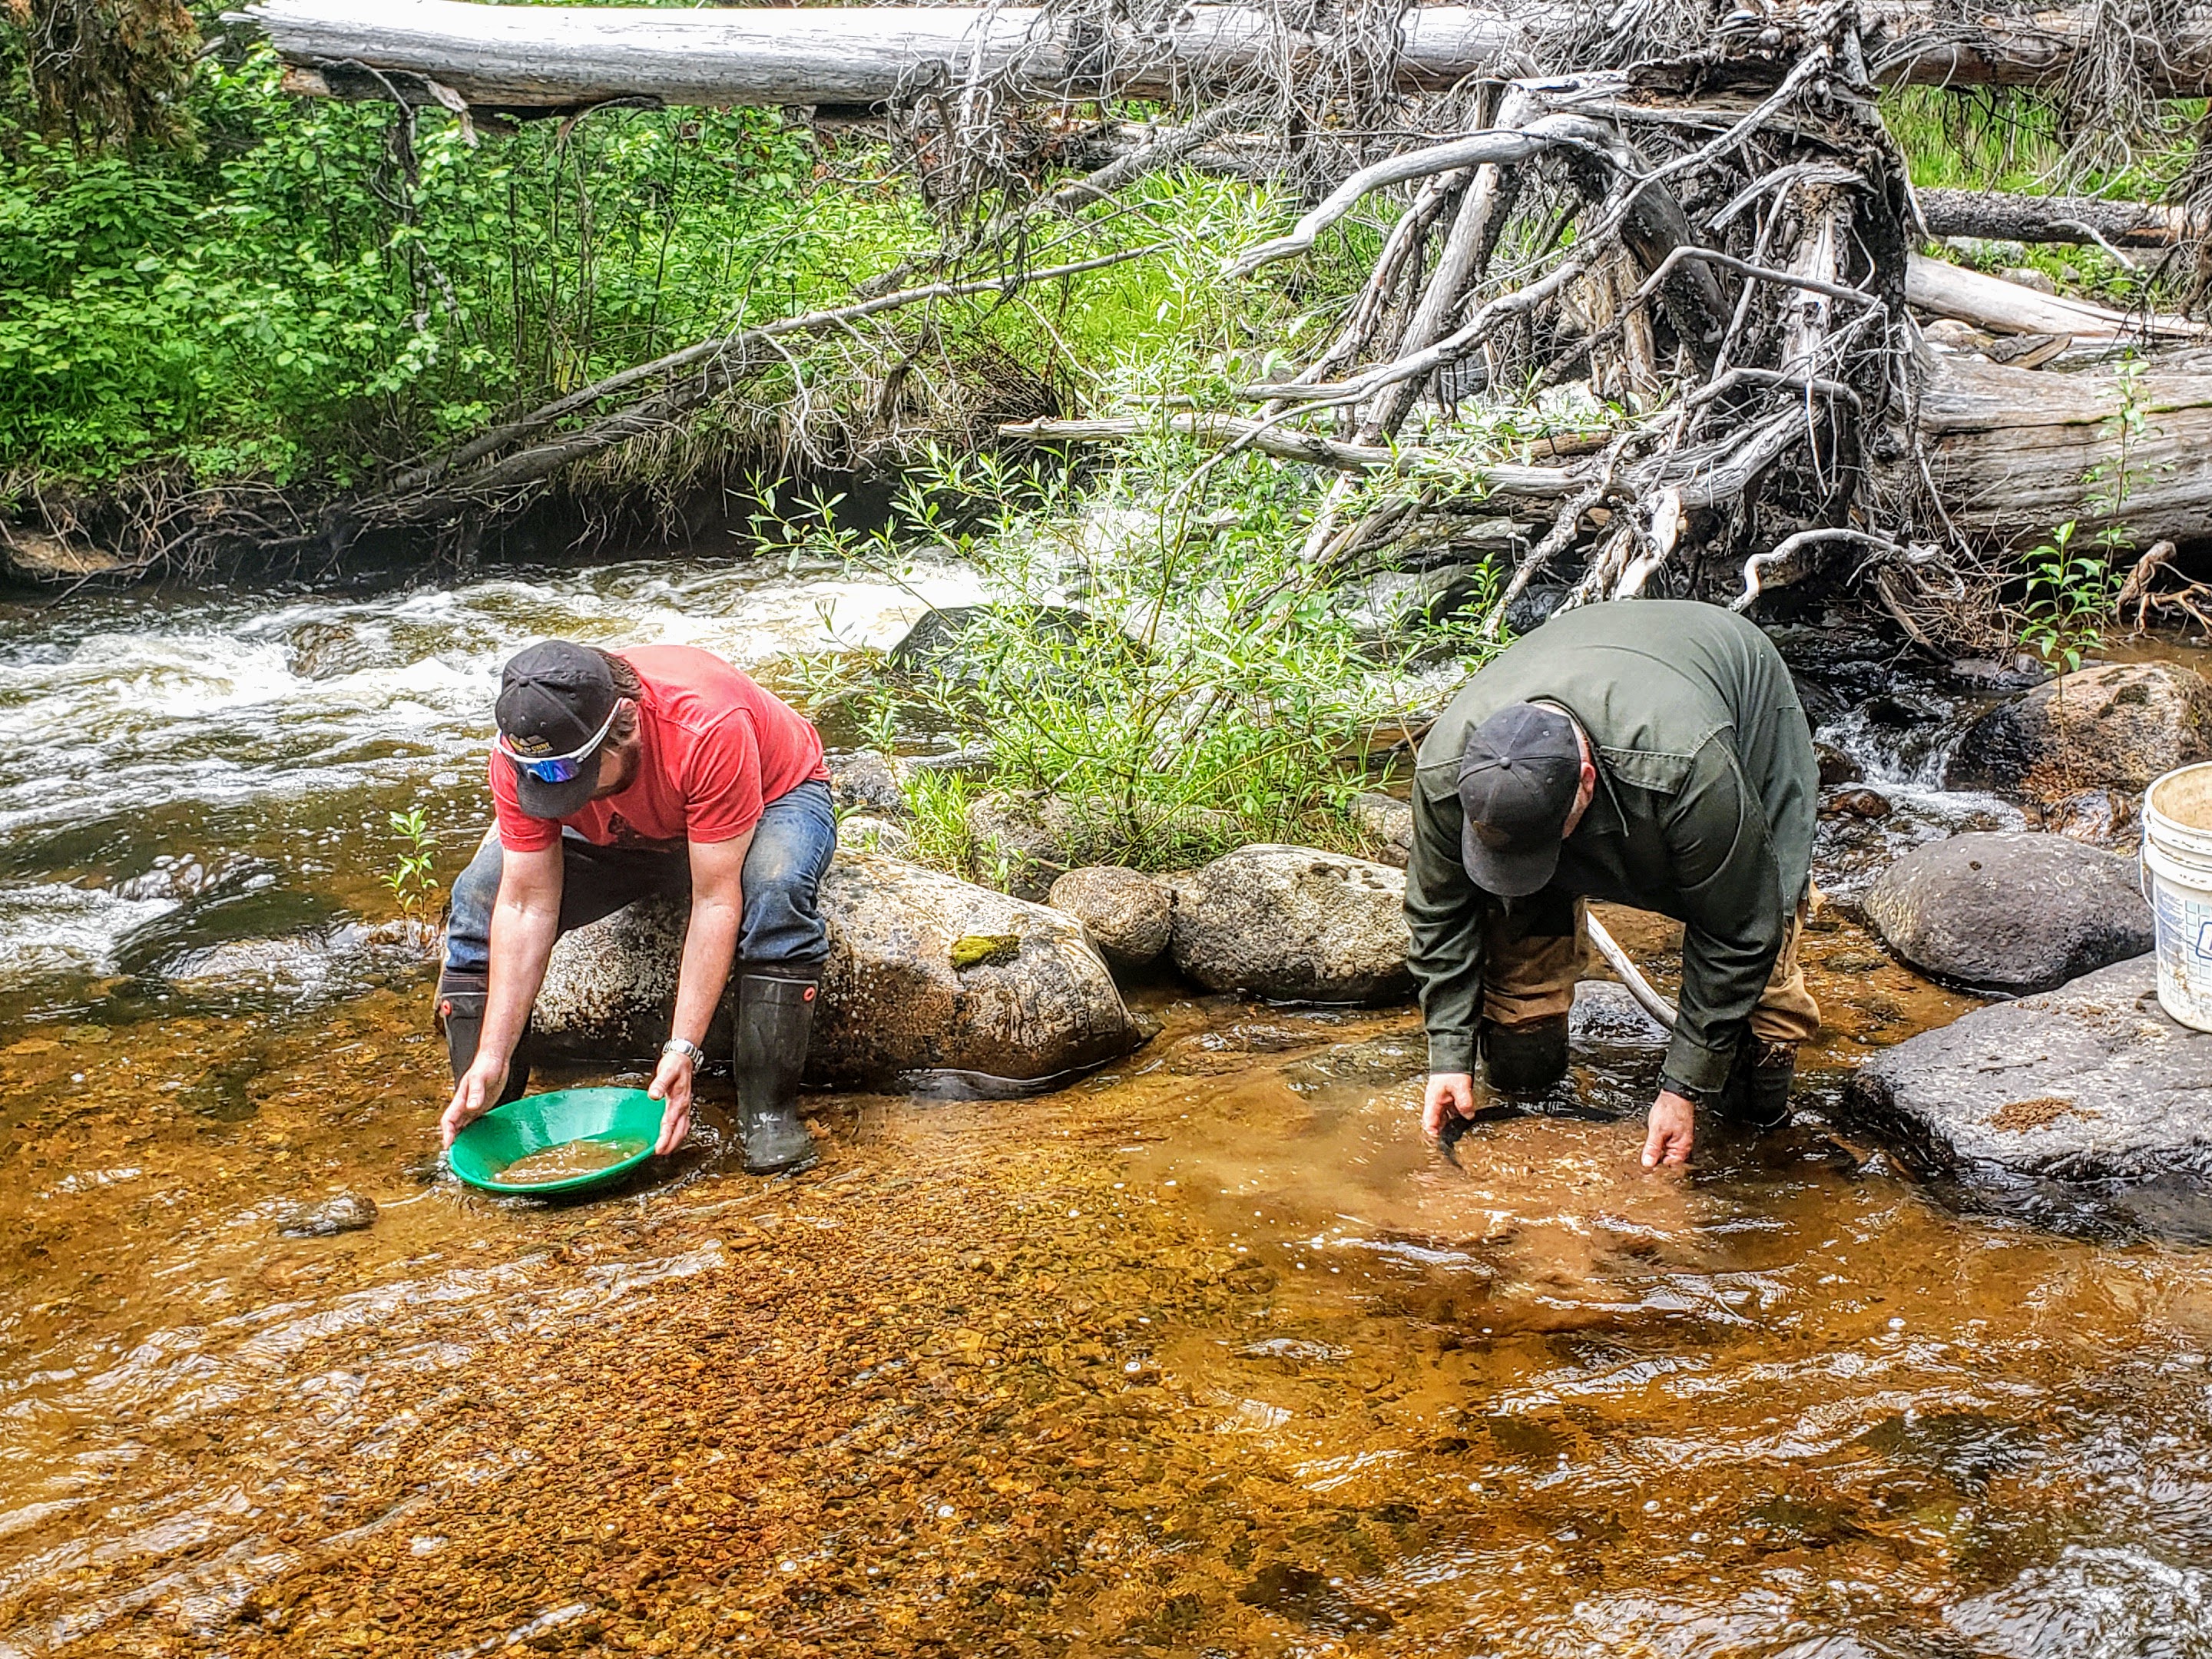
In placer exploration one of the most important things to understand is how to read a river. That means being able to understand which parts of a creek are likely to contain concentrations of gold. Placer gold is not distributed evenly, instead, it collects in certain parts of a stream while other parts have little to no gold.

The density difference between gold, water, and other minerals is a key component of placer prospecting. Since gold is very dense it takes a lot of energy to move it, when the water loses energy the gold will stay put. Basically, gold will accumulate in sections of the creek where the water velocity slows down. For example on the inside bends where a point bar is forming, on the downstream side of obstructions in the creek, or on riffles or old channels.

You’ll need to recognize the different types of placer deposits. Not all placer gold is found in streams.

  • Flood Gold is found in the upper gravels of a creek or river that actively move during floods. This gold tends to be small in size and can change from year to year. Flood gold can be found right on the surface of gravel bars in many cases.
  • Streambed Placer deposits are located within a stream or river channel but in stationary gravels that don’t move with seasonal floods. Streambed deposits tend to have larger gold but require more work to produce. When prospecting these deposits get as close to bedrock as you can as gold will sink to the bottom over time.
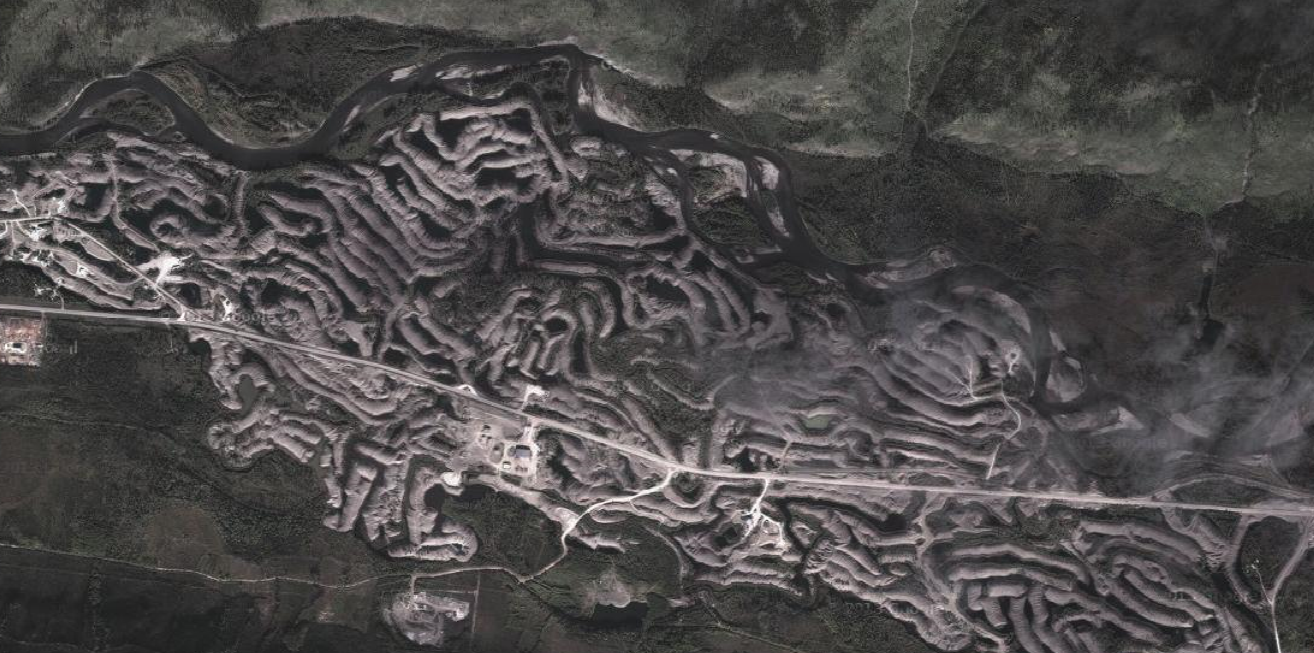
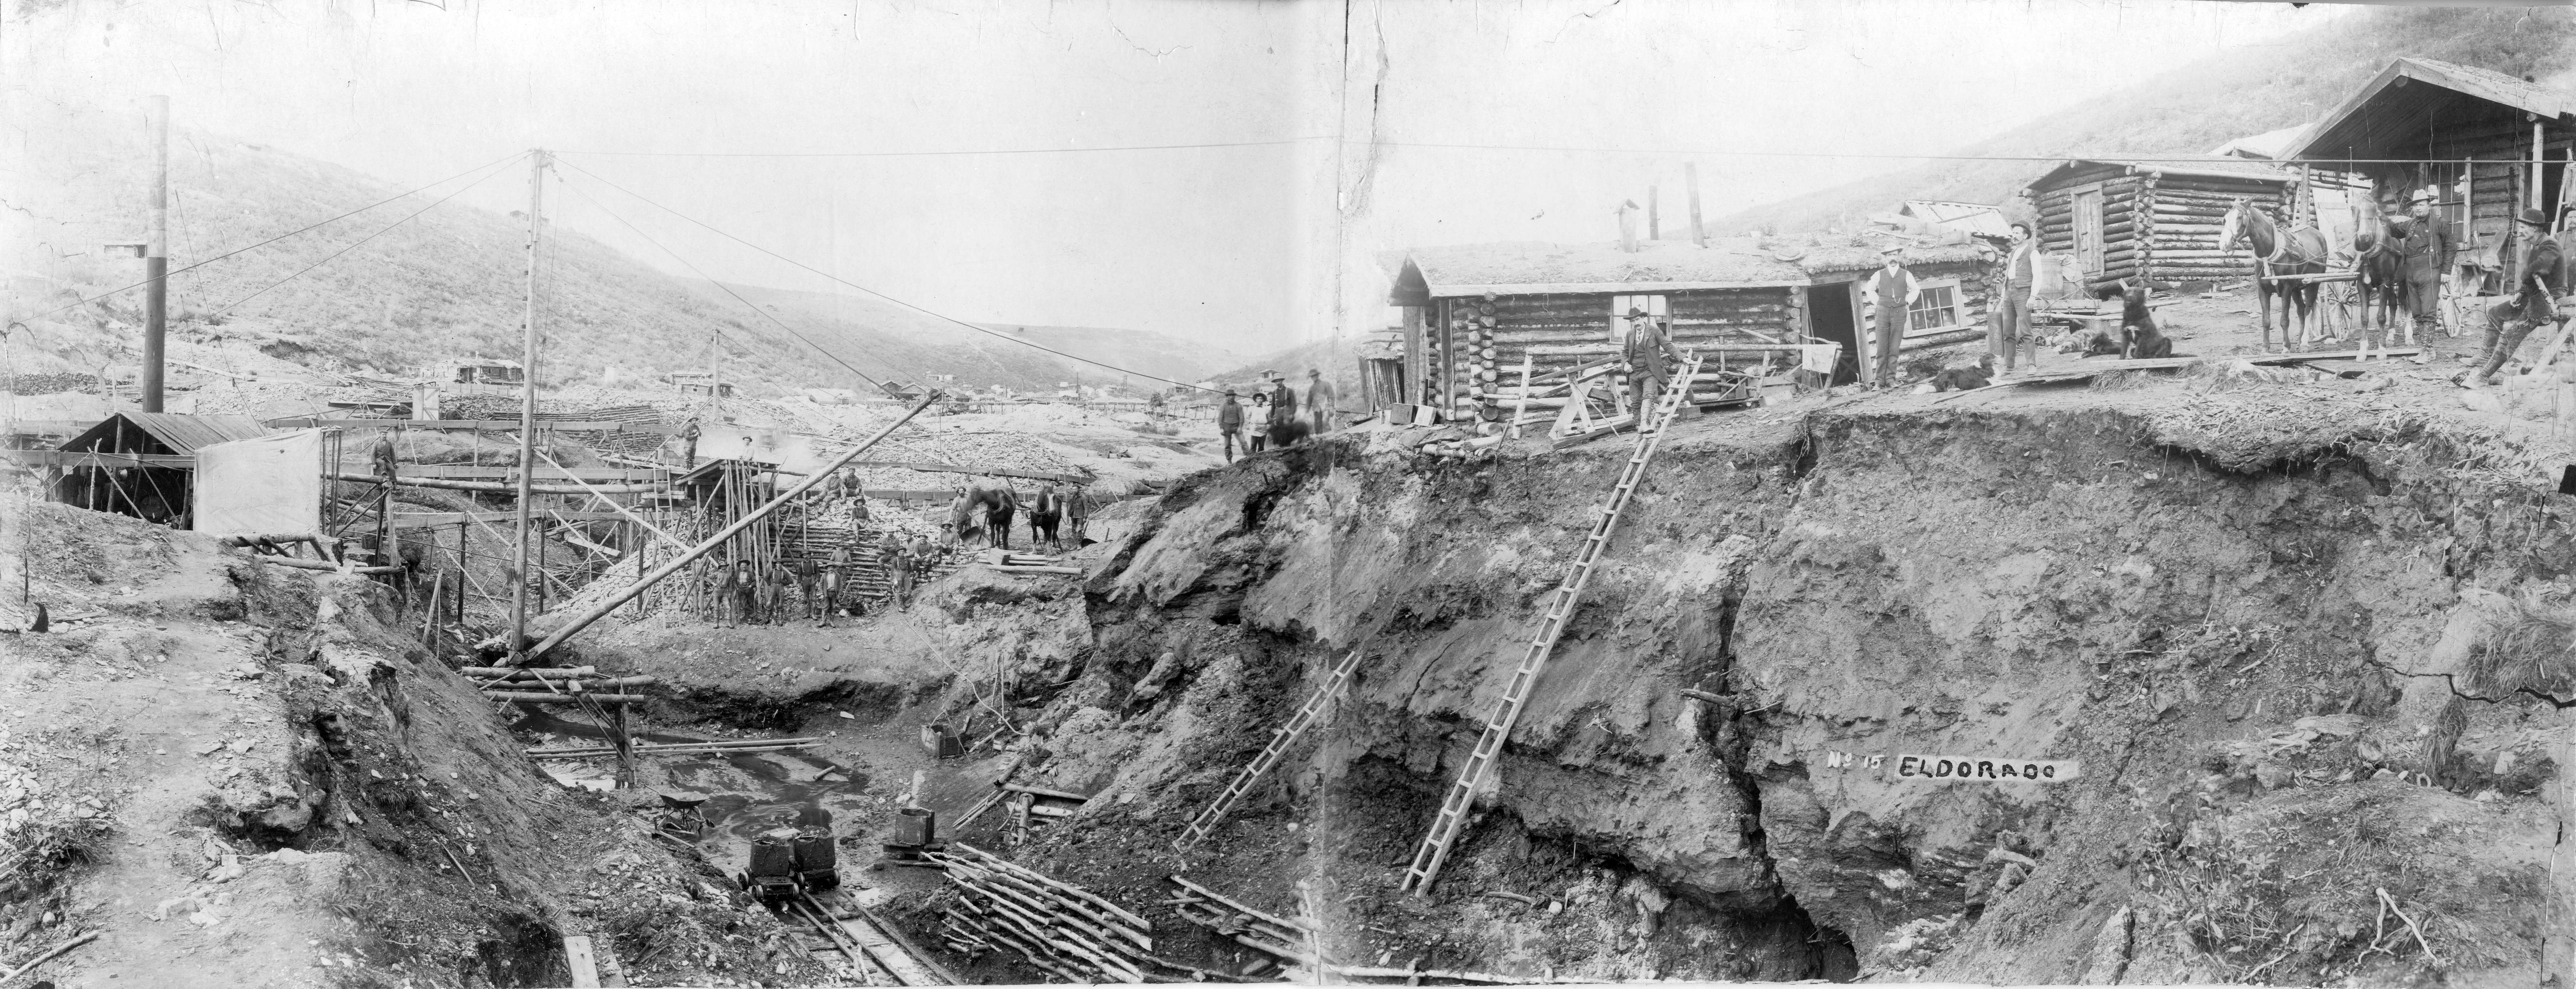
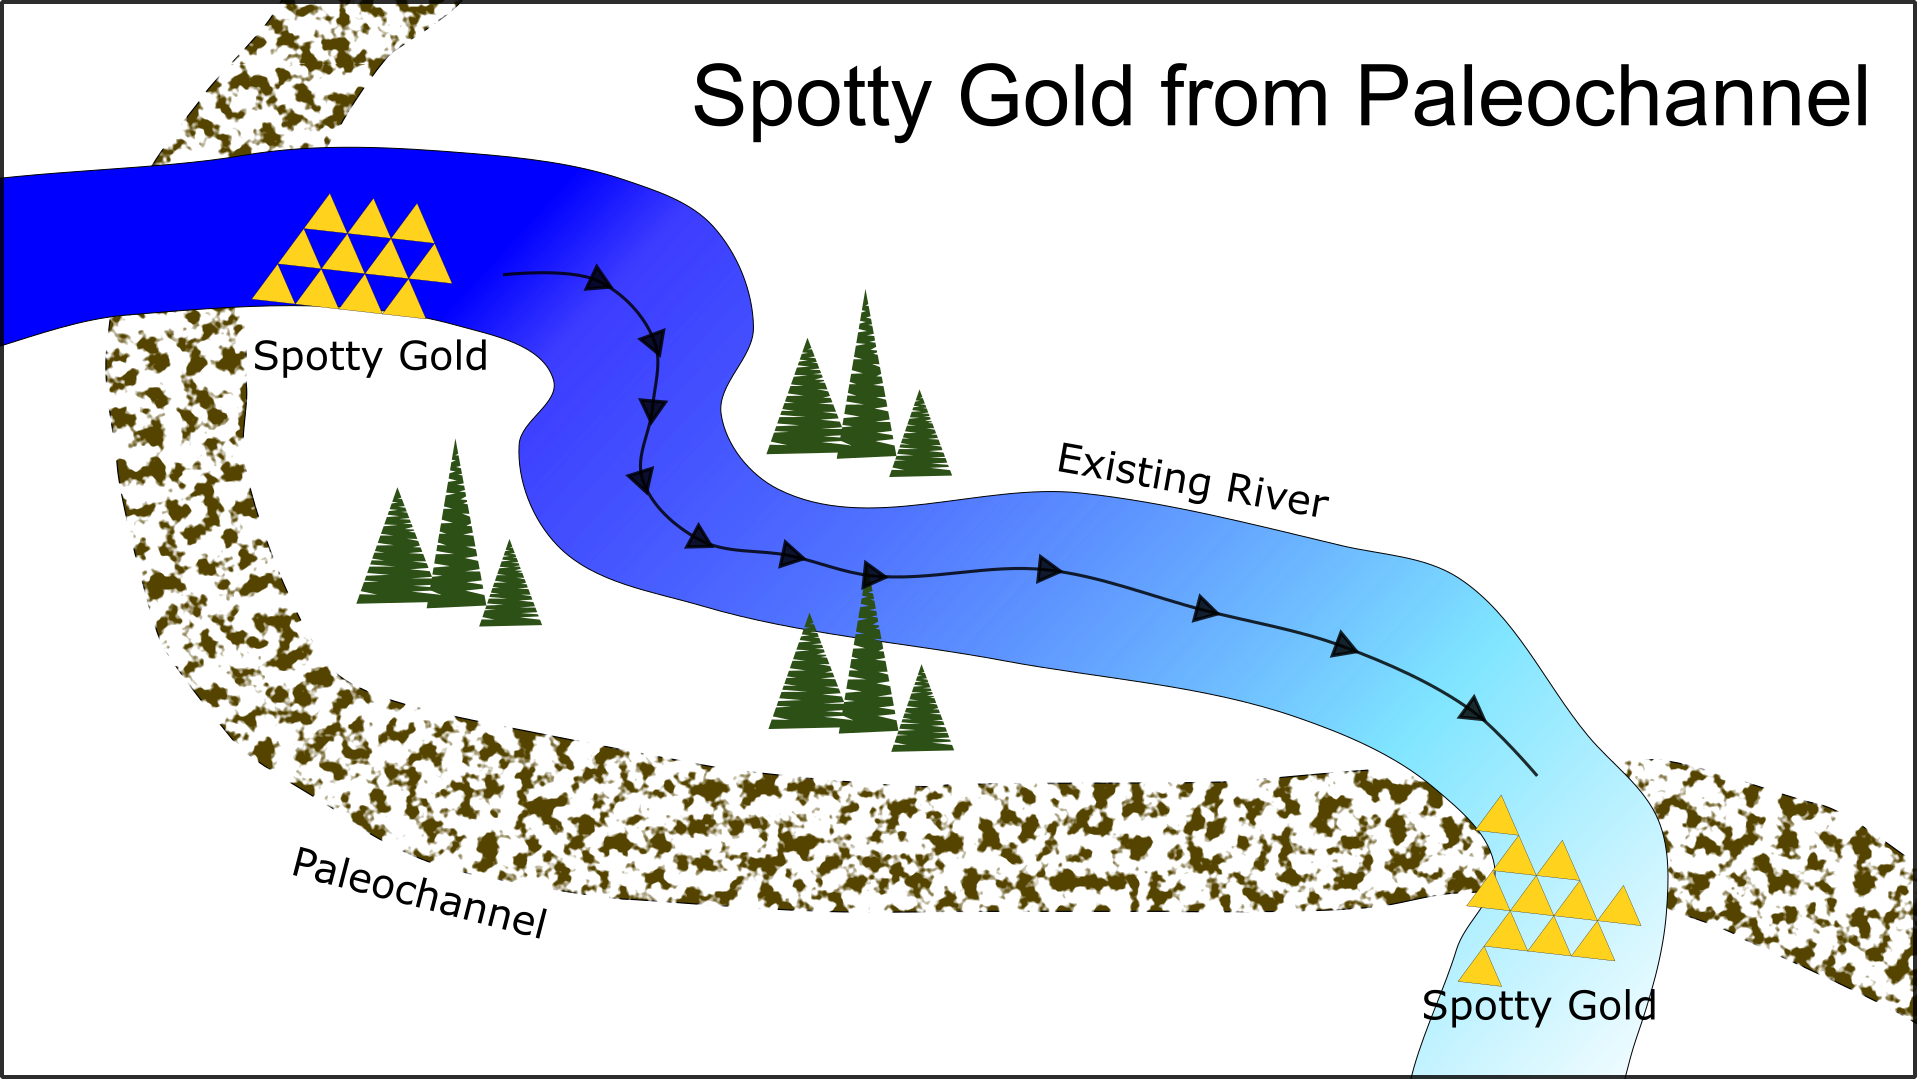
  • Bench Placers and Ancient Channels are remnants of old rivers that have changed course. They are basically streambed placers but the river is no longer running with water. Benches can be high above the current river and ancient channels can be in a totally different course than the river today. These are difficult to prospect but locating one of these deposits could bring you lots and lots of gold. More info on that here: Paleochannel Hunting Guide
  • Residual and Eluvial Placers are placer deposits that form near a hard rock source. They are formed by erosion as gold-bearing rock breaks free from its source. Gold can accumulate in the hillside in pockets. These deposits can be very rich but tend to be small in size. Pocket hunting can be lucrative for a small miner though.
  • Beach Placers form by concentrating placer gold due to the wave action of a beach instead of the flow of a river. A famous example of this is the deposit in Nome, Alaska which is featured in the TV reality show “Bering Sea Gold”.

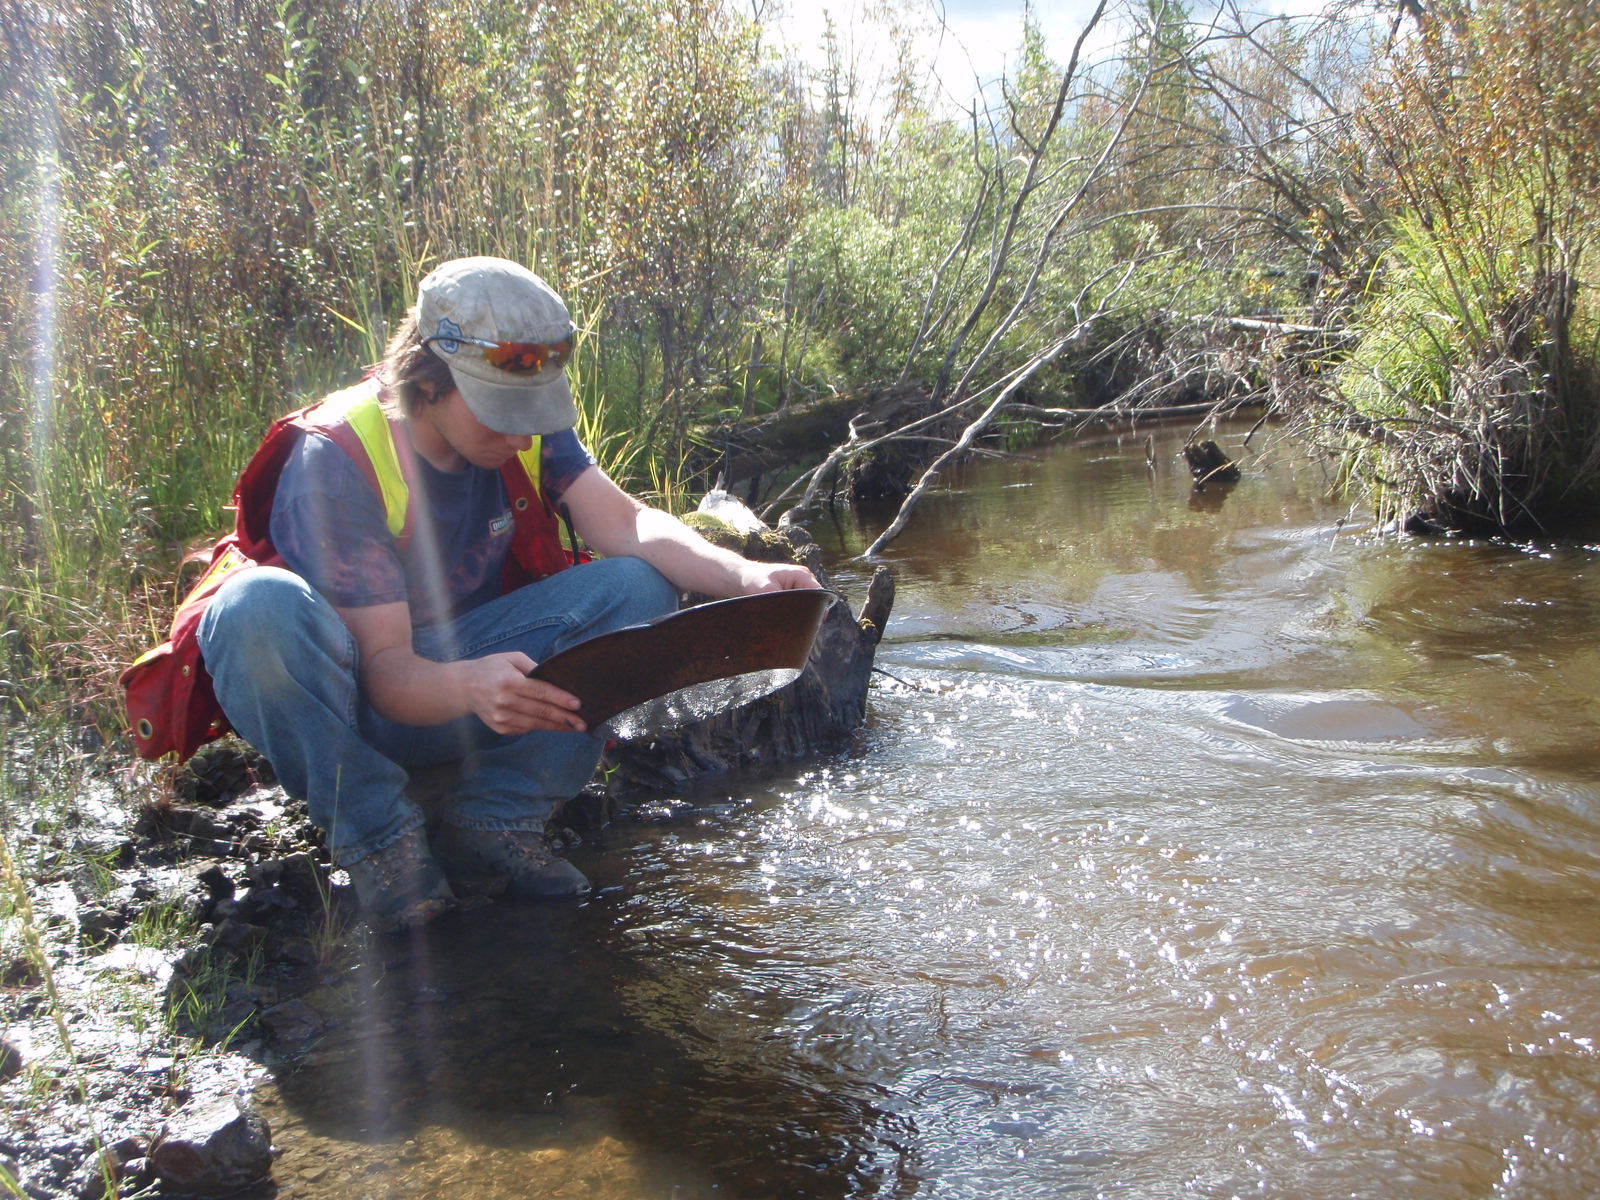
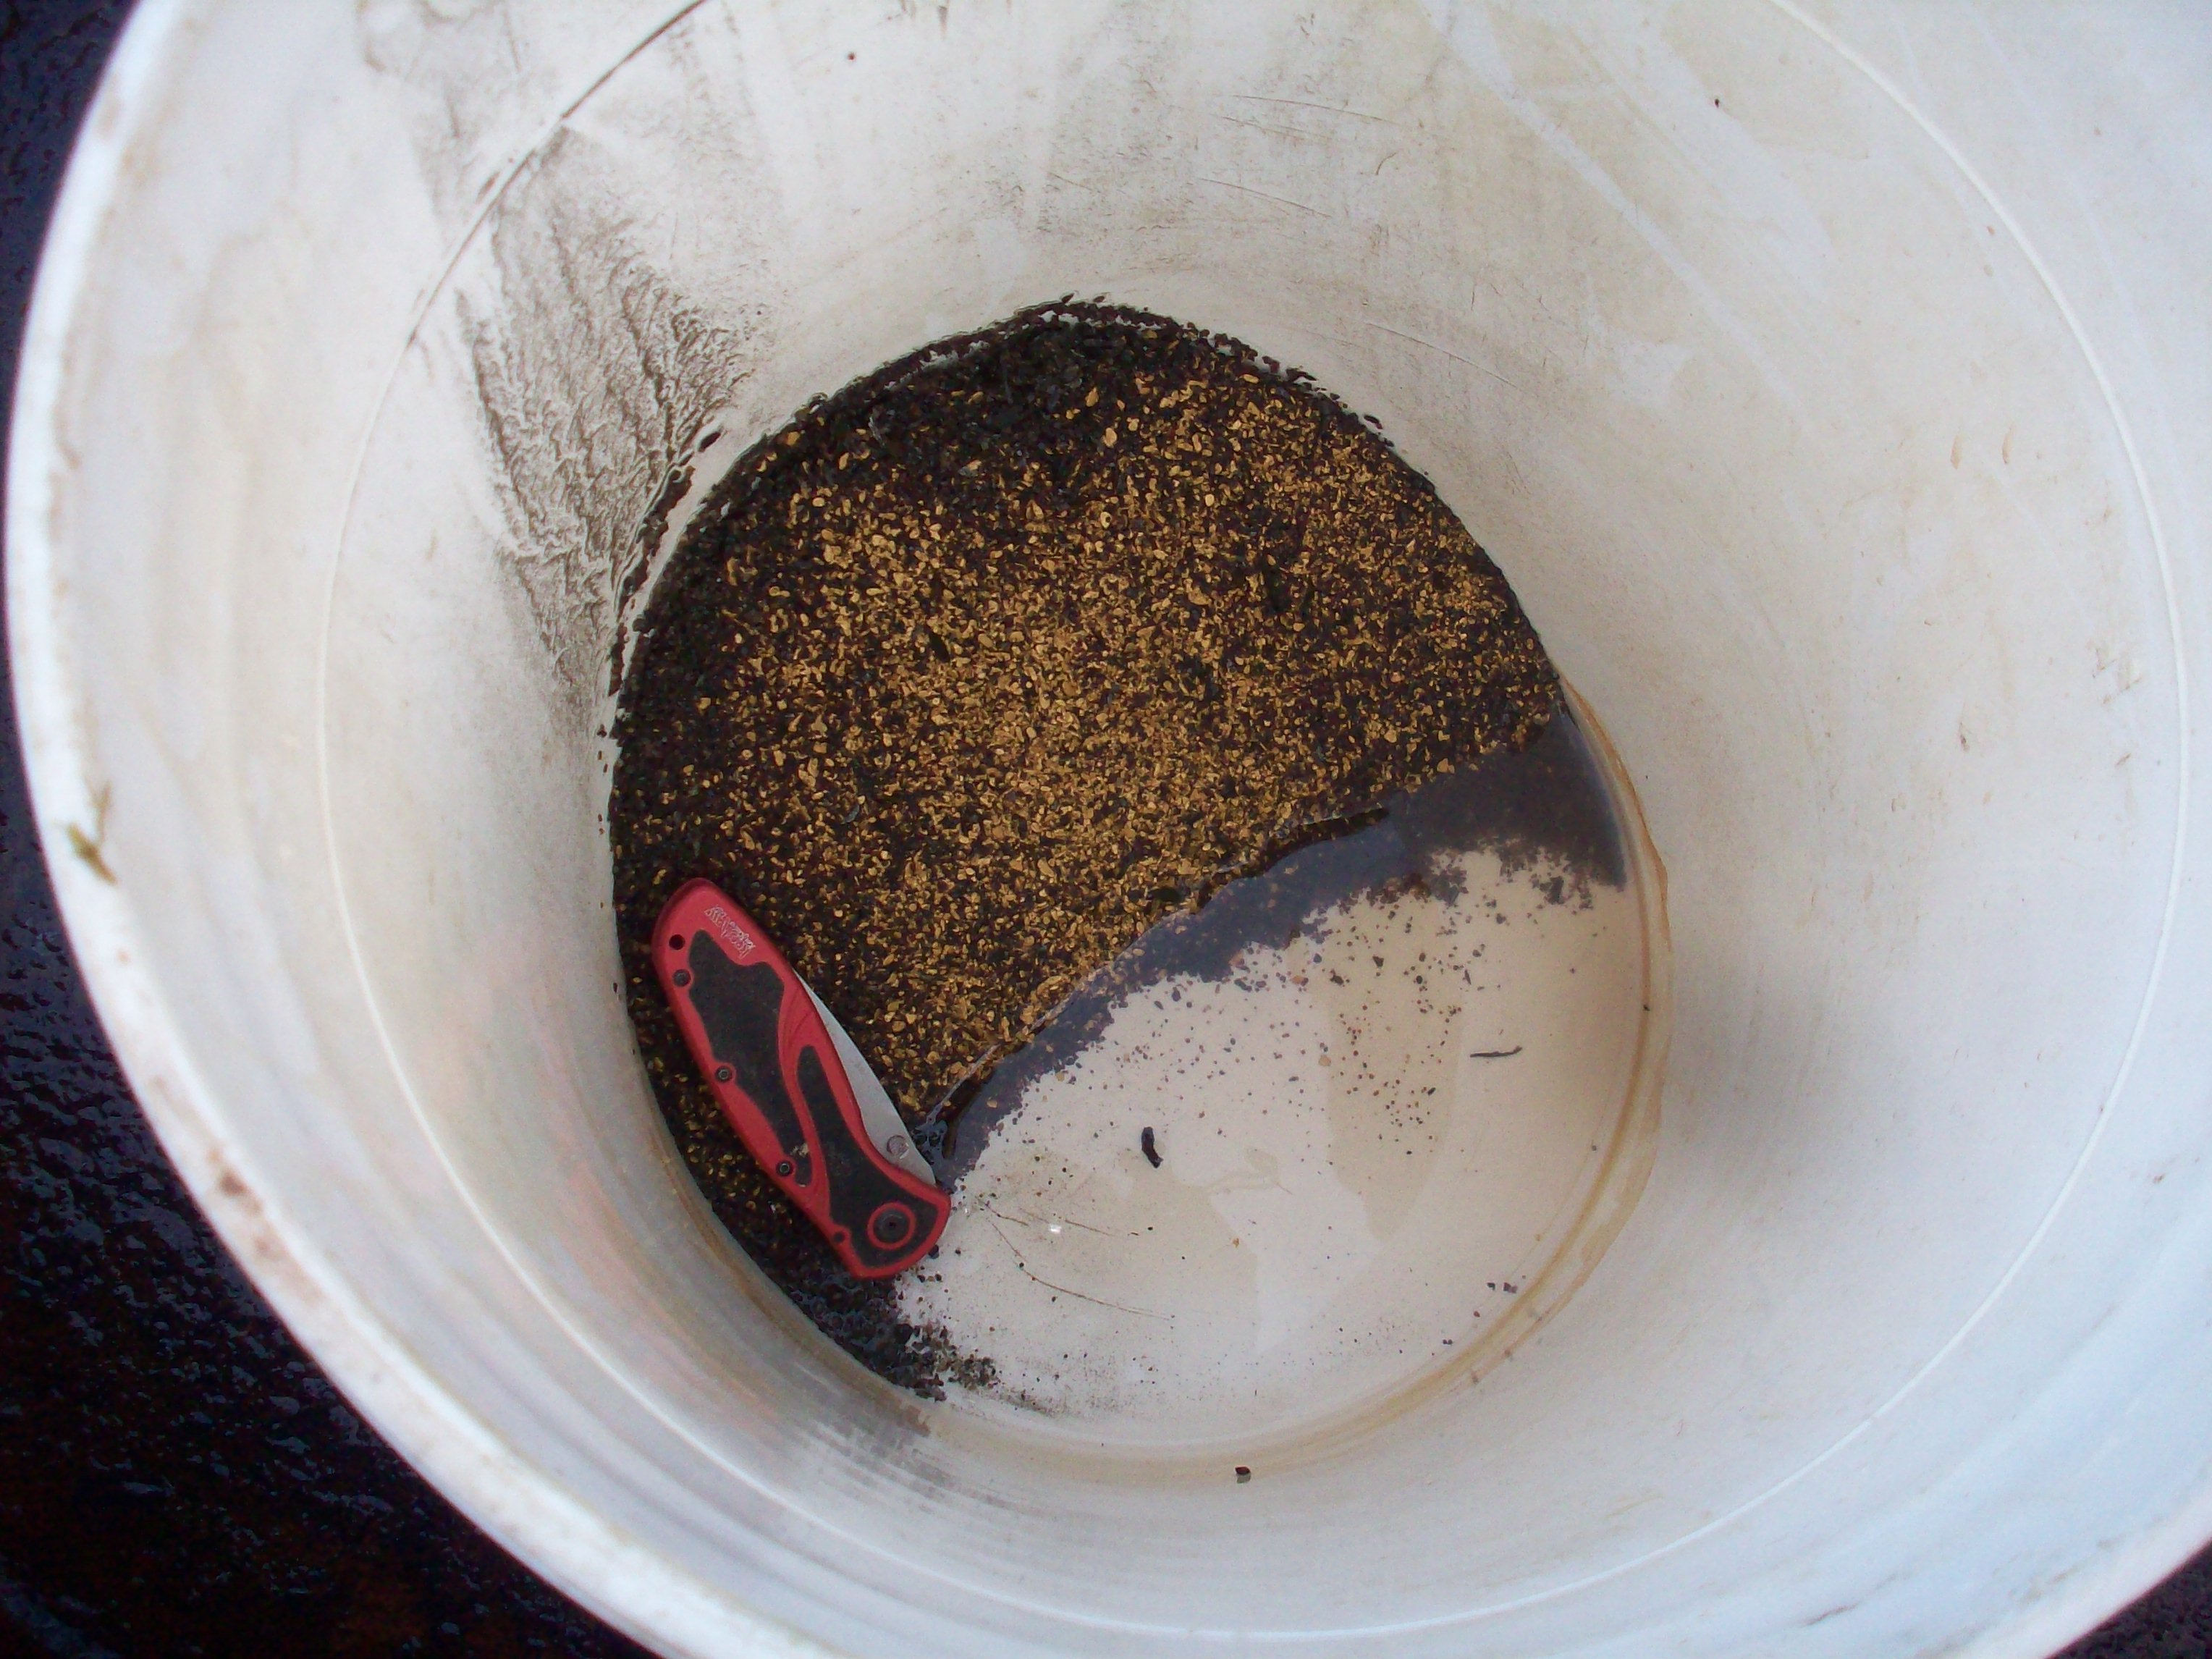
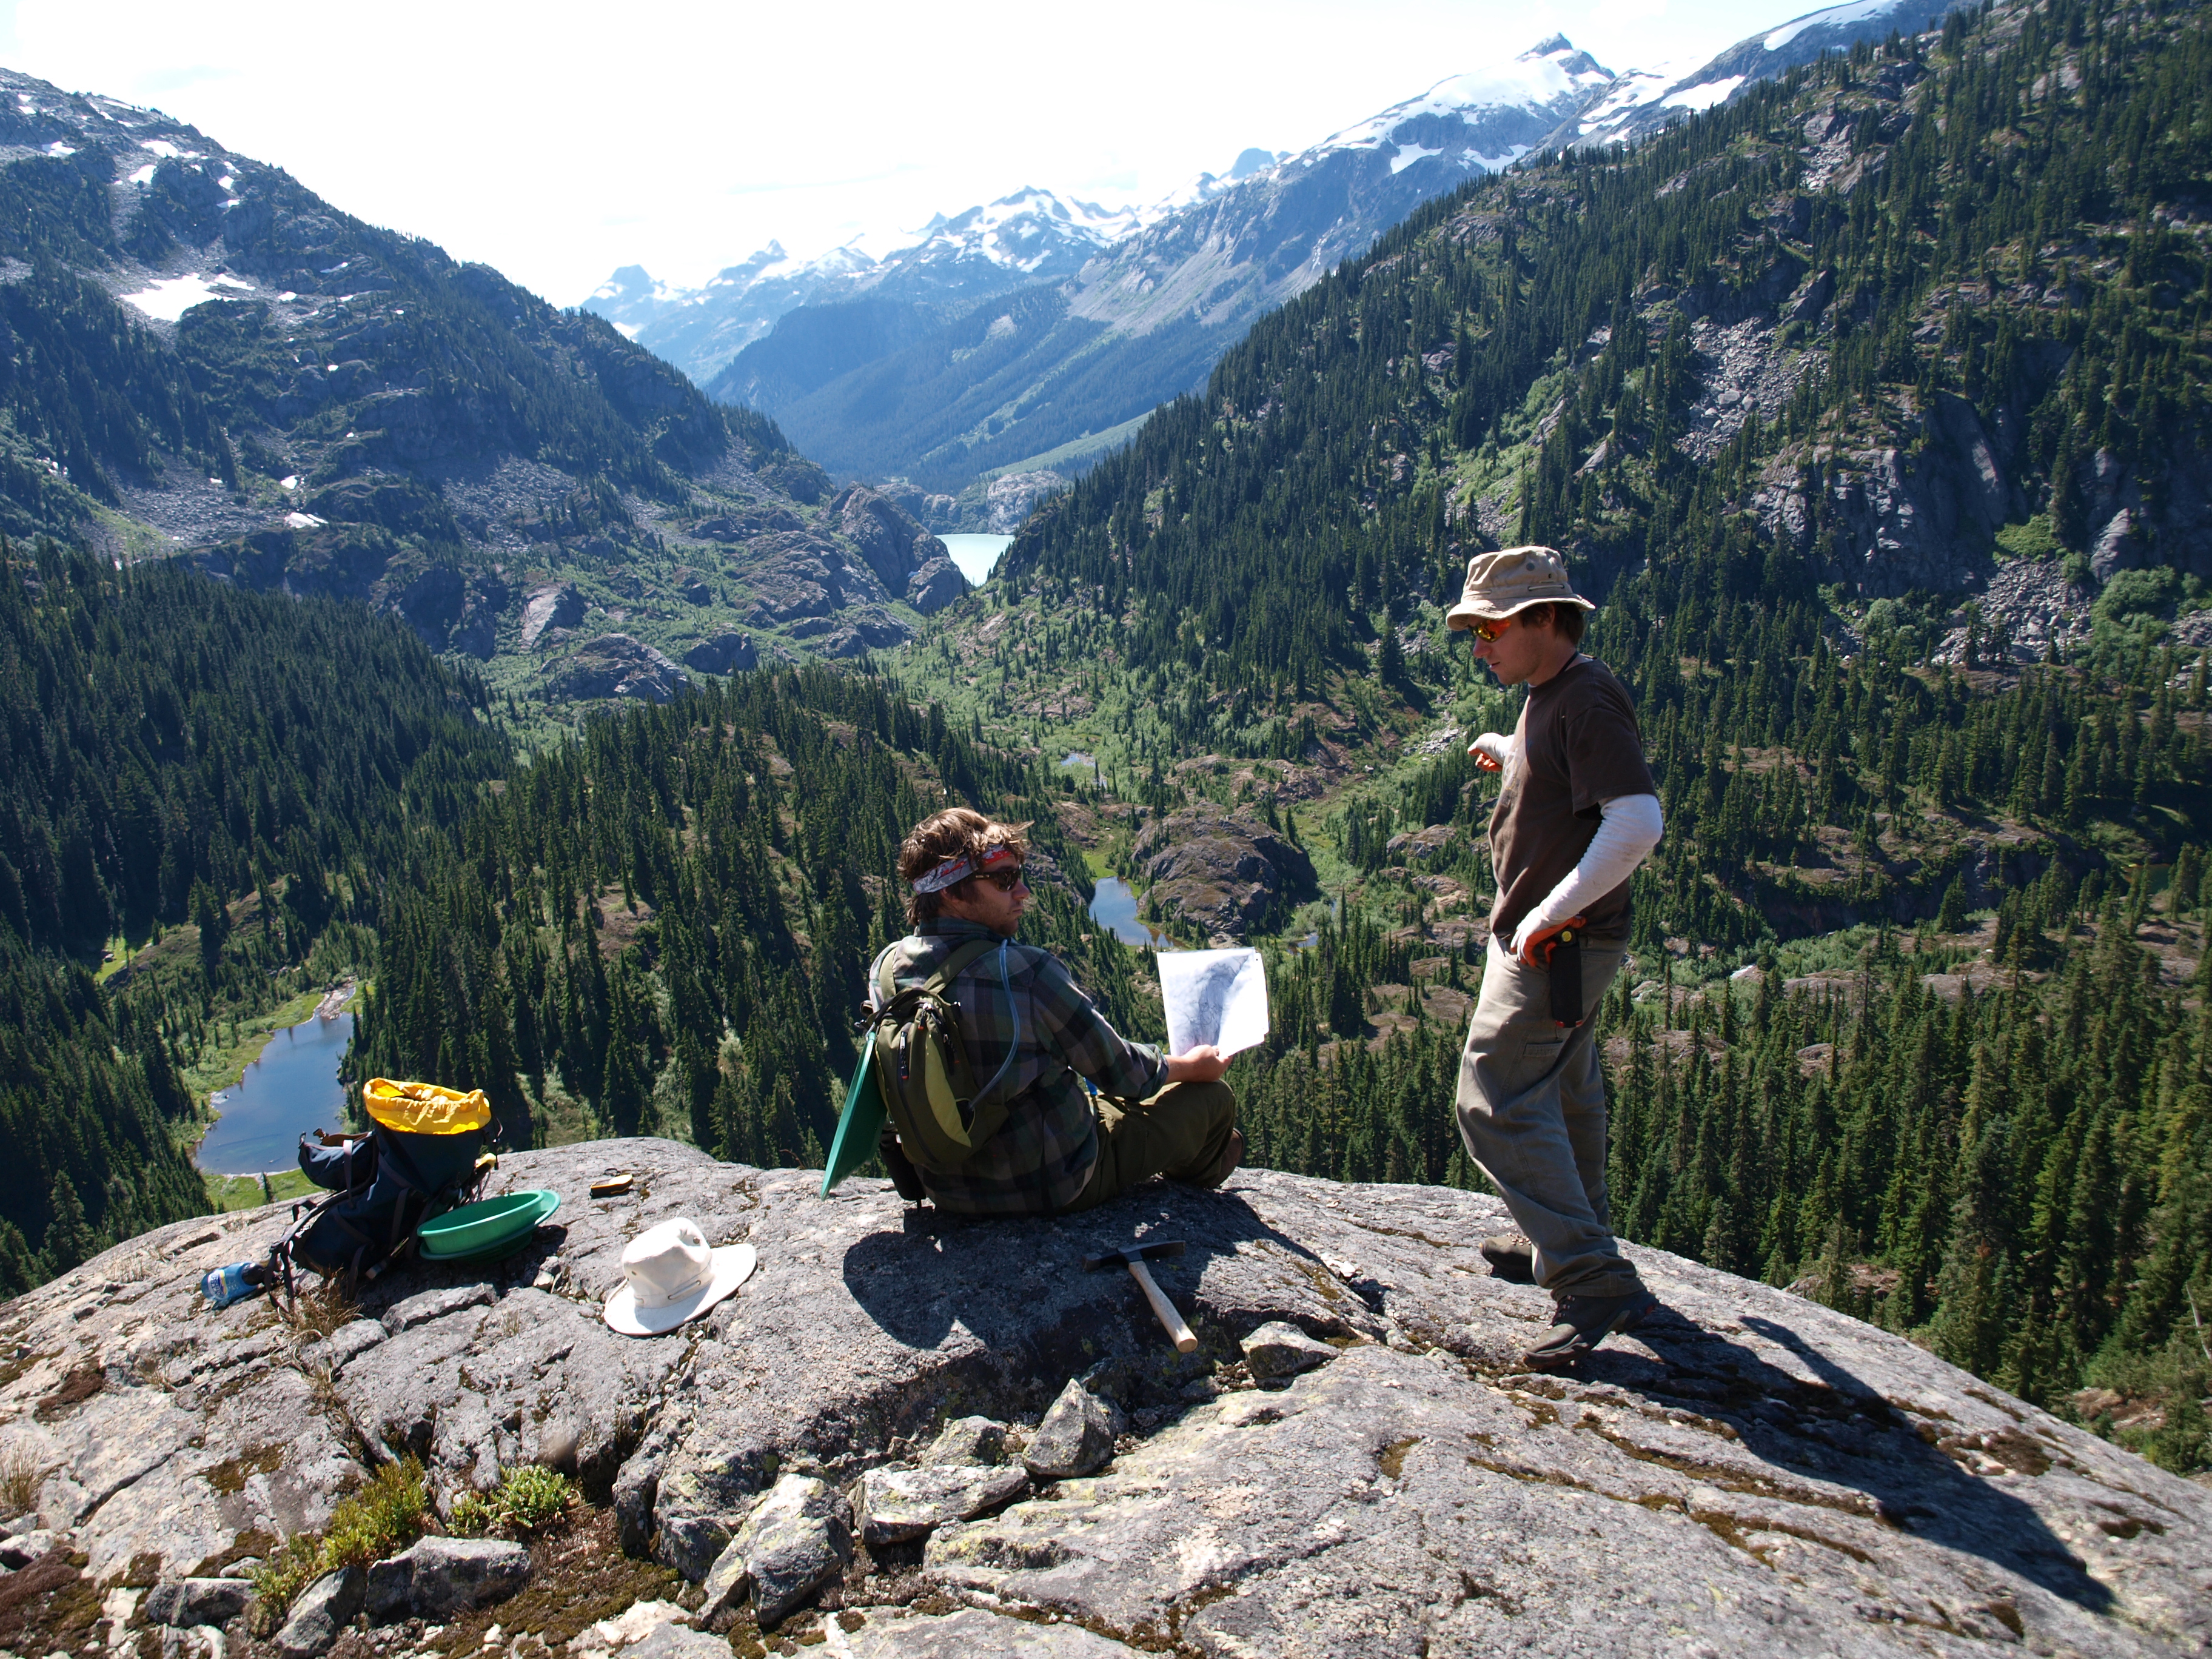
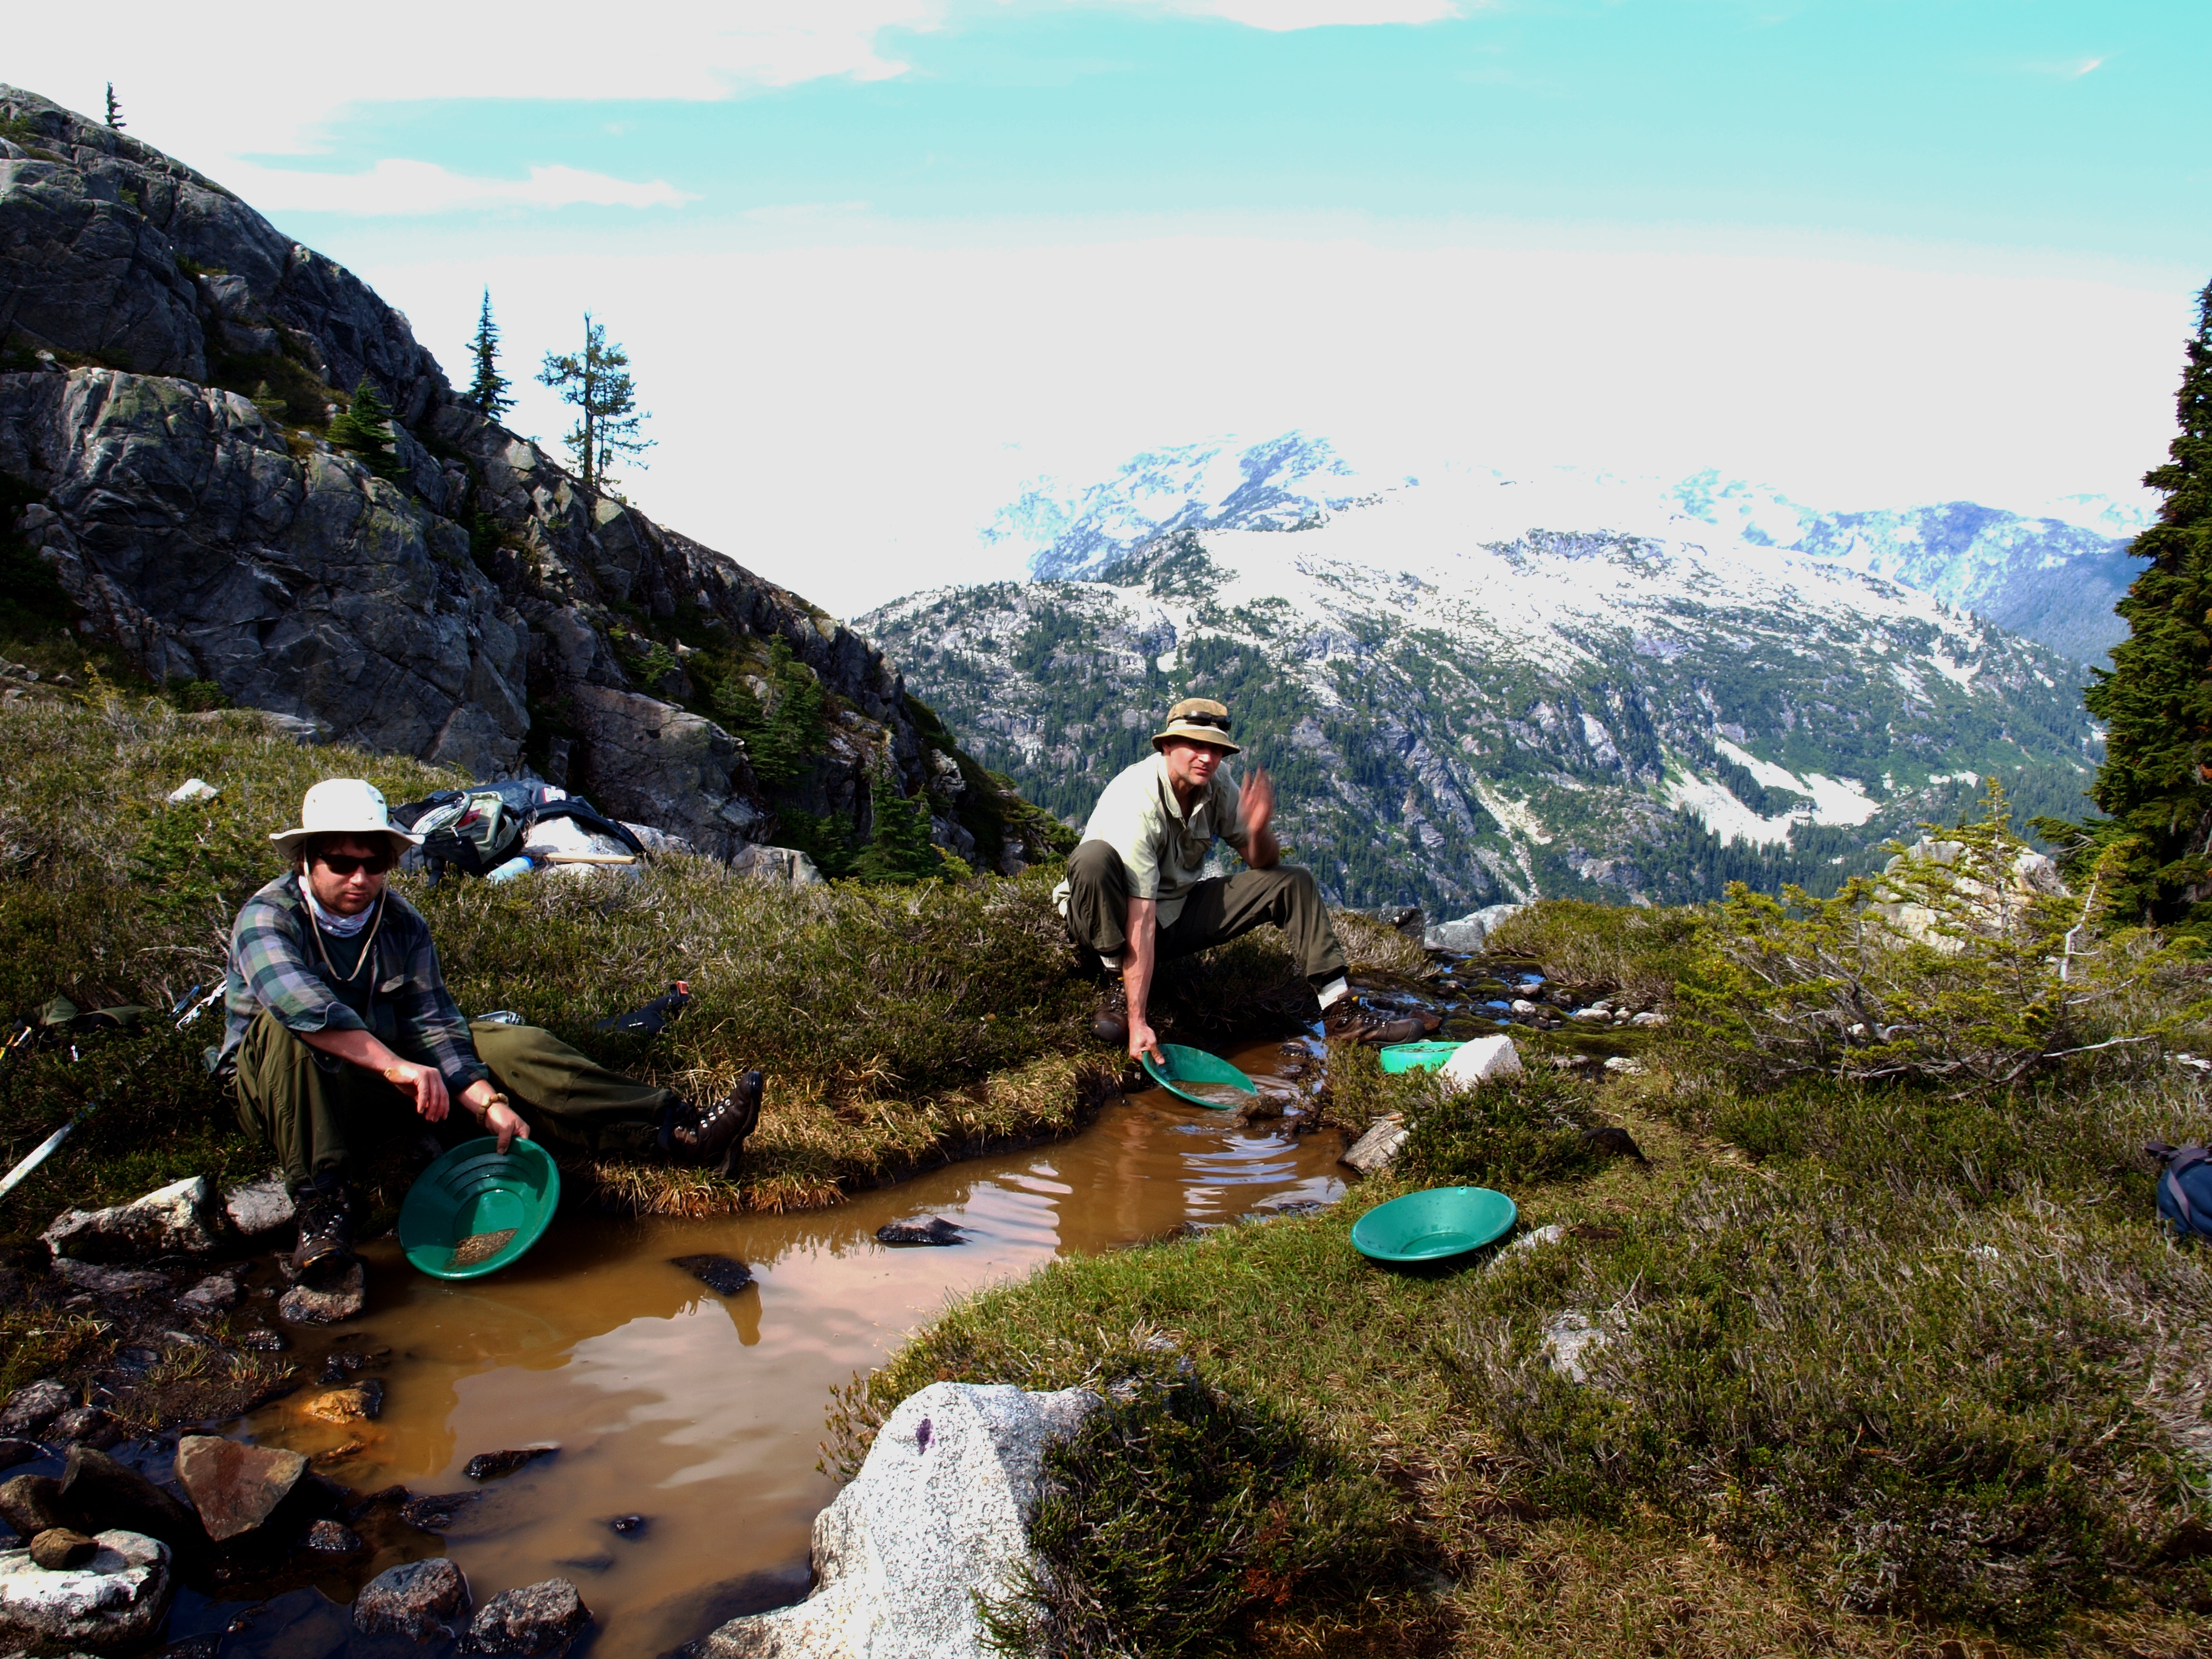
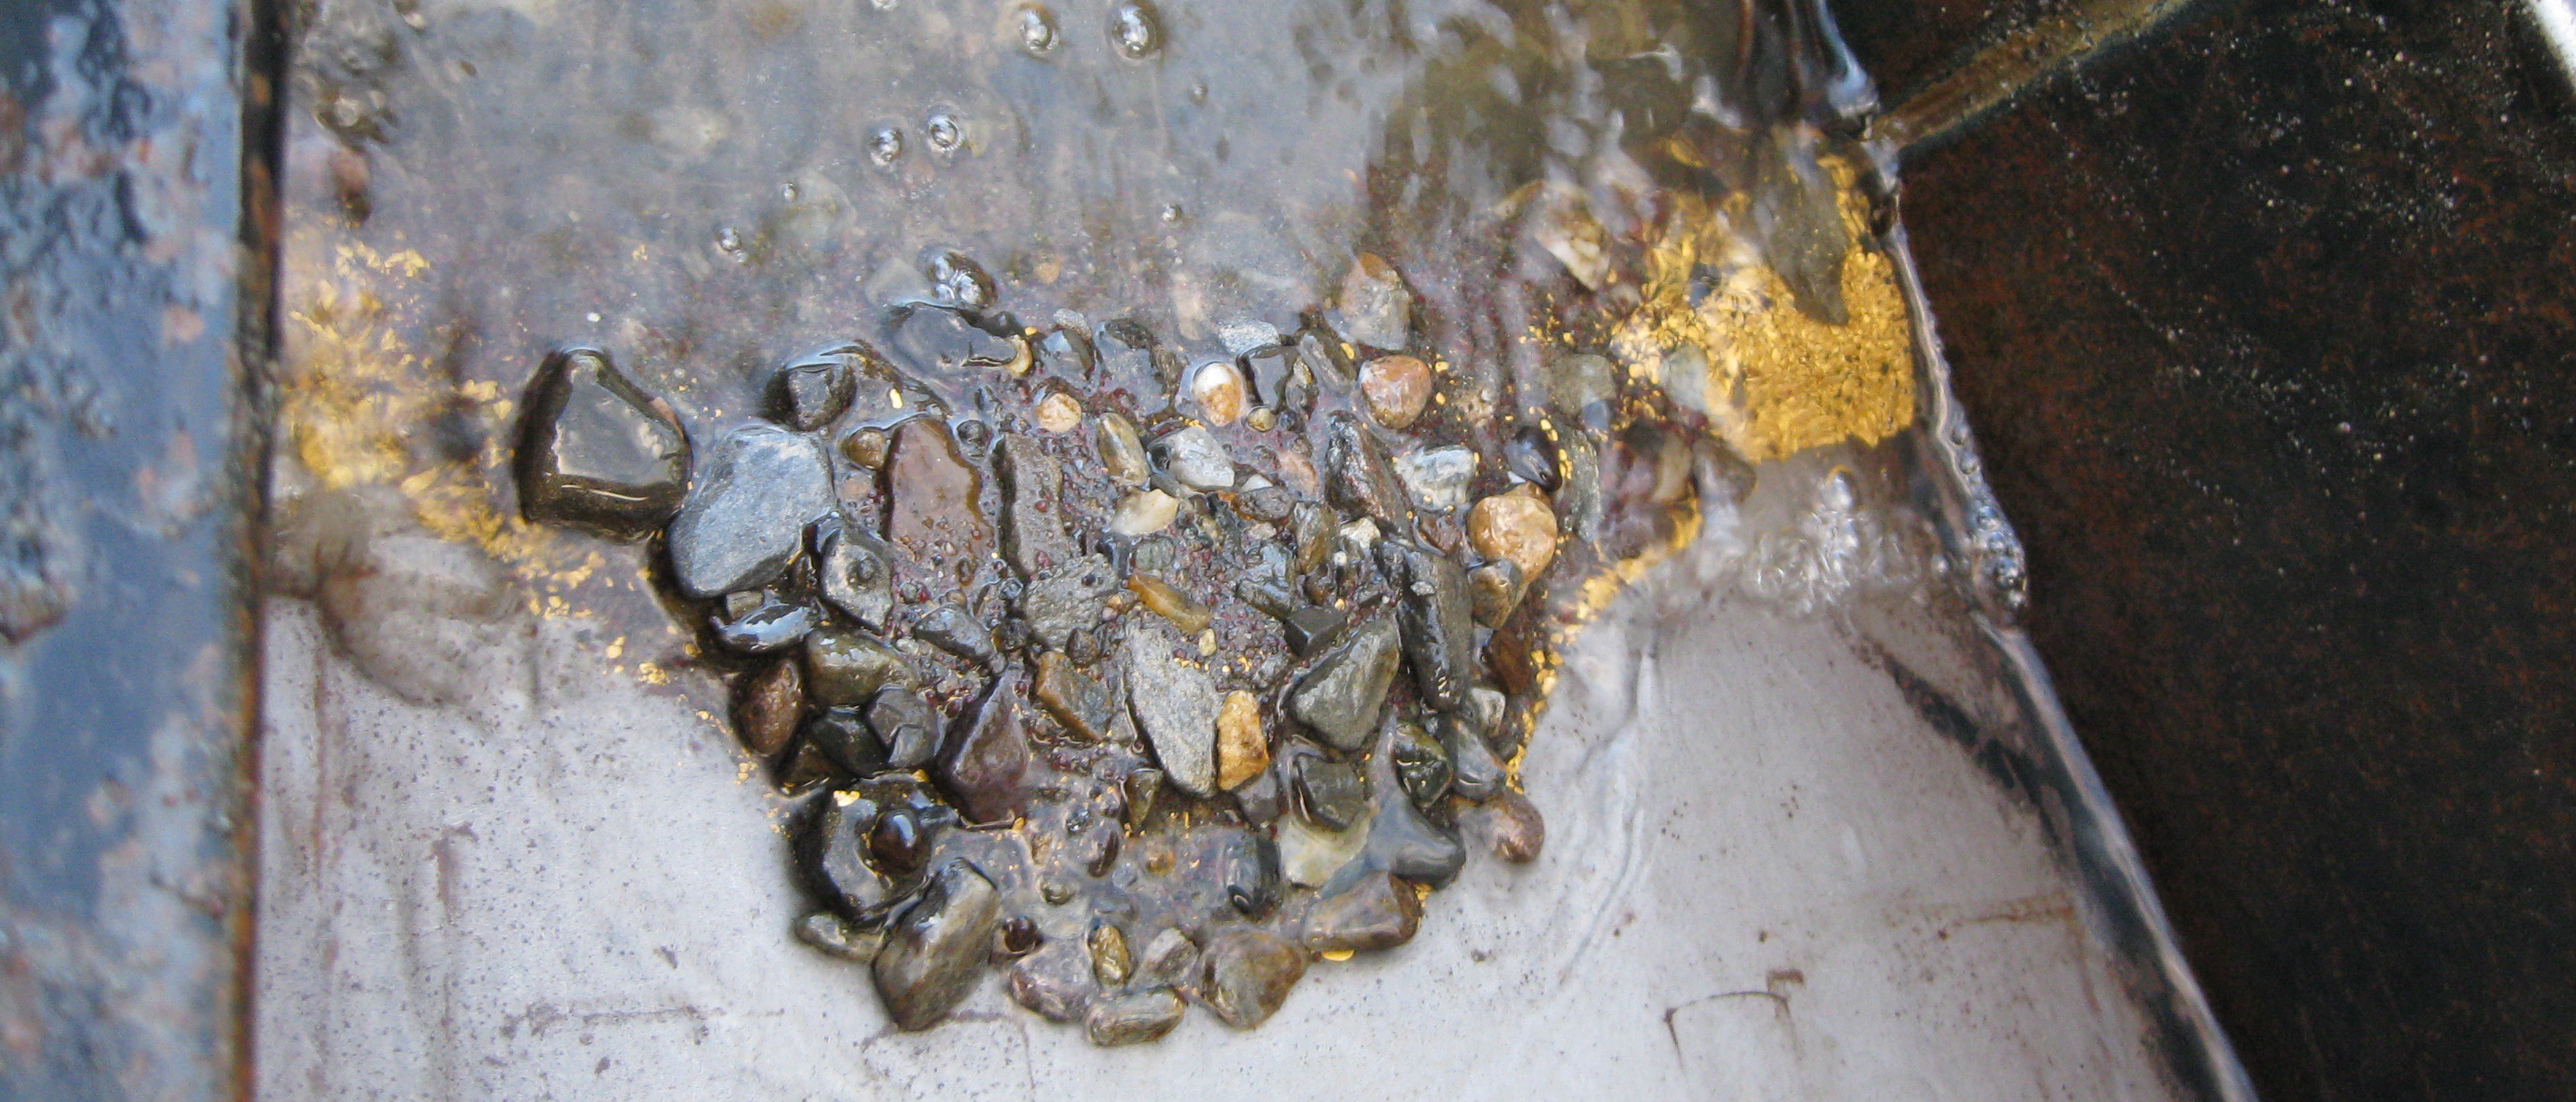
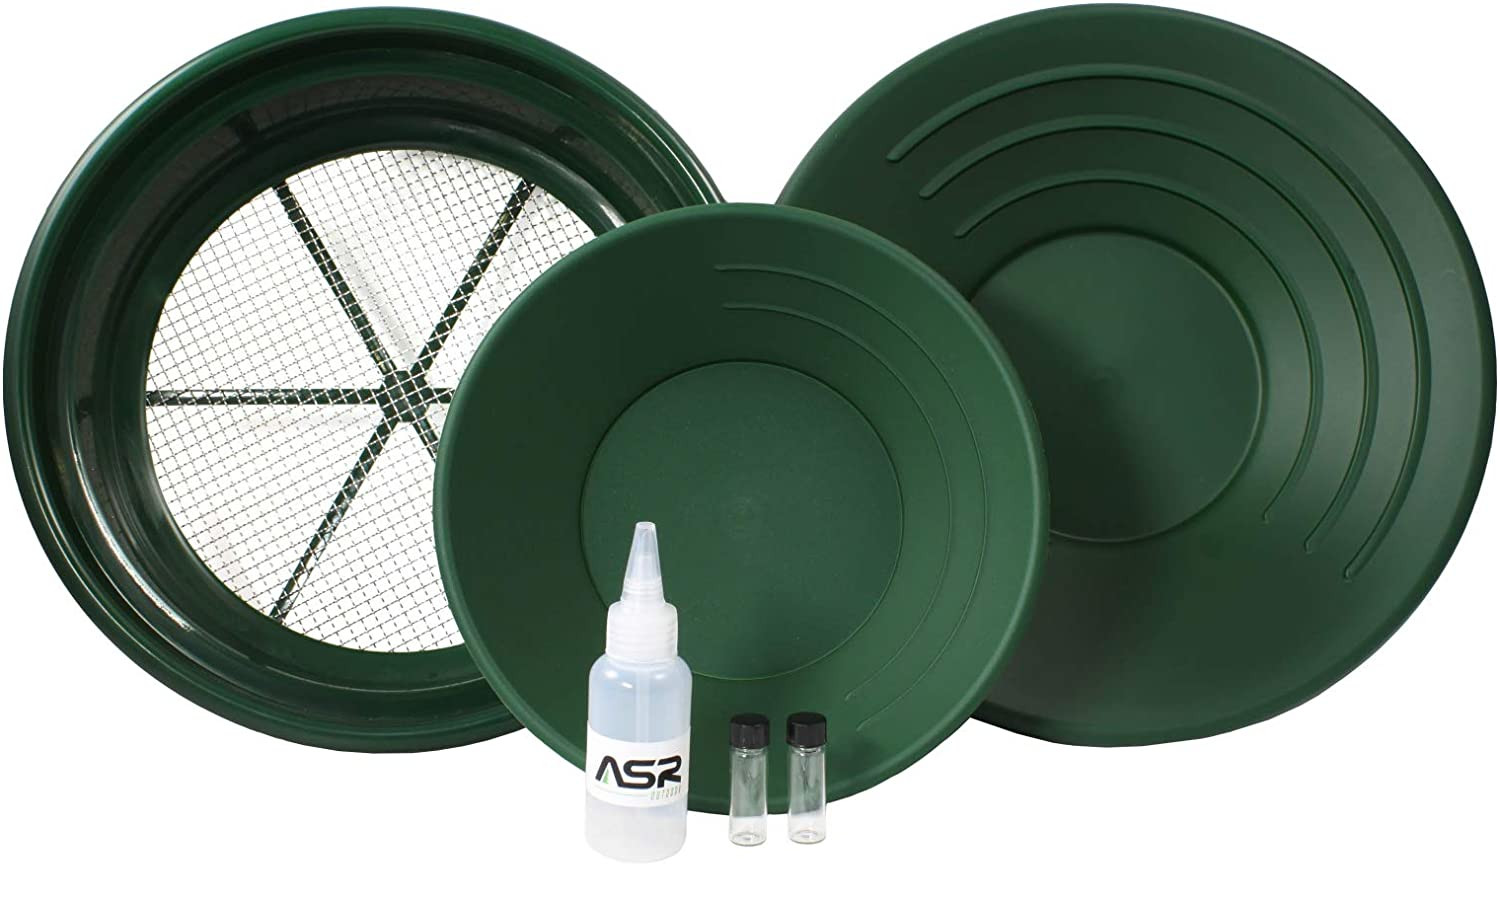
Once you’re able to recognize places where gold is likely to accumulate you’ll need to test the gravels. There is one fundamental skill that is used at every stage of placer prospecting and that is gold panning. You’ll have to spend the time to become good at gold panning. There are numerous devices available that are marketed to make up for lack of gold panning skill. No tool is more important to a gold prospector than his trusty gold pan!

Gold panning, like all placer methods, is based on the density difference of gold vs water, gravel, and black sands. When suspended in water gold will sink to the bottom of the pan. There are two steps to gold panning, agitating the material and washing away the less dense sands. As you’re panning you’ll alternate between these two steps, agitate and wash. As you’re agitating the material you’re allowing the gold to sink to the bottom of the pan, then you want to keep the gold in the bottom while you wash away the lighter material. Eventually, you’ll be left with only gold and nothing else.

Just like any skill it takes time to master. The best way to learn is to start out with lead shot. Try different sizes of shotgun pellets or BBs and mix them with gravel to practice. Once you’re able to separate the shot from the gravel you’ll be ready to try it for real.

You don’t need a lot of tools to start out. Lots of people go on a buying spree when they get started in prospecting. Don’t do that. All those extra gimmicks aren’t going to help you find more gold. Especially things like metal detectors and panning aids.

In addition to a gold pan, you’ll want a ½” or ¼” screen and a snuffer bottle. That’s all you need. The screen helps remove the larger pebbles which makes panning easier and faster. A snuffer bottle is a small plastic bottle that helps you keep your gold. It functions like a turkey baster, you squeeze it and use the bottle to suck up gold out of your pan for safekeeping.

Gold pan kit beginner

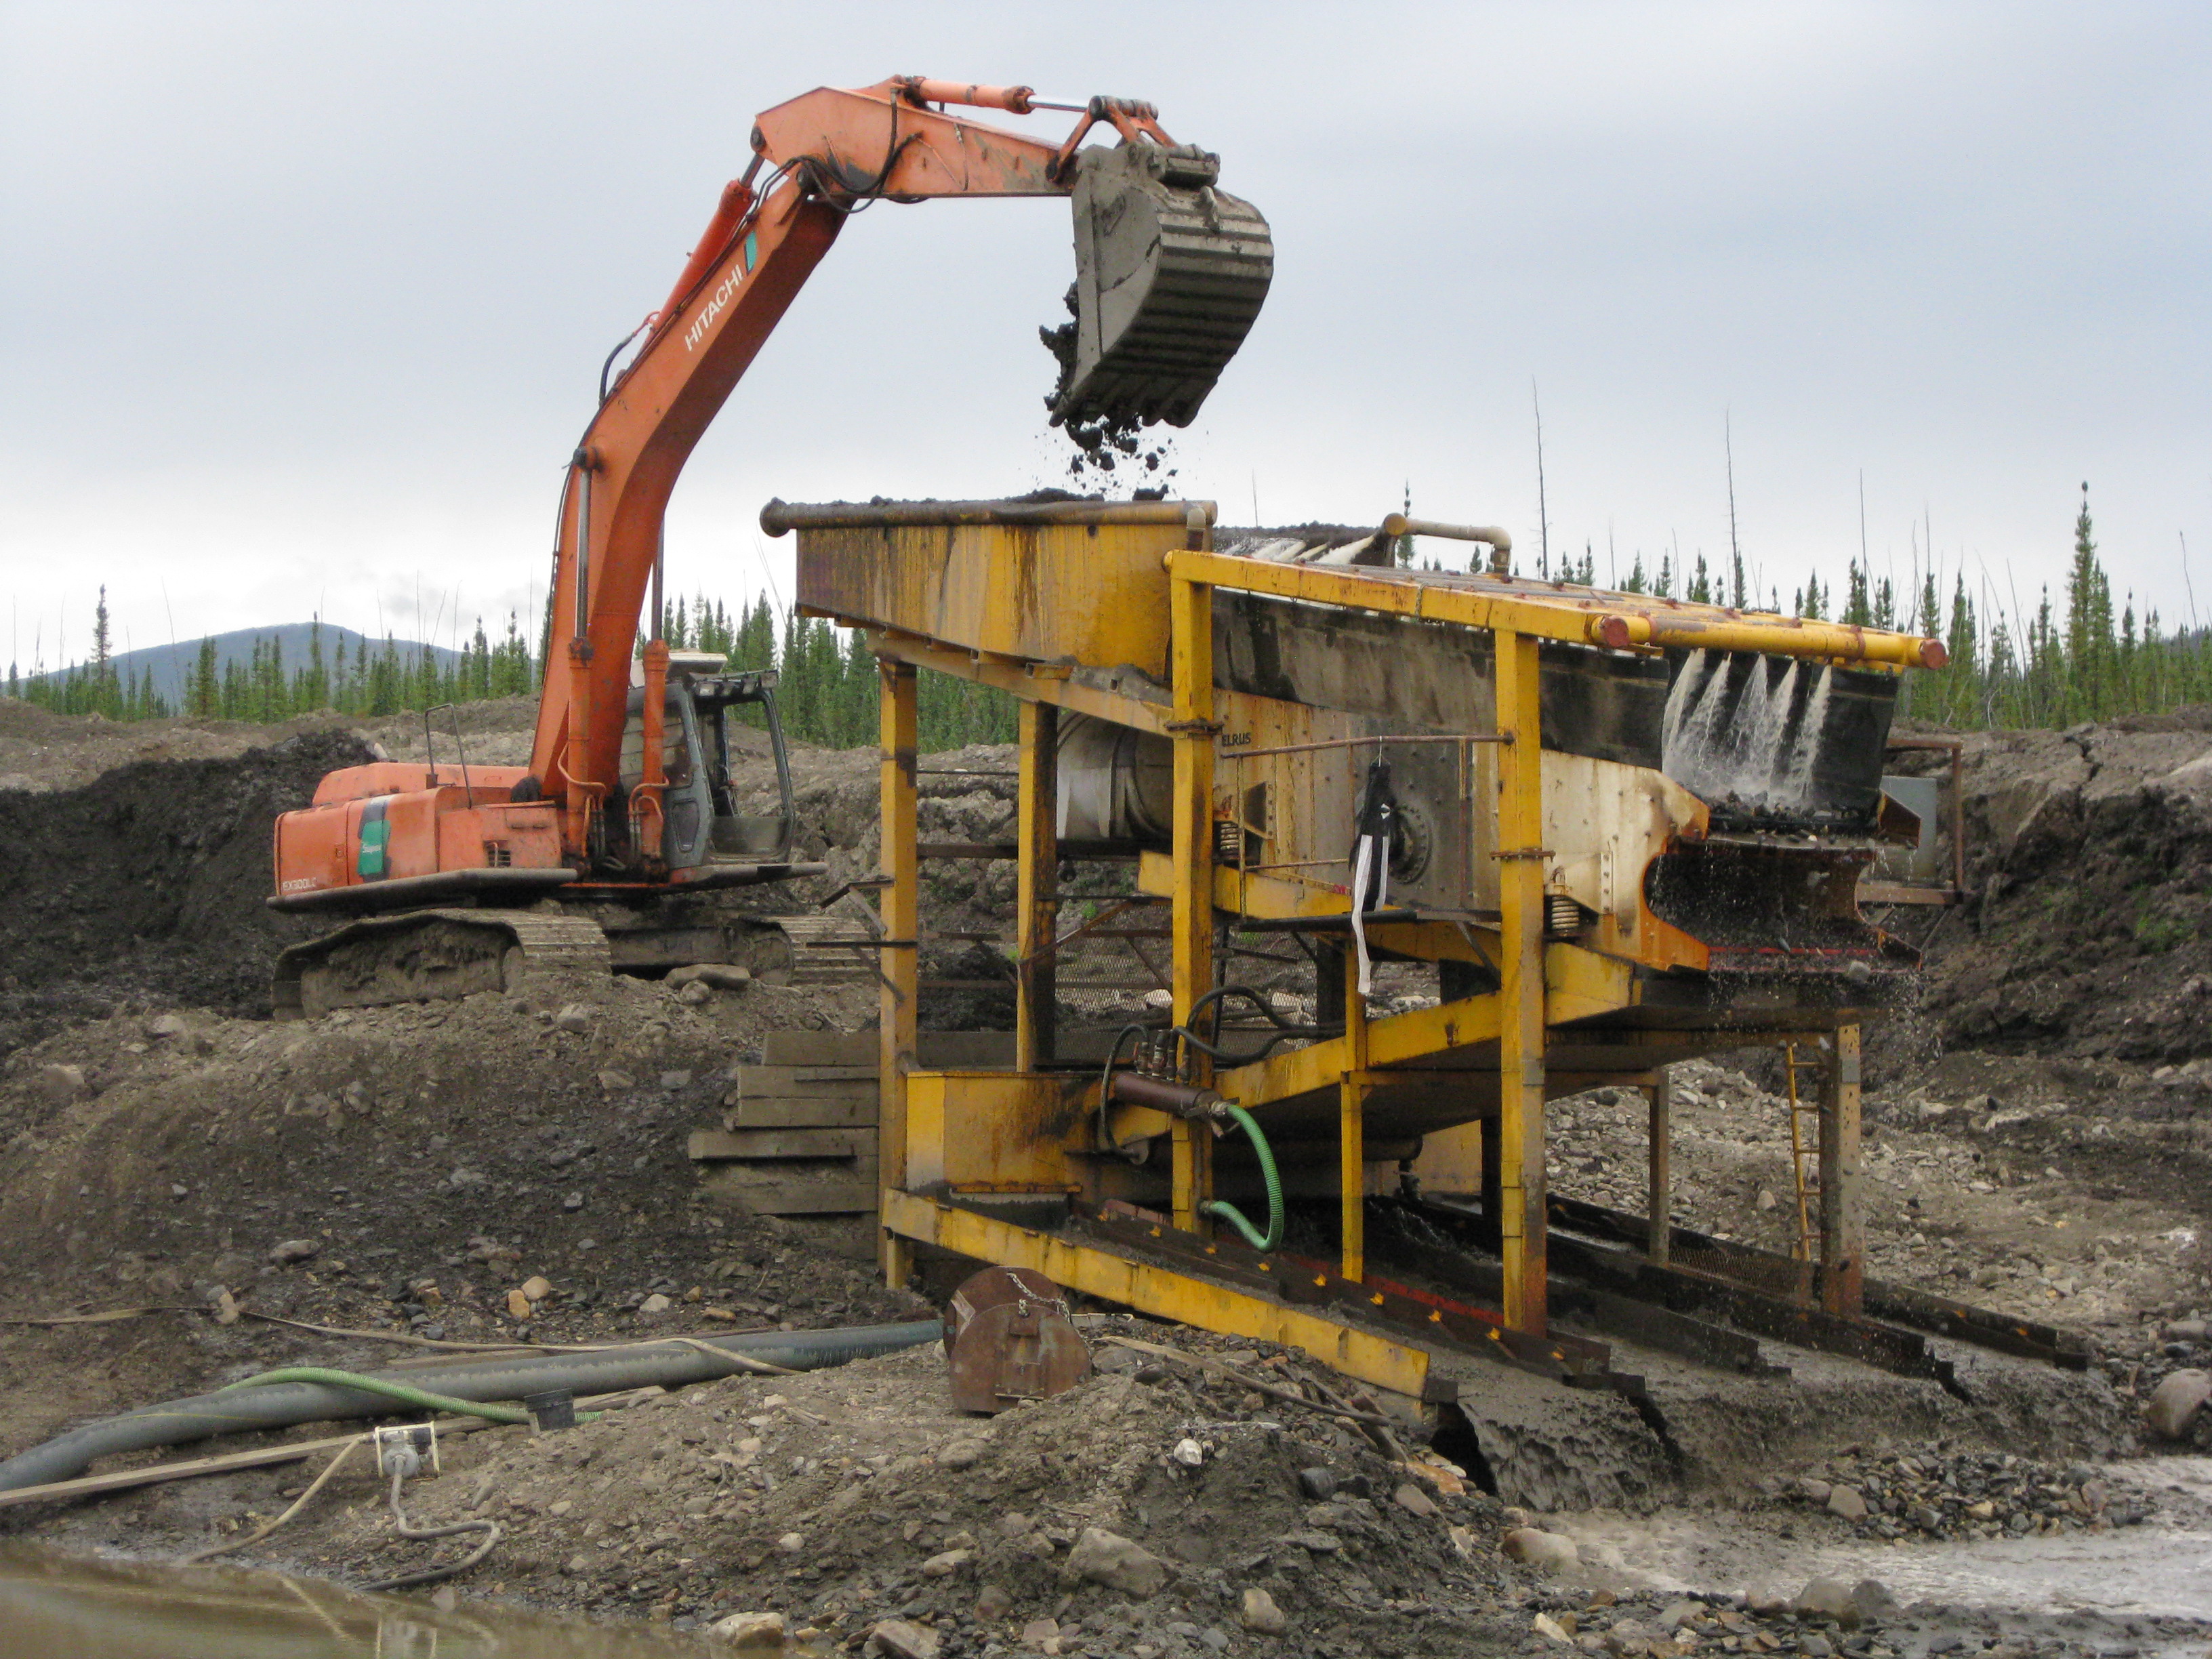
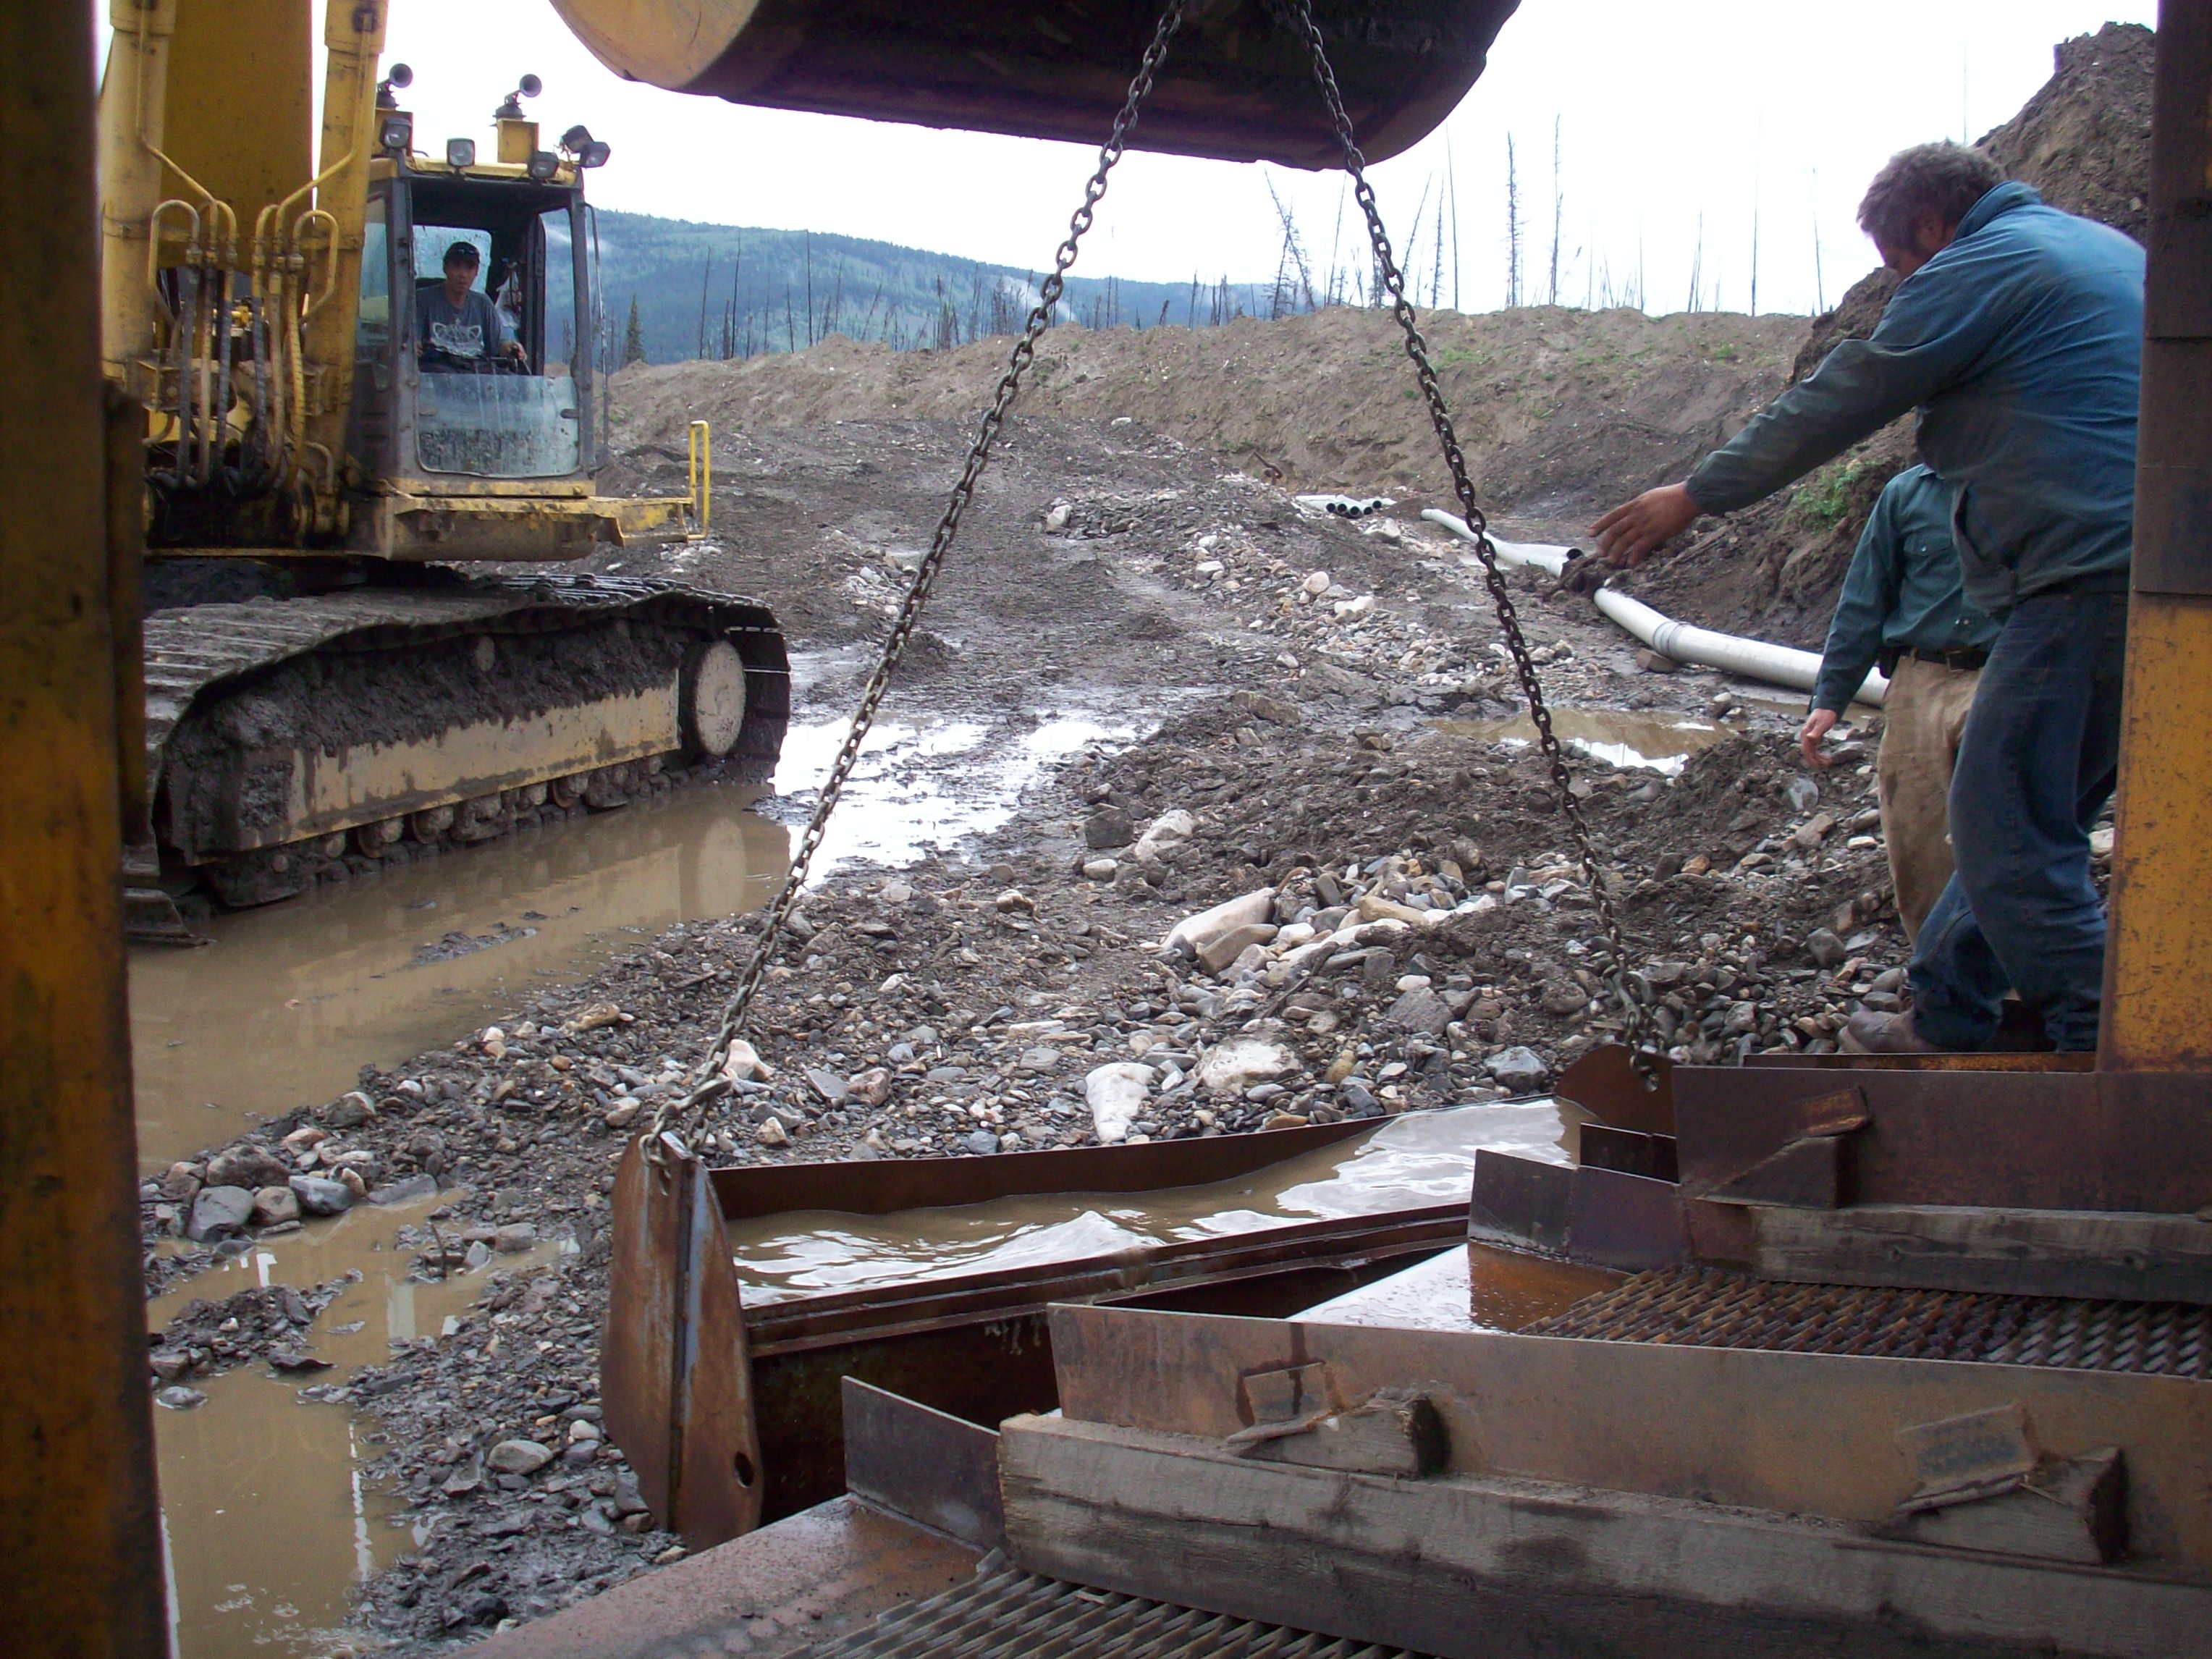
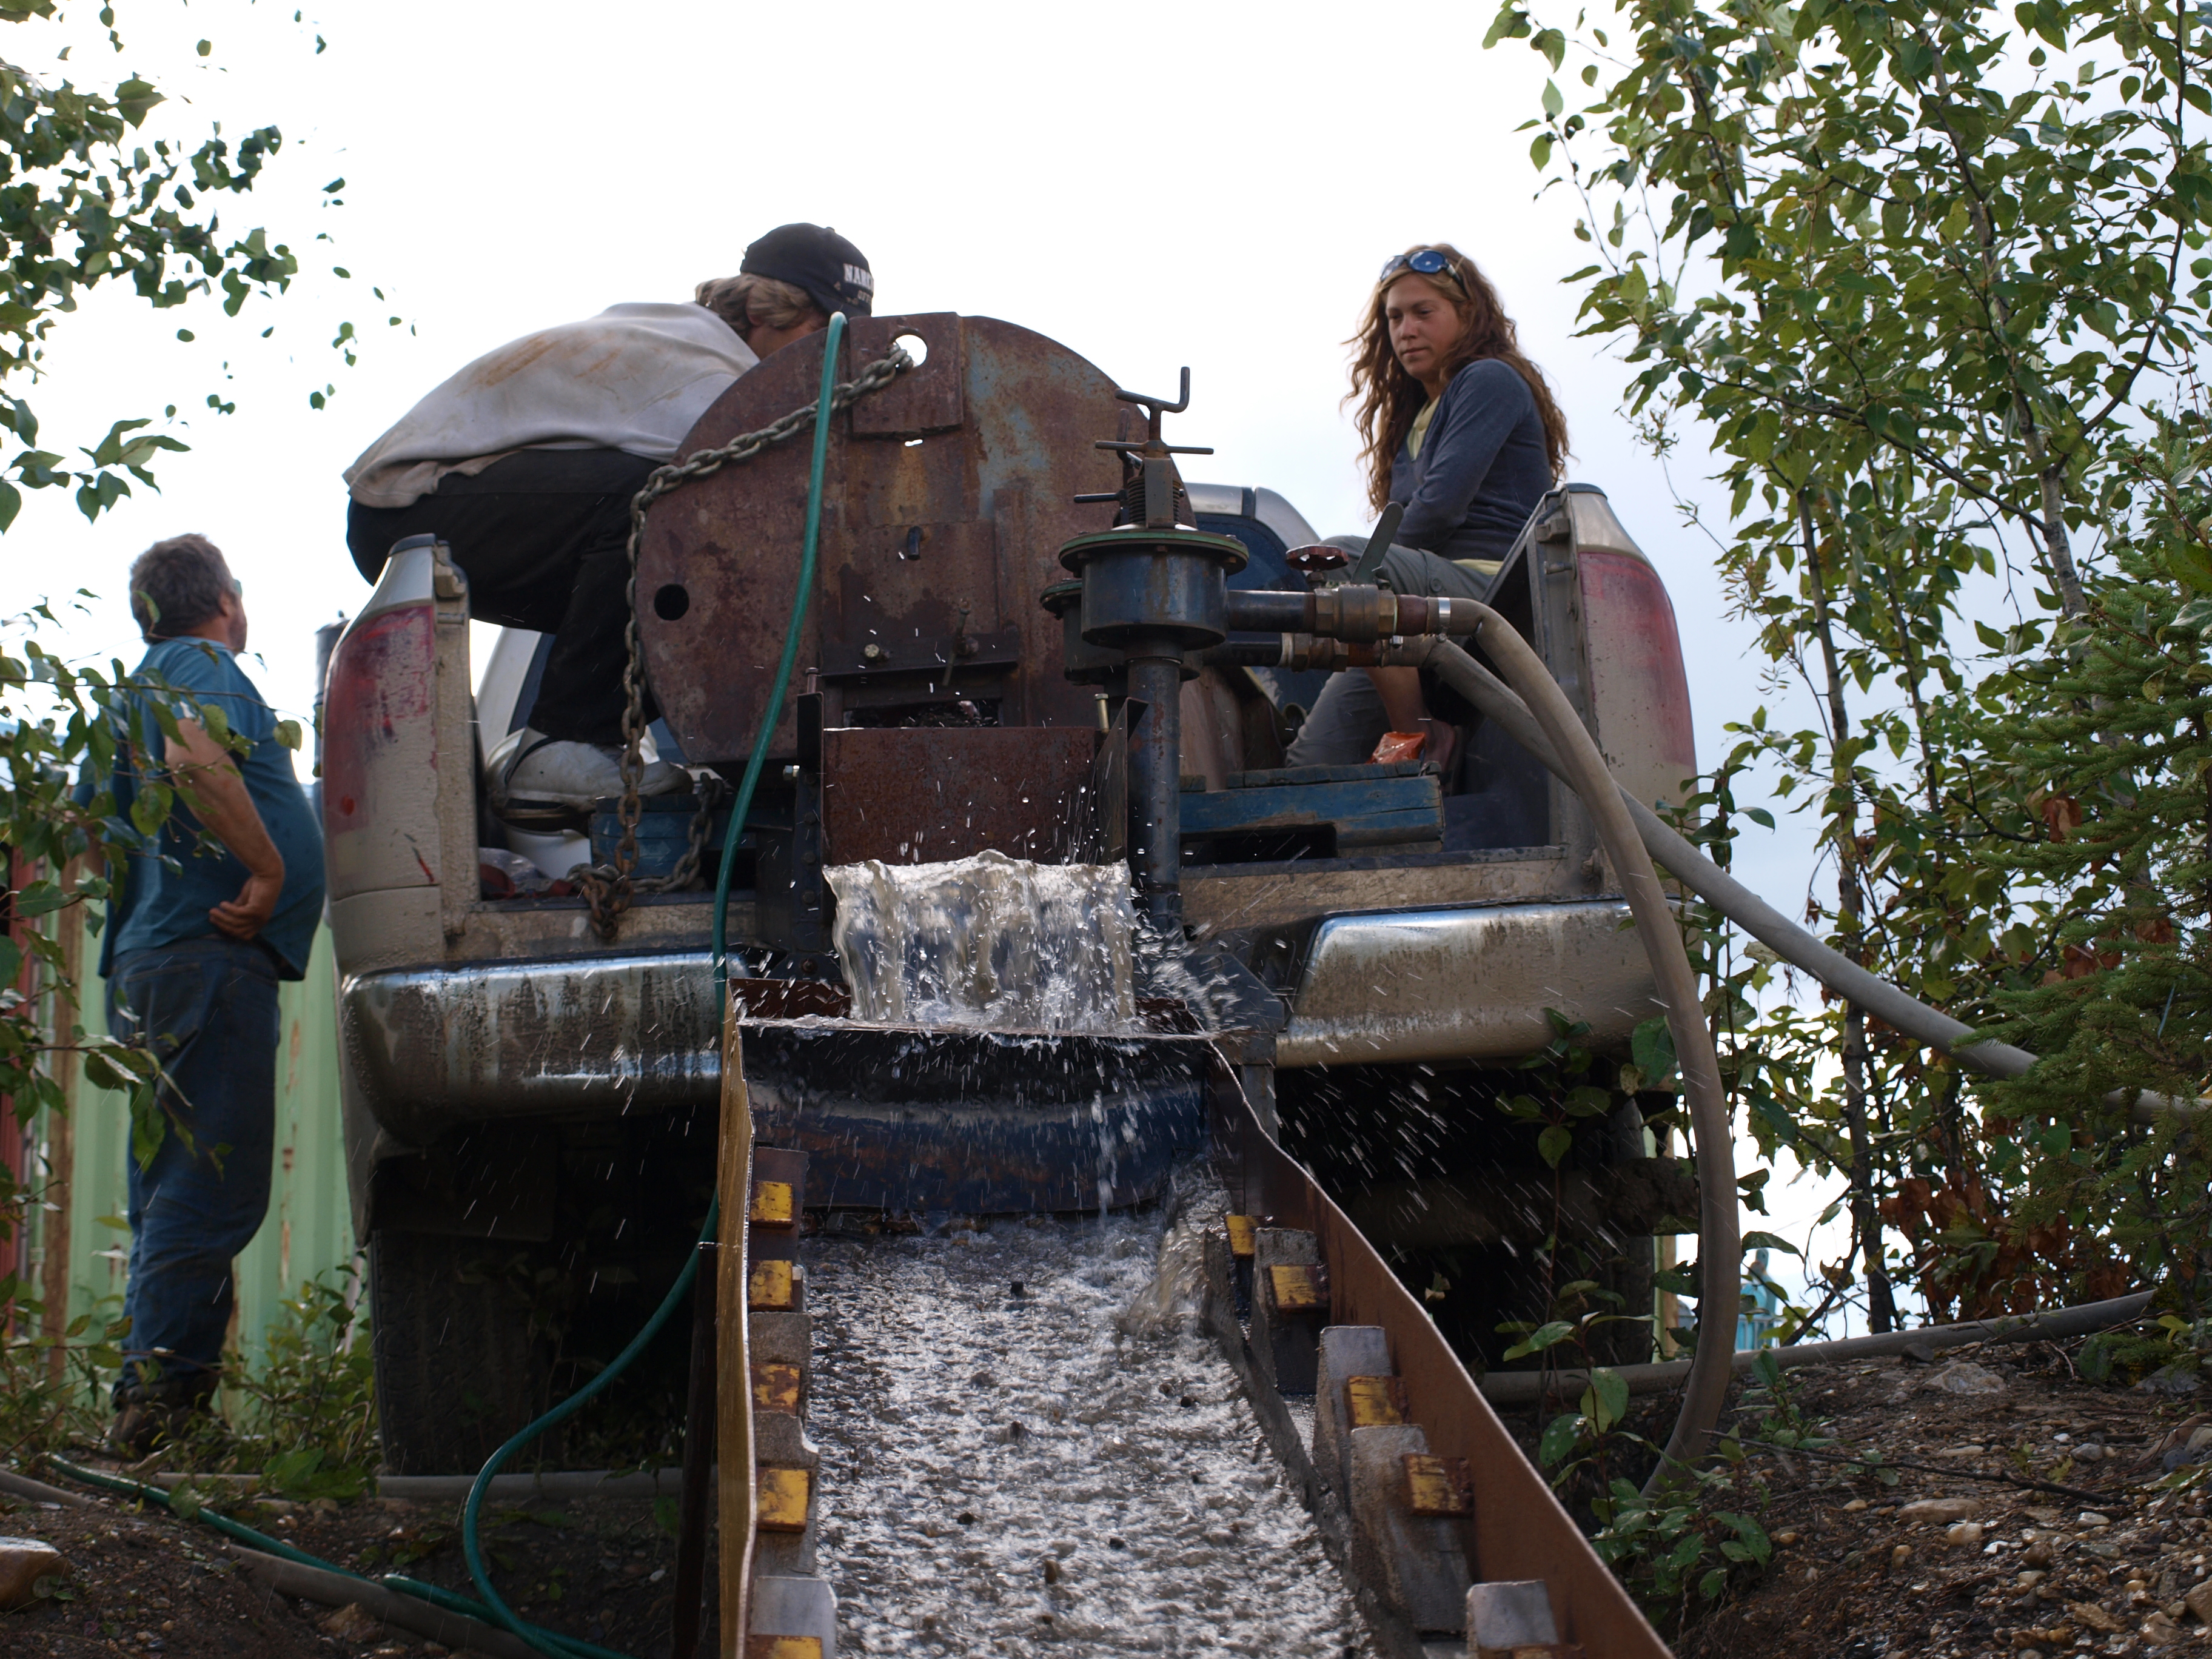
As you advance in your prospecting career you’ll find the need for additional tools. Gold pans are excellent for testing gravels and separating concentrates but sooner or later you’ll want to run larger samples and produce a bit of gold. To run larger samples you’ll need a device that can concentrate gold at a higher rate.

A sluice or highbanker is the next logical step. A sluice is a tray set at an angle with riffles that collect dense material (ie. gold). A highbanker is a portable machine with a sluice and a hopper that allows for concentrating larger amounts of material, usually between ¼ to 2 yards per hour. A high banker is the largest machine that you can run in BC without a permit, more on that below.

There are much larger wash plants available for larger-scale testing and full-scale mining.

When it comes to larger-scale mining you’ll need to learn about exploration, sampling, and mining on a larger scale. Each of those steps requires a lot of detailed knowledge, give us a call when you get to that stage and we’ll help you out.

Stake a Claim

Once you’ve made a discovery it’s time to stake a claim. There are a lot of things to consider when deciding which claim to stake. You’ll want to consider things like location, accessibility, price, type of deposit, and several other factors before you commit to a piece of ground. You’ll also need to consider the licensing and regulations.

In British Columbia, it is necessary to hold a Free Miner’s Certificate in order to hold a claim. This certificate provides certain rights such as access to mineral lands and to tenure ownership. The history of the FMC actually dates back to medieval Europe.

In order to obtain an FMC in BC it is necessary to visit a Front Counter office in person to verify your ID. The government website can guide you through the process.

You’ll have to decide if it’s beneficial for you to stake a claim yourself or to buy one from somebody else. The cost to stake a claim is quite low, in BC it costs about $100 for each 500m x 500m cell in staking fees. This is done with BC’s online staking system. In other jurisdictions such as the Yukon, physical claim posts are still used. There is a lot of debate about which system is better but that is beyond the scope of this article.

Buying a claim from someone else is much more expensive but if that person has already done some of the exploration work it could be worthwhile. Be extremely cautious of people advertising claims with good gold on them. Since the early days of the gold rushes in the 1800s speculation and deception have been part of this business. Mark Twain famously defined a gold mine as “A hole in the ground with a liar at the top”. Today is no exception.

If you are considering buying a claim from someone else do your due diligence first. That means doing your own testing on site. Test enough so that you’re confident in the gold grades being advertised. If you aren’t confident in your ability to do that then you’re not ready to buy a claim.

  • Location: The location of a claim is fundamental to whether it will be successful or not. First and most importantly it must have gold on it. After all, you can’t mine gold if it isn’t there. As mentioned above you should do significant research and test an area prior to staking it. Secondly, you need the claim to be in a location that you can get to on a regular basis. If it’s located far away from your home and you can only get there once a year how will you be able to work it?
  • Access: Aside from the gold grades you’ll need access to the property. You’ll have to decide what kind of access is necessary. If you want to be bringing in equipment you’ll need some kind of road access. Some newly discovered areas don’t have roads but you’ll need to decide how adventurous you want to get and how much development work you’re willing to do on your own. You’ll also want to determine the access to water and if you can get down to the creek or not. Is the claim in a canyon, or on top of a mountain?
  • Type of Deposit: as we discussed above there are different types of placer deposits. An area that you are considering claiming could have a creek, or it could be on a high bench with no water. It could be a beach placer or even high up on a mountain. All of these areas could host a viable gold deposit but you’ll have to decide if your skills and ambition are a match for the task at hand.
  • History: the mining history in the area is also important. You don’t want to buy a claim that’s already been mined out. It’s important to make sure that there’s still some gold left for you. There are scenarios where historical miners make mistakes or had poor prospecting techniques and left lots of gold behind. Sometimes that can be due to superstitions or insufficient funds. It’s also important to not get caught up in urban legends or miner’s tales about the area.
  • Other Land Owners: a mineral or placer claim gives you the rights to the hard rock or placer minerals within the boundaries of your claim. It does not give you ownership of the land. Someone else could own private property in the same location, other parties could have the forestry rights, traplines, or there could be things like a power line or pipeline right of ways, gravel pits or indigenous land. There are also provincial parks and other types of land ownership such as legacy claims and crown-granted claims to look out for. As a claim owner you have certain rights to access and develop your claim (even if it’s on private property in many cases) but the less conflict you have the better.

Ownership of a claim gives you certain privileges but it also comes with responsibilities. A claim will require upkeep in the form of assessment work or payments in lieu. You’ll also need permits for advanced work and mining which require a lengthy application process and first nations consultation in most cases. Spend the time to properly research and test a claim before you take the plunge, especially if you’re considering spending a lot of money on it.

Learn the Regulations

No matter what scale of gold prospecting you are going to engage in you’ll have to learn the rules and regulations. Now that’s easier said than done. In most jurisdictions, the rules are not readily available, especially in British Columbia. The major rules are usually somewhat easy to find but they are always ripe with exceptions and open to interpretation. Unfortunately, the mining regulations in BC are based on a patchwork of laws and there is no manual or anything that clearly summarizes the rules. Just like any law though ignorance of the law is no excuse for breaking it.

In BC, the rules regarding mining claims and land access are covered by the Mineral Tenure Act. You can access the regulations here: Mineral Tenure Act

The BC Ministry of Mines (or The Ministry of Energy, Mines, and Low Carbon Innovation if you want to use their full name) has put out a good summary of the rules for small-scale mining without a Mines Act Permit called Bulletin #38. You can access that document here: Permissible Activities without a Mines Act Permit

Other acts that regulate mining activities are the Mines Act, the Mining Right of Way Act and the Water Sustainability Act. The MTO website has links to the actual legislation behind those acts: BC Mining Legistlation

Small scale mining without heavy equipment is permitted in BC under the conditions in Bulletin #38. Larger work programs require permits from the Ministry of Mines and are subject to additional regulations.

There is no guidebook to the BC mining laws. It would be nice if the government could put together a book as they have for studying for your driver’s license. Unfortunately no such document exists. The Atlin Placer Miner’s Association put together a document called the Atlin Placer Mining Best Management Practices Guidebook, which was an attempt to create a guidebook.

Dolly1

This article is a brief overview of how to get started in placer mining. This is by no means a comprehensive guide. Each of the points mentioned in the article should be followed up on. Hopefully we answered some of your questions though.

There’s always more to learn and a good prospector will always be learning. Even experts in the field welcome the opportunity to learn a little bit more. The best advice we can give is to be patient, pay attention and hopefully you can find an experienced prospector to work with. The best way to learn is to work with someone who already has the knowledge.

Happy hunting!

The Search for Klondike Lode Gold

The Search for Klondike Lode Gold

In the summer of 2010 I was hired to work with a team to find hard rock gold in the Klondike.  We explored a group of claims on the Indian River.

IMG_1741My crew stayed at a camp operated by a character called Big Al.  That name might sound familiar because he has been featured on the popular TV show Yukon Gold on the History Channel.  Of course at that time we had no idea he was going to be a celebrity.  During the trip we heard a rumour that Hoffmans working a few claims over were filming for a TV show, it turned out to be the hit series Gold Rush on Discovery.  We were surrounded by gold mining TV stars but didn’t know it yet.

Klondike Tailings Piles

Indian River Yukon

The Klondike is a place that has a very storied history and was the site of the greatest gold rush of them all.  California, Oregon, and British Columbia had their gold rushes and stories but the Klondike was like no other.  Between 1896 and 1899 over 100,000 adventurers made the journey from all over the world to the largely uninhabited Yukon territory in search of gold.  What made this rush different is the long journeys and overall inexperience of the Argonauts.  At the time of discovery El Dorado and Bonanza creek were the richest creeks in the world.  Some claims on El Dorado were getting $27 to the pan once they hit the pay streak.  That is equivalent to about $750 per pan in today’s money.

My team met up in Whitehorse the capitol city of the Yukon Territory in early August 2010.  We then rounded up some remaining gear and drove in a rented truck up to Dawson City.  As you arive in Dawson City you can see the remains of over 100 years of placer gold mining. Before you reach the town you can see large tailings piles lining the sides of the highway.  When looked at from above they look like something that was produced by a giant insect.  The tailings piles were put there by humongous dredges that scoured the Klondike drainages until 1966.  It is estimated that each of the dredges were producing as much as 800 ounces of gold per day!

Aerial View of Kondike Tailings
Aerial View of Klondike Tailings

Dawson City is a cool town.  The residents have maintained the look and feel of Dawson’s heyday during the Klondike gold rush.  The streets are dirt with wood plank sidewalks.  Most of the buildings are original in the downtown area and many commercial buildings have the false front that was the norm during the gold rush era.  There is even a law that all signs have to be hand painted.

OLYMPUS DIGITAL CAMERA

OLYMPUS DIGITAL CAMERA

There are no corporate stores or businesses in Dawson.  Everything is locally owned and operated.  Some of the original establishments from the 1890s are still in operation today.  Diamond Tooth Gerties is one such establishment which offers games of chance and nightly can can dancers 7 days a week.  Anouther is Bombay Peggy’s which operated as a brothel during the gold rush.  It has turned into a classy bed and breakfast now.

OLYMPUS DIGITAL CAMERA
My Crew posing with the Can-Can girls

OLYMPUS DIGITAL CAMERADtHotel

Dawson has several historic bars as well.  One such bar is the Downtown Hotel.  We stopped in there one night after visiting several other bars and took part in a local tradition.  It is called the Sourtoe Cocktail.  Only one of my crew was willing to take the shot with me.  The Sourtoe Cocktail is a shot of Yukon Jack whiskey taken with an amputated human toe in the glass.  They keep the toe in a jar of salt above the bar.  Apparently the tradition started with a bootlegger losing his toe due to frostbite.  I was informed that this was their 6th toe which makes you wonder where they new ones came from.

Bombay Peggy'sThe Toe

The Bonanza Creek Road is the main access to Indian Creek.  Along this historic route there are plenty of relics of past mining adventures.  Most notably the historic Dredge No. 4 which mined Bonanza Creek until 1959.  There are other dredges as well and plenty of old heavy equipment that was abandoned by miners of the past.  There are abandoned bulldozers, excavators, trucks and other random big machines.  There is such a surplus of iron that many bridges use large dozer shovels as retaining walls.

Dredge No. 4
Dredge No. 4

We were tasked with finding the source of the placer gold in the Indian River.  We stayed at Big Al’s camp and were exploring mineral claims that overlapped his placer claims.  His knowledge of gold bearing benches as well as historical research was very important in our search.  Likewise our findings were beneficial to Al in exploring new placer areas.  Most of our time was spent exploring old miner’s trails on quads and by foot.  I’d be lying if I said it wasn’t a great time.

14 17

We came across several old mine shafts and evidence of placer mining was everywhere.  My crew participated in some of Big Al’s cleanups too.  It was exciting to see the amount of gold that he was pulling out.  We participated in all the steps of his cleanup process from cleaning the sluice to the concentrator jig and so on.  At each stage a fair amount of rum was consumed it seemed fitting when surrounded by hundreds of ounces of gold.

100_1565 CleanUP

Yup, that's exactly what it looks like.
Yup, that’s exactly what it looks like.

In our hard rock exploration we employed several techniques utilizing traditional prospecting as well as soil sampling and statistical pebble counts.  The soil sampling was conducted with helicopter support which made it a lot easier.  We were bagging close to a hundred samples per day each which was more than we could carry in the bush.  At the end of the day we’d chop out a helicopter landing area and radio the chopper.  Then we’d pick up the samples that we cached during the day.  Hard work but a lot of fun too.

IMG_1883

We spent a total of six weeks prospecting the area.  We took a lot of samples to be sent in for assay from all over the claims.  Prospecting in the Yukon is similar to BC, there is not a lot of exposed rock around.  Unlike the barren lands of the North West Territory and Nunavut there is plenty of forest and vegetation covering the rock.  We spent a lot of time in the helicopter scoping out rock outcrops.

IMG_1746

There seemed to be a correlation between the garnets that were showing up in the placer operation and high grade gold.  When the placer miners hit the paystreak they got a lot of garnets with it.  We started prospecting up a creek called “Ruby Creek” assuming it was named for the abundance of garnets.  The hunch turned out be be right.  We chased the garnets up to some large outcrops near the top of the mountain.  The samples contained a lot of garnet but not a lot of gold.

100_1595 SoilSampling

From an old mineshaft that we found near a cabin we discovered that the miners hit a layer of pure quartz conglomerate.  And it was loaded with gold.  We then knew what to look for.  The search for the source of the Klondike gold continued for several weeks.  We encountered giant moose, grizzly bears, Northern Lights and some great people.  On several occasions we thought we found the fabled mother lode but the samples returned disappointing assay results.  Some of the more random samples showed the highest grades.  They say gold is where you find it.  We did not find the source of the klondike but we did manage to have a great time and got paid for it.

OLYMPUS DIGITAL CAMERA

Hard Rock Prospecting near the Thompson River

Hard Rock Prospecting near the Thompson River

In September I went out to check out a claim in the Thompson River area of Southern BC.  This claim has an adit on it that was hand excavated prior to World War 1.  A government report from the 1930s says that a sample from this adit assayed at 9.12 g/t Au.  The report also claims that the adit extended 80m into the rock face and intersected several large quartz veins.

PANO_20150911_134348

The claim was staked in 2006 by the previous owner who held it for several years.  They were able to locate the adit in 2007 but were not willing to enter the portal because of its precarious position on a vertical rock face.  It seems as though nobody has entered this lost mine since the 1930s era.  Naturally I wanted to check it out.

ClaimLocationJune

I was accompanied by a guy that I met on the internet named Rob.  He turned out to be a great partner, and took most of these photos.  We geared up with some rock climbing gear as well as prospecting equipment and a camera.

ClaimLocationAdit

The claim covers an area with a couple of narrow valleys with steep sides.  Its beautiful country but tough to get around in.  According to a prospecting report from the previous claim owner they were able to photograph the adit from the other side of the valley.  Take a look at their photo below.

Adit Location

So we had a photo and even a coordinate from the report.  We were ready to show up and heroically rappel into the adit.  We did not know exactly what we would find in there but I wanted to verify the old assay and hopefully find some gold.  Whoever put in the time and effort to dig an 80m tunnel into solid rock held a strong belief that there were riches in there.  It was all looking good and as usual I remained skeptically optimistic.

Heading Out

Right off the bat we headed up the creek towards the coordinate from the 2007 report.  It didn’t take long to reach the location.  There were no signs of an adit or anything that matched the picture.  It is difficult to tell though when looking straight up a rock face.  We proceeded to hike along the bottom of the vertical wall trying to spot the entrance.  Later we climbed to the top of the ridge to see if we could spot the adit from above and rappel down as planned.

Me on June Cliff

We did not have any luck.  We walked all over that ridge but were not able to spot the adit.  We went around for one last look and managed to find a decent quartz vein.  The vein was a decent size and seemed to continue in to the rock.  I took a sample which will be sent to a lab for assay to see how much gold is in it.  No gold was visible to the eye but it rarely is.  The quartz looks pretty good though, some iron staining and nice crystals in part of it.

Quartz Vein on June Bug

While taking the sample my camera fell out of my packpack and tumbled all the way down to the creek.  It must have bounced down at least 100m.  I scrambled after it expecting to find it in pieces to my surprise it was not shattered just soaking wet.  I was able to dry it out several days later and it seems to be OK.

Quartz

  QuartzCrystals

Having failed to find the old mine we climbed the opposing ridge across the valley.  It was somewhat easier climbing since there wasn’t much vertical rock to deal with.  It was mostly talus which poses its own challenges.  We tried to recreate the photos from the report.  Rob and I took lots of photos with the hope that we could later spot the adit using a computer.  Sadly none of the photos turned out well because the sun was facing us straight on.

Veiw From Across Valley

What started out as a plan to saunter up to a lost mine adit and rappel into it.  It turned into an all day scouting adventure and climbing two different steep mountain ridges.  It almost seems as if we were cursed, every attempt to locate the adit had failed.  Fortunately nobody got hurt and we did manage to get a nice quartz sample, even my camera survived.

I’ll be back soon to find that adit.  Our failure gives me even more enthusiasm to find this thing.  I just refuse to be beat by the mountains.


Search for Slumach’s Lost Gold Mine – Part 2 Expeditions

Search for Slumach’s Lost Gold Mine – Part 2 Expeditions

Searching for a legendary lost gold mine is a little different from a typical prospecting trip.  Instead of picking an area based solely on its mineral potential our clues were derived largely from literature and first person accounts from decades ago.  It was half treasure hunt and half geological prospecting.  Before the first trip we did a lot of research reading up on the legend and accounts of previous explorers of the area.  Some background is mentioned in “Part 1 – The Legend”. We also consulted as many topo maps, aerial photos, geological reports and other information as we could get our hands on.  It always blows me away how much different terrain can be than what it shows on the map.  A topo map can show you several contours close together over 2 or 3 cm of paper but when you get out there it’s a different story.

The Map Lies

We chose to check out the area around the Terrarosa and Stave glaciers in Southern BC.  The legend says the mine is somewhere North of Pitt Lake, and Volcanic Brown’s last camp was found just below the Stave Glacier.  In the early 20th century there was a lot activity on Fire Mountain which is just East of that area so we know that gold has been found close by.  Geological maps show the boundary between several geological units at a large fault in the valley between the Stave and Terrarosa glaciers and we wanted to check that out. On both trips we took rock samples for lab assay and panned some of the best looking areas.

Flame Peak

In 2012 we launched the first trip to the area with myself, my brother and a trusted friend.  To access the area we travelled up the side of Harrison Lake and took the 4×4 roads up to Fire Lake which is beside Fire Mountain.  Several historical high grade hard rock mines are located there.  From the end of the road we began our trek to our planned campsite at Terrarosa Lake.  The walking distance from the parking spot to Terrarosa Lake was about 17km. Right off the bat we had a very steep incline towards a ridge that would keep us in the alpine as we headed towards the lake.  I much prefer alpine over bushwacking up creeks.  Its a bit of a push to get up there but no real vegetation to deal with once you do.  This ridge offers amazing views of Glacier Lake and the mountain peaks all around.  You can see several large glaciers from up there.  Non stop postcard quality views.

Access RidgeDSC00129_crop

It took us two days to reach Terrarosa Lake.  We took a pretty sketchy route to an unnamed lake above Terrarosa.  We had to do some rock climbing to get up there which is not easy with backpacks loaded with gear.  On the 2014 trip we took a much better route.  The terrain up there is extremely rugged, you are either climbing a talus field, an insanely steep slope or descending on ice most of the time.  Coming into Terrarosa Lake was an amazing sight, perhaps the greatest view I have ever been rewarded with.  It kind of reminds me of a job I was on once near Atlin, BC.  When the company sent me out there my boss told me it was going to be “scenic” and my co-workers all started snickering.  I later found out what they meant.  The camp had no showers, no floors in the canvas tents and no toilet, it was beautiful though.

Terrarosa Ridge

Before we reached our main camp site at Terrarosa we had to cross the run off from the glacier.  There was no way through without crossing a maze of alder bushes and several knee deep streams of ice cold glacial melt.  I always hated alders but after the first trip they will forever be on top of my list of plants that I hate.  It was quite a relief to reach the camp.  We spent three days checking out the area around the lake and tried to make our way into the valley to the West.  Unfortunately we were not able to make it into the valley on that trip.  We did find some great samples of mineralized rock but not the placer that we had hoped for.  After exploring as much of the area as we could we departed on the two day hike back to the logging road.  Once we reached my SUV though we were unpleasantly surprised to find my battery dead.  After several failed attempts to bump start it we had to make the 20km hike out to get a boost.  It was pretty heartbreaking after 7 days of hiking in some of the roughest terrain there is.

Fuel SUVDCIM100GOPRO

On the return trip in 2014 our primary target was the valley to the West of Terrarosa Lake.  On the way up we spent a night at the Sloquet hot springs and had our last real food and beer before the 9 day trek ahead.  For backpacking we use the freeze dried astronaut food and other lightweight foods. The logging road up to Fire Lake had been fully deactivated since the 2012 trip.  There were deep drainages to cross and pushed the limit of my SUV, I bent my hitch somewhere along the way.  This time we were more confident in our hiking route as we had learned by trial and error on the previous trip.  Instead of camping up above at the lake we moved our camp right down in the valley.  It took three days to get in and another three days to get out of the valley and added some even uglier slopes.  It also rained for five of the nine days that we were out there which only added to the difficulty.  We did have a better planned route though.

TalusFlame

The valley had some amazing rock with lots of quartz veins and signs of gold.  There are several creeks down there that have potential for placer gold as well.  We saw several waterfalls too.  It was tough going and to reach one of our targets we had to wrestle our way through the worst alder bushes I hope I ever see.  They have sideways branches the size of a human thigh filled in with smaller bushes.  It was like some kind of cruel jungle gym on a steep mountain slope.  We managed to reach all of our targeted spots this time with a few mishaps along the way.  At one point my brother had to jump naked into a freezing creek because he dropped his rock hammer.

TerraRockClimb

The climb out of the valley was very treaterous.  It was almost too steep to walk up, we spent a lot of the time crawling and holding on to vegetation like a climbing rope.  There were a couple of close calls but we made it up OK.  We hiked back around the lake and set up a camp for the night.  It took two more days to reach the SUV again.  This time I disconnected the battery to prevent a repeat of the previous situation.  After a couple of well deserved warm beers and some clean clothes we hit the road.  We took the long way around and stopped in Whistler for one of the most rewarding hamburgers of our lives.


GlacierCross

The trips we took up into Slumach country were some of the most memorable of my life.  The scenery and sense of accomplishment from mastering that kind of terrain will forever be etched in my memory.  Both expeditions had numerous challenges but we made it out alive and well.  I have everything mapped out in GIS but because of the time, sweat and money investment I won’t post it publicly. Slumach’s curse did not take us yet.  As for the gold?  I’m not going to give away too much info on what we found up there.  I have every reason to believe that the legends are true.

Search for Slumach’s Lost Gold Mine – Part 1 The Legend

Search for Slumach’s Lost Gold Mine – Part 1 The Legend

There are many legends on the West Coast of lost treasure, mines, and caches of precious metal.  They are entertaining and spark our adult imagination the same way fantasy novels did when we were kids.  I have to admit that I am fascinated with theses stories and the lure of stumbling upon a huge reserve of gold is hard to ignore.  The closer to home the legends are the more tantalizing they become.  One pervasive legend is the legend of Slumach’s lost gold mine.  I have been part of two expeditions to find this mine in 2012 and 2014.

Mountain Panning
Panning Above Stave Valley

On the West coast this legend is well known.  Books have been written about this legend so I’m not going to regurgitate the whole story here, this is about my own search for the treasure.  I first read of the story in a book called “Lost Bonanzas of Western Canada”.  There was a description of the legend and stories of historic attempts to find the mine.  Another great book on the subject is “Slumach’s Gold: In Search of a Legend“.  There is lots of info online as well.

The legend states that in the late 1800s a Coquitlam native named Slumach would occasionally come into New Westminster with a bag full of gold nuggets.  He would blow the wealth on liquor and brothels and eventually return to his cabin on Pitt Lake.  Slumach allegedly would never tell the location of his mine to anyone.  In 1890 Slumach was found guilty of the murder of man named Louis Bee and hanged a year later for the crime.  There is a lot of debate around the circumstances of the murder, it may have been self defence but that is irrelevant as far as the gold is concerned.  It is said that prior to being hanged Slumach put a curse on the mine in the Chinook language  “Nika memloose, mine memloose”.  When translated into english the curse means “No man who finds the gold will live long enough to bring it out.”

DSC00089
Hiking Out of Stave Valley

There are all sorts of ideas about the facts surrounding Slumach’s trial, his life and so on.  The truth is there isn’t much recorded history about the guy.  Some say he took women up the mine to cook for him and murdered them to hide the location.  Others believe their is no mine at all and he got his gold from robbing other miners in the area.  None of that really matters as far as finding a rich gold deposit in the mountains North of Pitt Lake.

There are other characters in the ongoing story that hold much more compelling evidence.  Not least of which is a prospector known only as “Jackson”.  He left a letter vaguely describing the location of a creek rich with nuggets.  Apparently Jackson found a very rich gold bearing stream somewhere North of Pitt Lake.  He carried as much gold with him out and buried the rest due to the weight under a tent shaped rock.  Jackson seemingly wrote the letter from his death bed in San Fransisco unable to return to claim his gold.  Here is the text of the Jackson letter:

Dear Friend,
It will come to you as a surprise after all these years to hear from me for no doubt you have long since forgotten me. But you will remember the old man you so kindly grub staked with money and provisions at Guytos. Since then I have prospected with the varied success that usually goes with the life of a prospector.
In 1901 I went to B.C. and it is of this trip I want to tell, and hope you will gain by it untold thousands for your kindness to me. I heard you went broke like most everyone else at Guytos but had lost all trace of you since then except that you had gone to Washington. Well, I made a great discovery in New Westminster but after coming out for supplies and tools was taken down with a severe attack of rheumatism that ever since has left me almost bedfast until a short time ago, when I recovered sufficiently as though to make the trip again.
I made up my mind to hunt you up and take you with me. In hunting over a Seattle directory I found your name and address and concluded to come to Seattle and talk the matter over with you. A few days after arriving here from my little place in the hills, I was suddenly stricken down again and the Doctors say that I will never recover and may drop off any time for my heart is badly affected. So I will tell you of my trip and what I found and direct you to the best I can to find it. It is too great to be lost to the world and I know with you it will be in good hands.

Well, I arrived in Vancouver about the first of July and hired a couple of natives to take me to the headwaters of the ____ then dismissing the natives I struck out in the mountains, and they are rough ones. I prospected up beyond the lake but found nothing of importance. But the formation looked all right. I concluded to prospect back towards ____ Lake. I kept well up on the mountains but was often compelled to make long trips down before crossing could be found on the deep canyons.
I had been out about two months and found myself running short of grub. I lived mostly on fresh meat for one can’t carry much of a pack in those hills. Found a few very promising ledges and some color in the little creeks, but nothing I cared to stay with. I had almost made up my mind to light out the next day. I climbed to the top of a sharp ridge and looked down into a little canyon or valley about one mile and a half or two miles long, but what struck me as singular, it appeared to have no outlet for the little creek that flowed at the bottom. Afterwards I found the creek entered a ______ and is lost.
After some difficulty I found my way down to the creek. The water was almost white. The formation for the most had been slate and granite but there I found a kind of schist and slate formation. Now comes the interesting part. I had only a small prospecting pan, but I found colors at once right on the surface and such colors they were. I knew then I had struck it rich at last.
In going up stream I came to a place where the bedrock was bare and there you can hardly believe me, but the bedrock was yellow with gold. In a few days I gathered thousands and there were thousands more in sight. Some of the nuggets were as big as walnuts and there were many chunks carrying quartz. After sizing up carefully I saw that there were millions stowed away in the little cracks. On account of the weight I buried part of the gold at the foot of a large tent shaped rock facing the creek. You can’t miss it. There is a mark cut out in it. Taking with me what I supposed to be about $10,000 proved to be over $8,000. After three days of extreme hard traveling it would not be over 2 days of good going but the way was rough and I was not feeling well. I arrived at the lake and while resting there at the Indian Camp was taken sick and have never since been able to return and now I fear I never shall. I am alone in the world. No relations, no one to look to me for anything.
Of course I have never spoken of this find during all this time for fear of it being discovered. It has caused me many anxious hours but the place is so well guarded by surrounding ridges that it should not be found for many years unless someone knew its being there.
Oh, how I wish I could go with you and show you to the wonderful place for I find I can’t give any exact directions and it may take you a year or more to find it but don’t give it up. Keep at it and you will not fail and you will be repaid beyond your wildest dreams.
I believe any further directions only tend to confuse so I will only suggest further that you go alone or at least take one or two Indians to pack food and no one need to know but you were going on a hunting trip until you find the place and get everything fixed up to suit yourself.
When you find it, and I am sure you will, should you care to see me advertize in the “Frisco Examiner” and if I am living I will either come and see you or let you know where to find me but once more I say to you don’t fail to look this great property up and don’t give up till you find it. I am very sorry I can’t give you more definite instructions. Of course I expected to have gone back long since. I have drawn a rough sketch that will help you. Success and happiness.
Yours truly,
W. Jackson

Not much else is known about Jackson.  There is another character called Volcanic Brown also known as R.A or “Doc” Brown.  Unlike the previous two Volcanic was well known in BC in the early 1900s.  Volcanic was a respected healer and prospector with many successes.  There is even a ghost town from a mine that was discovered by Brown that is called Volcanic City.  He discovered the large scale Copper Mountain mine outside of Princeton that is still operating today.  Volcanic Brown is said to have gained a copy of the Jackson letter and started looking for the lost mine in the late 1920s.  He would go each summer and stay out there for several months.  In 1928 he got frostbite and amputated one of his toes and continued to hike out.  I can tell you after hiking this area myself I would not have come back after that.

VolcanicBrown
Volcanic Brown

Volcanic Brown would check in at the small logging community of Alvin at the head of Pitt Lake at the end of his season.  In 1931 he did not check in and soon after a search party went out looking for him.  The search party trekked over the Stave glacier in November to find Volcanic (no small feat in itself).  They didn’t find the man but they are said to have found a collapsible pup tent, some cooking utensils, a double barreled shotgun, a notebook containing herbal remedies, and a glass jar containing eleven ounces of course gold.  The gold is said to have contained traces of quartz and was believed to have been hammered out of a solid vein.  The rescue attempt was well recorded, it even made the newspaper.  So Volcanic Brown definitely found some nice gold out there.  His last camp was found in the valley at the beginning of the Stave river near Upper Stave Lake.  My expeditions were in a similar area.

The final character is Stu Brown, no relation to Volcanic.  For me the Stu Brown story is what made the Slumach legend believable.  Brown had several science degrees and was a world war two air force veteran.  He apparently used stereoscopic air photos to identify the area described in Jackson’s letter.  The area that he identified was inside Garibaldi provincial park.  Stu Brown wrote numerous letters to the government asking for permission to claim the site and extract the gold.  He was unsuccessful in persuading them to allow him to mine, he even sent a letter to Teck mining corporation.

Terrarosa Lake
Terrarosa Lake

Stu described a 100′ high natural rock dam blocking a stream where water shoots out of a hole in the dam.  He described a pool at the base of the dam that is ankle deep in gold.  Stu was never able to give accurate directions to the spot however.

In 2012 I embarked on our first expedition to Terrarosa lake which is at the foot of the Terrarosa glacier and near the Stave glacier.  We did some gold panning and sampling in the area of interest.  This area was selected because it is near Volcanic’s last camp and vague clues that Stu Brown gave out seemed to fit in this area.  The geology of the area is very favourable for epithermal gold as well with a huge fault passing through from Glacier lake marking the boundary between two geological units.  In 2014 we reached a lower area in the valley between the Stave and Terrarosa Glaciers.  2012 took us 8 days and 2014 took 9 days of unsupported backpacking and rock climbing in very rugged terrain.  My next post will describe the details of the expeditions.

Check out part two here:

Part 2: Expeditions

Where Does Placer Gold Come From? – Part 3 Placer

Where Does Placer Gold Come From? – Part 3 Placer

Placer gold mining has been practiced for thousands of years with evidence dating back as far as 2600 BC in ancient Sumeria and Egypt.  The technology required is minimal with only a gold pan you can refine gold in a placer deposit.  The word “placer” comes from the spanish word meaning “pleasure”.  Perhaps an allusion to the delight of finding precious metal in a river bank.  The word was spread as gold bearing gravels were discovered in parts of North America colonized by Spain.  In fact the discovery of gold the primary motivation for Spanish explorers to dig deeper and deeper into the newly discovered continent.

Big Al Jig

As we discussed in the part 1 and part2 gold is created in fantastic cosmic explosions.  It has traveled across the universe and made up a small part of the material that the earth formed from.  Tectonic and volcanic forces collected gold in concentrated lode deposits where it can be mined.  The concept of how gold transfers from lode deposits to placer deposits is pretty straightforward.  Rock holding the gold bearing veins or ore is slowly chiseled and broken by weathering and erosion.  The erosive forces of water, wind, and ice transport rock fragments into drainage systems such as streams and rivers.  Gold and other heavy minerals will settle out in areas in the stream where the water loses momentum or creates a trap.  These traps form into placer deposits over time.

Erosion

Placer deposition is driven by gravity.  Gold is very dense, meaning that compared to another substance of the same volume it experiences a stronger pull of gravity.  There are other principles of physics that apply to placer deposition.  The property of inertia is the resistance of any physical object to any change in its state of motion.  Less dense objects require less force to move them and in the case of a stream will travel farther and faster than heavy objects.  Gold has a density that is twenty times that of water and about 8 times the density of sand.  Another factor in the formation of placer deposits is Archimedes’ principle which states that the force of buoyancy on an object is  equal to the weight of the displaced fluid.  This principle was historically used to measure density of gold by Archimedes himself.  As gold is many times more dense than water the force of buoyancy on submerged gold particles is much less than the force of gravity.  So gold in a stream is held in place by gravity and resists movement due to its weak buoyancy and strong inertia.
Nuggets

There are several types of placer deposits.  There are alluvial placers, eluvial placers, beach placers, eloian placers and paleo-placers.  For each type of deposit there are miners who specialize in that type of deposit.  All placer deposits have concentrated gold from its source in some kind of trap.  The vast majority of the placer gold that is mined in the world is of the alluvial variety.

Alluvial placer deposits are formed in watercourses such as creeks, rivers, streams and deltas.  The gold is eroded from lode deposits and carried into the watercourse through rains and melt.  Once into a stream it can be moved great distances.  Gold does not move easily in a stream due to the inertia and buoyancy forces described above.  It takes many years for gold to make its way into a stream and to travel within it.  The gold will move along the bottom of the stream until it reaches a point where the water loses velocity or it is physically trapped.  Typically gold will accumulate on the inside bends of a river where the water velocity is lower.  Large rocks or outcrops can create a natural riffle or eddy where the water slows down and dense material will accumulate.  Waterfalls are another great trap for gold.

Alluvial placers can be broken into several groups.  Flood gold is placer gold that moves during annual floods or other flood events.  Gravel bars and upper sections of stream sediment are where flood gold is usually found.  This type of deposit generally consists of small flake and flour gold since they move more rapidly than nuggets.  Flood gold is actively being deposited and will replenish year after year

StreamSediment

Streambed placer deposits are essentially the same as flood deposits except that they no longer move.  Streambed placers are found in a current watercourse.  These deposits typically consist of gravel that is settled in the stream bed.  To produce a streambed placer you have to mine under the water.  Techniques that can be used are sniping, suction dredge, or diverting the water using a dam such as a wing dam.

The third type of alluvial placer deposit is a bench placer.  Bench deposits are part of the old stream bed before it cut into a deeper channel.  Benches can contain huge amounts of gold if the river carried gold at that time.  A bench is typically flat on top and may appear like steps coming down the valley side.  Benches can be mined using conventional mining equipment since they are usually high and dry above the current river.

OldSchool

Eluvial placer also known as residual placer deposits are formed before any water transportation has taken place.  These deposits form close the source of hard rock gold.  Eluvial placers will contain much large particles of gold than other types because it takes a lot of energy to move large nuggets.  Often quartz will be found with gold still attached in Eluvial placers.  These types of placers are formed by weathering and decay of the host rock that holds gold.  Areas where there is a lot of iron can break down rapidly as the iron oxidizes.  The lighter overburden is generally washed away and unsorted gravel and heavy material is left in place.  These deposits are generally small and very attractive to small miners they also are close to gold bearing veins which can be very exciting.

Beach placers are deposits that occur on the edges of large lakes or the ocean.  The wave action on the beach is the mechanism that concentrates gold and other dense minerals.  Gold can either be carried to the beach by an alluvial system or eroded directly by waves.  A famous beach placer is the deposit in Nome, Alaska which is featured in the TV reality show “Bering Sea Gold”.

CreepSaltSusp

Eolian placers form in areas where wind is the main mechanism of erosion and not water.  Eolian placers are similar to Eluvial placers in some ways, they occur close to the hard rock source, and are poorly sorted.  Wind does a terrible job of moving gold.  In Eolian placers the overburden is swept away by strong winds and leave the heavy ore behind.  They occur primarily in desert regions such as the arid regions of Australia.

The last type is paleo-placer deposits.  These are any of the above placer types that happened a long time ago.  By a long time we are talking about millions of years.  Paleo-placers were once placer deposits but over time they have been hidden and covered in sediment.  There is often no sign at the surface of ancient river systems below.  Paleo-placers can be ancient river channels, benches or sedimentary rock formed from old placers such as quartz pebble conglomerate.  This kind of deposit can amount to huge quantities of gold and make you very rich.  The largest known gold deposit in the world in Witwatersrand, South Africa is one of these.  Over 1.5 billion ounces of gold has been mined in Witwatersrand.  Deposition occurred approximately 3 billion years ago in Witwatersrand, and it is estimated that 50% of all the gold mined on earth came from that deposit.

Witwatersrand

That’s the story of where placer gold came from.  It was created in incredibly powerful explosions from dying stars.  It made up the earth as it formed and was squeezed into concentrated deposits by volcanic processes.  The veins eroded into river systems and hopefully made its way into your gold pan.  Gold’s unique properties of density and its resistance to corrosion and most other chemical reactions allow it to build into the kind of deposits that we can find and mine.


Where Does Placer Gold Come From? – Part 2 Deposits

Where Does Placer Gold Come From? – Part 2 Deposits

In part 1 of “Where Does Placer Gold Come From?” we discussed the origins of gold and how it appeared on earth.  Now we’ll discuss how it moves into mineable deposits.

LodeGoldwide

Gold is spread relatively evenly throughout the crust of the earth at approximate concentrations of 1 part per billion.  To put that into contrast, low grade mineable gold deposits need to be concentrated to at least 1 part per million which is about 1000 times more concentrated than the background.  High grade gold deposits are in the order of 20-100 ppm.  Gold concentrations are usually expressed in grams per ton, which is interchangeable to ppm.

So if gold is evenly spread through the crust how does it become concentrated?  There are several natural processes that allow this to happen and they are all driven by the same force, plate tectonics.  Plate tectonics is the force that moves continents, creates mountains and most volcanoes, and of course earthquakes.  The image below shows the current tectonic plates and their names.

Tectonic Plates

The plates are constantly moving, crashing into each other and subducting, they are pushed by convection currents in the mantle.  In the distant past there have been several supercontinents where all the continents had come together to from one.  Past supercontinents have names like Rodinia, Godwana and Pangea, it is predicted that a new supercontinent will occur in the next 250 million years.

Subduction

At the boundaries of these plates is where the excitement happens.  It is at these areas such as the West coast of North America where volcanic processes squeeze gold into veins.  There are two main ways that this happens.  Orogenesis (mountain building) takes place as the force of two plates hitting each other forms mountains as the edges of the plate buckle and slide.  In the mountain forming process rock is squeezed to the point of breaking and creates fissures and faults that extend deep into the crust.  These cracks allow heated and pressurized water to come up the cracks.

The other way is driven  by volcanoes forming from the subducted plate.  When the edge of the plate is far enough below the surface it re-melts and the newly molten rock builds up pressure.  This pressurized molten rock is what forms the volcanic chains inland from the subduction zone.  As volcanoes form they crack and fissure the surrounding rock and contribute to the same epithermal process.

HotSprings

Imagine the rock as a sponge and when it is squeezed the water is expelled through the cracks.  It is actually the same way that hotsprings work but with more squeezing.  This kind of gold mineralization often takes place near volcanic or geothermal activity such as hot springs or geysers.  When the mineralized water cools it leaves behind the minerals in solid form which we then call a vein.  Typically we are looking for quartz veins.  Vein deposits are often called lode deposits in artisanal miner vocabulary.  Placer miners will often refer to the “mother lode” that is the quartz vein or veins that broke down into rich placers.


There are other hard rock gold deposits other than epithermal lodes.  There are Greenstone, volcanic massive sulphides, porphyry and Calrin trend deposits.  All of these depend on volcanism as well and occur in similar ways as described above.  Areas high in volcanoes and seismic activity are good places to look for gold.  The Pacific ring of fire is an area surrounding the boundary of the Pacific tectonic plate.  This area contains 3/4 of the worlds volcanoes and is responsible for 90% of the world’s seismic activity.  In the gold rushes of the 1800’s prospectors envisioned a world wide gold belt.  It wasn’t until the 1950’s that plate tectonics became an accepted scientific theory and decades later we mapped out that gold belt.RingofFireROFdepositsOf course not all gold is found in the ring of fire.  The largest known gold deposit on earth is in Witwatersrand, South Africa.  It is estimated that 50% of the gold mined on earth has come from this mine.  Witwatersrand is actually a huge placer deposit from 3 billion years ago.    In my next post we’ll finally get to the formation of placer gold deposits.  Stay tuned.

Check out Part 3 on how gold placers form:

Where Does Placer Gold Come From? – Part 3 Placer